
Candy Cane Cookies

Delicate peppermint-swirled cookies shaped like tiny candy canes, crisp at the edges and tender inside—perfect for holiday trays and gifting.

This batch of Candy Cane Cookies has become my holiday signature because they are simple, cheerful, and somehow transport the whole kitchen back to childhood. I first adapted this version during a December when I wanted a small, hand-held treat that combined buttery shortbread texture with a cool peppermint finish. The contrast between the tender, lightly golden cookie and the bright pop of red makes them as pleasing to the eye as they are to the palate. Every year I make a double batch so neighbors and friends can take a little festive joy home with them.
The texture is what I love most. These cookies are buttery and melt-in-your-mouth with a delicate crisp at the edges when baked 8 to 10 minutes. The peppermint extract keeps the flavor fresh and bright without overpowering the butter and vanilla. Shaping them into candy cane curves is half the fun and a great activity to involve kids or guests. The dough is forgiving, easy to tint, and stays soft enough to roll, so even novice bakers find success.
Why You'll Love This Recipe
- Quick to make from pantry staples: unsalted butter, powdered sugar, all-purpose flour, and a splash of peppermint for flavor.
- Fast bake time: ready in about 30 minutes from start to finish when you work efficiently, great for last-minute trays.
- Kid friendly shaping: rolling and twisting two colors into tiny candy canes is a fun assembly step that doubles as a decorating moment.
- Make-ahead friendly: dough holds well in the fridge for a day and freezes for up to three months for holiday prep.
- Perfect for gifting and party trays: uniform size and attractive red swirls look professional without much effort.
- Customizable flavor: swap peppermint for almond or skip coloring for a simpler shortbread-style cookie.
My family always asks for these during December gatherings. One year I packed them in small glass jars and left them on the doorstep of elderly neighbors; the jars came back with notes saying how they brightened the morning. I also discovered that chilling the dough for 20 minutes makes shaping easier and produces a cleaner red-white twist. That small step has become my trick to consistent results.
Ingredients
- Unsalted butter: 1 cup softened to room temperature, about 2 sticks. Use a high quality European-style butter for a rich mouthfeel. I often use Plugra or Kerrygold when I want extra depth.
- Powdered sugar: 1 cup, sifted to remove lumps. Powdered sugar helps the dough stay tender and provides a smooth texture that granulated sugar cannot.
- Large egg: 1 room temperature egg to help bind and add a touch of richness. Bring the egg to room temperature for even incorporation.
- Vanilla extract: 1 teaspoon. Pure vanilla intensifies the buttery notes; use a good-quality extract.
- Peppermint extract: 1/2 teaspoon. A little goes a long way, so start small and adjust for stronger peppermint punch.
- All-purpose flour: 2 1/2 cups. Spoon and level your measuring cup for accuracy to avoid a dry dough.
- Salt: 1/2 teaspoon to balance sweetness and bring out butter flavor. Use fine sea salt or kosher salt.
- Red food coloring (gel): just a few drops to tint one half of the dough. Gel color provides bright hue without changing dough hydration.
Instructions
Prep the oven and pans:Preheat the oven to 375 degrees Fahrenheit. Line baking sheets with parchment paper and set aside. If you have a baking stone or a heavy cookie sheet, use it on the middle rack for even browning.Cream butter and sugar:In a large mixing bowl, beat 1 cup softened unsalted butter and 1 cup sifted powdered sugar using an electric mixer on medium speed for 3 to 4 minutes. Scrape the bowl once or twice. You want the mixture light and fluffy; this traps air that helps the cookies have a tender texture.Add egg and extracts:Beat in 1 large room-temperature egg, 1 teaspoon vanilla extract, and 1/2 teaspoon peppermint extract until smooth and homogenized. Mix just until incorporated to avoid overworking the dough.Blend in dry ingredients:Sift or whisk together 2 1/2 cups all-purpose flour and 1/2 teaspoon salt. Add the dry mix to the wet ingredients in two additions, mixing on low speed until just combined. The dough should be soft and hold together but not sticky. If the dough feels sticky, add up to 1 tablespoon more flour.Divide and tint dough:Divide the dough evenly into two portions. Leave one portion plain. Add red gel food coloring to the second portion a few drops at a time and knead until evenly colored. Wear gloves if you want to avoid staining your hands.Shape into candy canes:Pinch off about 1 teaspoon of each color. Roll each into a rope roughly 4 inches long and 1/4 inch thick. Lay a red and white rope side by side and gently twist together, then bend one end to form the candy cane hook. Press the ends to seal. Place shaped cookies on prepared baking sheets about 1 inch apart.Bake and cool:Bake in the preheated oven for 8 to 10 minutes, rotating pans halfway through. Cookies are done when the bottoms are lightly golden but not brown. Allow cookies to cool on the pan for 5 minutes, then transfer to a wire rack to cool completely.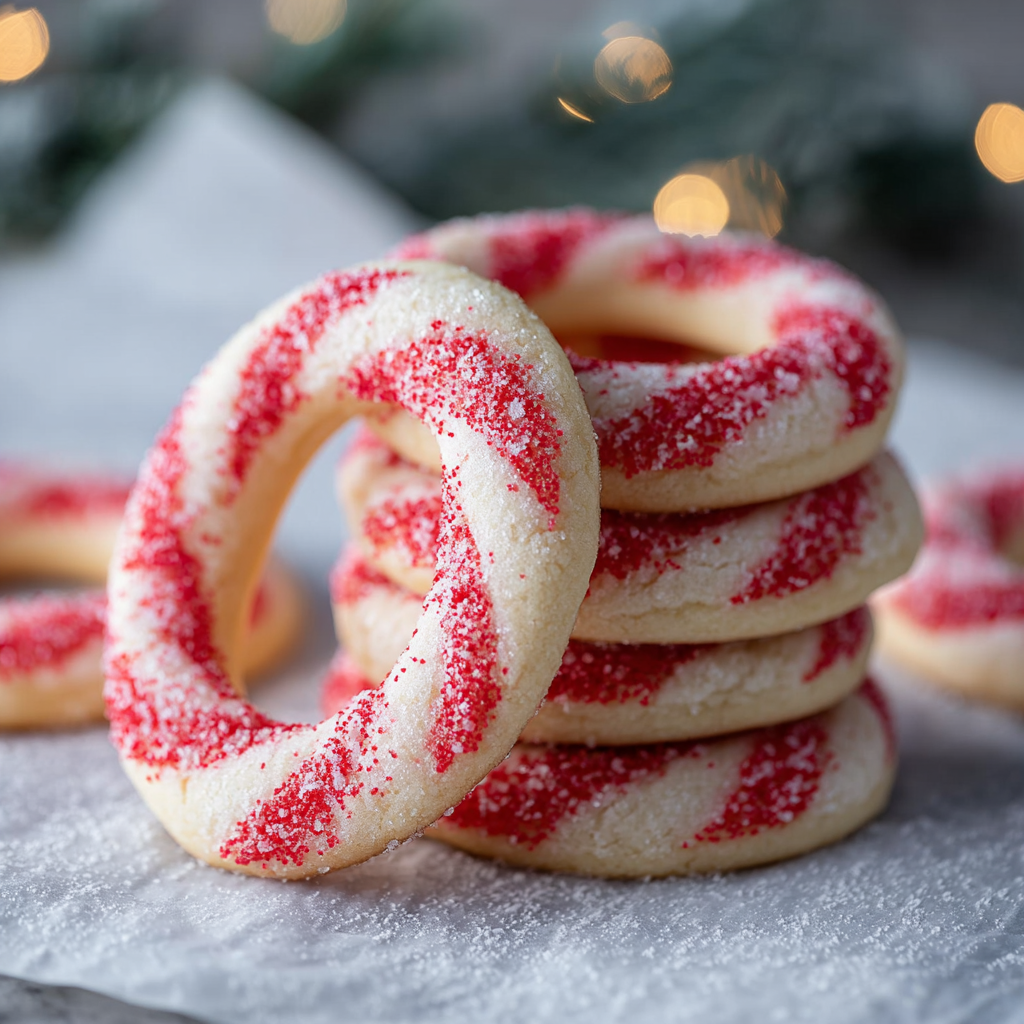
You Must Know
- These cookies freeze well either as shaped dough or baked cookies. Dough can be frozen up to 3 months; wrap tightly in plastic and a freezer bag.
- Store baked cookies in an airtight container at room temperature for 4 to 5 days, or in the refrigerator for up to 2 weeks if you like a firmer bite.
- High in simple carbohydrates from powdered sugar and flour, each cookie is a treat sized portion; enjoy in moderation as part of balanced gatherings.
- For cleaner red streaks, chill colored ropes for 10 minutes before twisting to prevent color bleeding into the white dough.
My favorite thing about these cookies is how small details transform them from ordinary to memorable. Chilling the ropes slightly makes twisting neater and keeps the candy cane curve intact after baking. Years ago I brought a tin to a neighbor potluck and someone asked if a bakery made them. Homemade can look that professional with a few careful steps. Watching kids line the tray during assembly is one of my holiday highlights.
Storage Tips
To maintain texture, cool cookies completely before storing. For short term, place in an airtight container layered with parchment between rows and keep at room temperature for up to five days. For longer storage, freeze baked cookies in a single layer on a tray until firm, then transfer to a sealed freezer bag for up to three months. Thaw at room temperature in their container to avoid condensation. If storing unbaked twisted ropes, flash freeze them on a tray for an hour, then bag; bake from frozen adding a minute or two to the bake time.
Ingredient Substitutions
If you need dairy free, substitute 1 cup of vegan butter at room temperature for the unsalted butter and confirm powdered sugar is processed without bone char. For an egg-free version, use a commercial egg replacer equivalent to one egg or 3 tablespoons aquafaba beaten to froth; texture will be slightly different, a touch more crumbly. Swap peppermint extract for 1 teaspoon almond extract for a marzipan-like twist, or omit color for elegant white shortbread crescents. When substituting flours, note that whole wheat will make the dough denser and may require 2 to 3 tablespoons more liquid.
Serving Suggestions
Arrange the cookies on a festive platter with sprigs of fresh rosemary or holly for holiday presentation. Pair with hot chocolate or peppermint tea to amplify the mint notes. For gifting, stack six to eight in a small box with tissue paper and a ribbon. For a party board, mix with salted nuts, dried cranberries, and chocolate bites to balance sweetness. Garnish with a light dusting of sifted powdered sugar for a snow-dusted look when presenting at winter gatherings.
Cultural Background
The candy cane shape and peppermint flavor are staples of Western holiday confectionery with roots that trace back to simple sugar sticks used in church choirs in the 17th century. The hooked form was popularized as a decorative motif on Christmas trees in the 19th century. Turning that motif into a butter-based cookie is a modern home baking tradition that captures both the visual and flavor cues of the classic candy cane. This adaptation marries the nostalgic symbol with familiar shortbread techniques common in European and American home kitchens.
Seasonal Adaptations
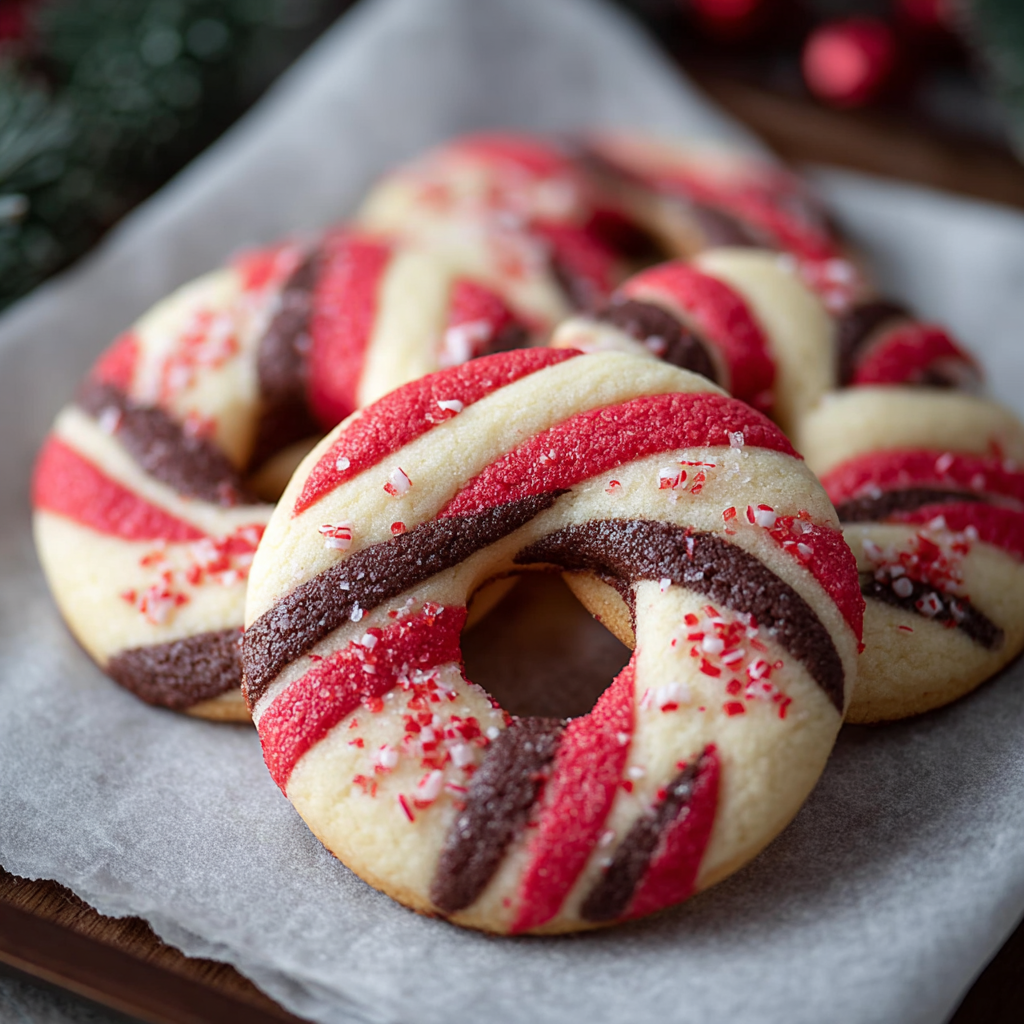
For winter events keep the traditional red and white. In summer or for bridal showers swap red for pastel pink and replace peppermint with lemon zest and 1/4 teaspoon lemon extract for a citrus version. For Halloween use orange and black gel colors and a drop of coffee extract for a deeper flavor. For a sophisticated holiday party consider a chocolate-peppermint variation: add 1/4 cup cocoa powder to half the dough and tint a deep red for dramatic contrast.
Meal Prep Tips
Make extra dough and form ropes ahead of time. Wrap ropes tightly and refrigerate for up to 48 hours before baking, or freeze for up to 3 months. Bake multiple sheets at once using an extra cooling rack to maintain workflow. Label containers with bake dates and flavor notes so you can easily rotate through batches during the holidays. Reheat cookies briefly at 300 degrees Fahrenheit for 4 minutes to refresh their scent and crisp the edges before serving.
These candy cane cookies are a joyful, approachable project that rewards a little patience and charm. They travel well, freeze well, and always bring a smile. Try them this season and make the shaping step a shared activity—those are the memories everyone will remember.
Pro Tips
Chill the colored ropes for 10 minutes before twisting to prevent color bleed and to help the shape hold during baking.
Use gel food coloring for vivid color without adding extra moisture to the dough.
Sift powdered sugar before measuring to avoid lumps and to ensure a tender texture.
Flash freeze shaped, unbaked cookies on a tray before storing to keep shapes intact in the freezer.
This nourishing candy cane cookies recipe is sure to be a staple in your kitchen. Enjoy every moist, high protein slice — it is perfect for breakfast or as a wholesome snack any time.
Tags
Candy Cane Cookies
This Candy Cane Cookies recipe makes perfectly juicy, tender, and flavorful steak every time! Serve with potatoes and a side salad for an unforgettable dinner in under 30 minutes.
Ingredients
Dough
Instructions
Preheat oven and prepare pans
Preheat the oven to 375 degrees Fahrenheit and line baking sheets with parchment paper. Arrange an oven rack in the middle position for even heat.
Cream butter and powdered sugar
Beat 1 cup softened unsalted butter and 1 cup sifted powdered sugar on medium speed for 3 to 4 minutes until light and fluffy. Scrape the bowl to ensure even mixing.
Add egg and extracts
Mix in 1 large room-temperature egg, 1 teaspoon vanilla extract, and 1/2 teaspoon peppermint extract until just combined. Avoid overmixing to keep the dough tender.
Incorporate dry ingredients
Slowly add 2 1/2 cups all-purpose flour and 1/2 teaspoon salt in two additions, mixing on low until the dough comes together and is soft but not sticky.
Divide and color dough
Divide the dough into two equal portions. Tint one portion with red gel food coloring, kneading until evenly colored. Handle sparingly to avoid warming the butter.
Shape candy canes
Roll 1 teaspoon of each color into 4-inch ropes and twist together. Bend one end to form a candy cane hook and press ends to seal before placing on lined sheets.
Bake and cool
Bake for 8 to 10 minutes until bottoms are lightly golden. Cool on the pan for 5 minutes then transfer to a wire rack to cool completely.
Last Step: Please leave a rating and comment letting us know how you liked this recipe! This helps our business to thrive and continue providing free, high-quality recipes for you.
Nutrition
Did You Make This?
Leave a comment & rating below or tag
@royalrecipe on social media!
Categories:
You might also like...

5-Minute Air Fryer Roasted Garlic Magic That Wows
Learn how a 5-minute prep transforms a whole garlic bulb into silky, caramelized cloves in the air fryer. Perfect as a spread, mix-in, or flavor booster that elevates weeknight meals and party plates.

Air-Fried Pizza Rolls
Golden, melty pizza rolls made in the air fryer—crispy outside, gooey inside, ready in under 20 minutes. Perfect for snacks, parties, or quick dinners.

Air-Fried Rice Paper Noodle Rolls
Crispy, light rolls filled with vermicelli, tofu or shrimp, and crisp vegetables—air-fried for a healthier crunch and quick prep.
Did You Make This?
Leave a comment & rating below or tag @royalrecipe on social media!
Rate This Recipe
Share This Recipe
Enjoyed this recipe? Share it with friends and family, and don't forget to leave a review!
Comments (1)
This recipe looks amazing! Can't wait to try it.
Comments are stored locally in your browser. Server comments are displayed alongside your local comments.

Hi, I'm Riley!
What's Popular

30-Minute Meals!
Join to receive our email series which contains a round-up of some of our quick and easy family favorite recipes.