>>
30-MINUTE MEALS! Get the email series now →


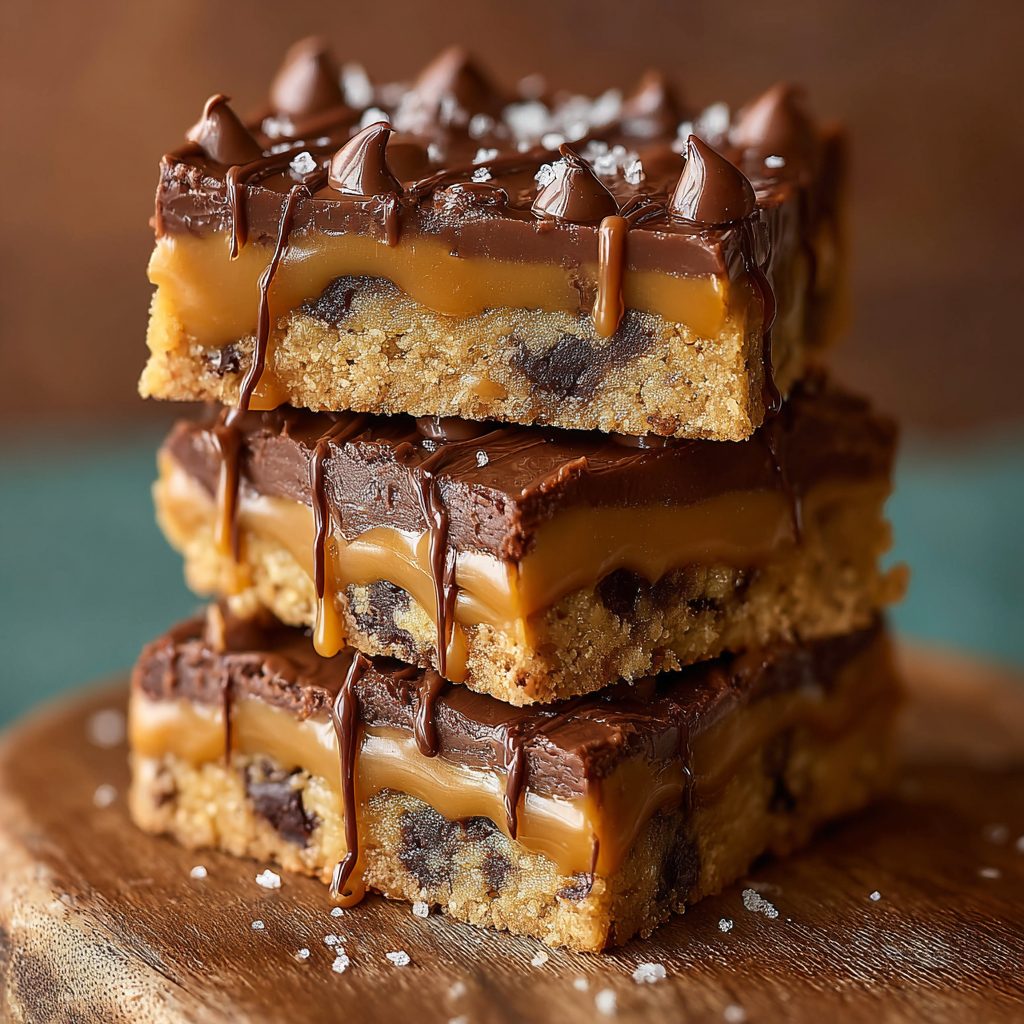
Buttery, chewy cookie bars layered with sticky caramel — an easy crowd-pleasing bake that travels well and disappears fast.
This caramel cookie bars recipe has been my go-to for potlucks and weeknight dessert cravings. I first put this together on a rainy Saturday afternoon when the pantry offered a lonely bag of brown sugar and a jar of ready-made caramel. The combination of rich butter, toasted brown sugar notes, and a stretchy caramel layer instantly transported me back to the first time I bit into a classic bakery bar — crisp edges, tender middle, and that oozy caramel surprise in the center. It’s the kind of dessert that makes people stop mid-conversation and come back for a second piece.
What makes these bars special is their balance of textures and flavor: a slightly crunchy base pressed snugly into the pan, a molten caramel ribbon, and a soft top that browns just enough to spell comfort. I love that the method is forgiving — you can use store-bought caramel for convenience or make a quick stovetop caramel if you prefer. Over the years I’ve refined temperature cues, pressing techniques, and the exact bake time so you end up with bars that hold together while still being delightfully chewy.
I remember bringing a pan of these to a neighborhood block party once; strangers asked for the recipe and a toddler scraped the tray clean. My partner insists on the extra drizzle of caramel right before serving, which I now consider mandatory. These bars have become part of small celebrations for me — birthdays, book club night, and lazy Sunday baking sessions when I want something comforting and shareable.
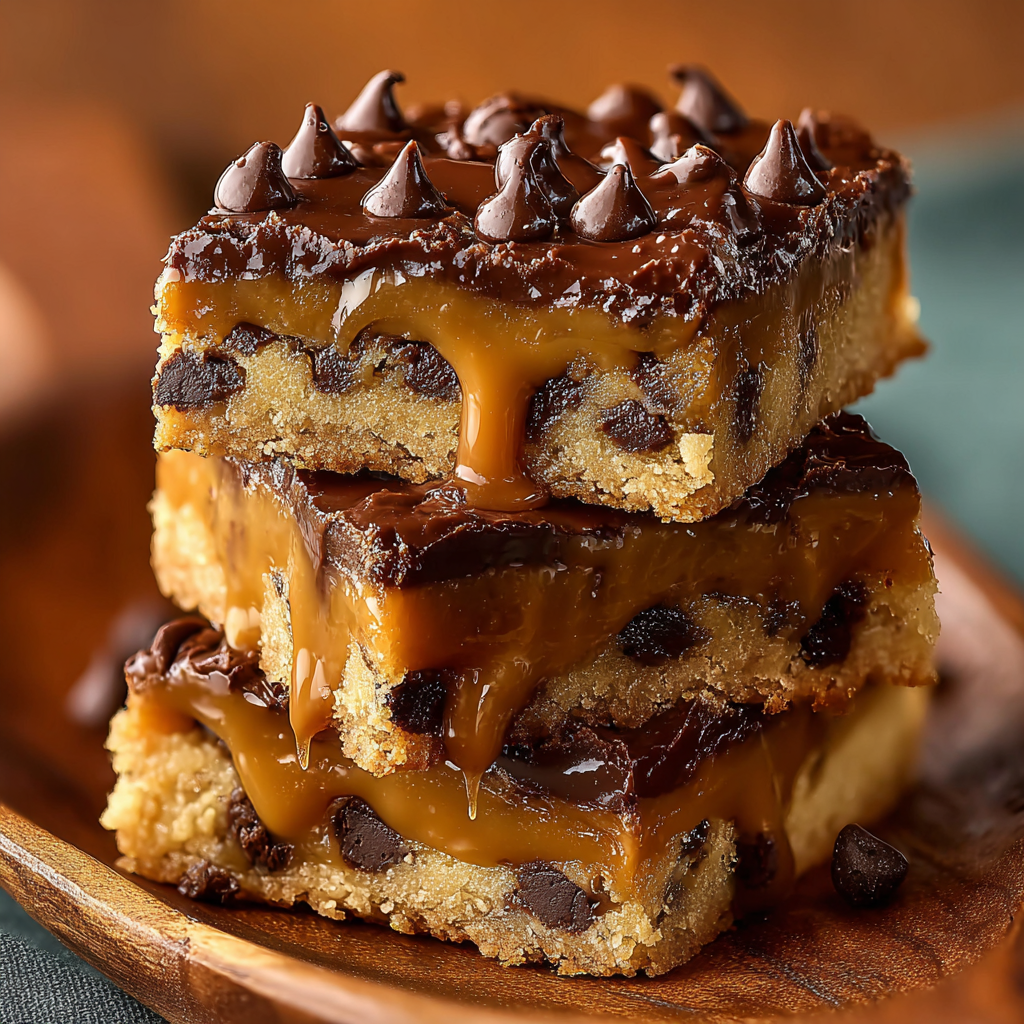
My favorite aspect is how adaptable this formula is: swap in chocolate chips or toasted pecans, sprinkle flaky sea salt on top, or drizzle additional caramel before serving. I once halved the dough and baked in an 8x8-inch pan for thicker bars; they were a hit at a family potluck where two neighbors asked for the recipe and one confessed to hiding a piece for later. This versatility makes the bar a staple whenever I want a dessert that feels both nostalgic and impressive.
Store cooled bars in an airtight container at room temperature for up to 48 hours. For longer storage, layer parchment between bars and refrigerate for up to 5 days, or freeze individually wrapped bars in plastic wrap and a zip-top bag for up to 3 months. To reheat, thaw frozen bars at room temperature or warm slices in a 300°F oven for 6–8 minutes to revive the chew and soften the caramel. Avoid microwaving for long stretches; a short 8–10 second burst is okay but can make the texture gummy.

For a dairy-free option swap butter for a high-quality vegan stick margarine and choose a dairy-free caramel or make a coconut milk caramel. To reduce sweetness, use all brown sugar and reduce granulated sugar slightly by 2 tablespoons; expect a denser texture. Whole wheat pastry flour can replace up to 30% of the all-purpose flour for a nuttier flavor, but avoid using only whole wheat which will dry the bars. If you prefer a firmer caramel layer, mix 2–3 tablespoons of finely chopped chocolate into the caramel before spreading.
Serve warm with a scoop of vanilla ice cream or a dollop of whipped cream and a pinch of flaky sea salt. For afternoon tea, cut into smaller squares and arrange on a platter with fresh berries. At parties, these bars pair beautifully with robust coffee or a lightly brewed black tea; the bitterness balances the sweet caramel. Garnish with toasted pecans or a drizzle of dark chocolate for a more elegant presentation.
Bars like these are an American baking tradition that blends cookie and candy techniques — a hybrid that rose to popularity mid-century when home bakers embraced sheet-pan efficiencies. Variations across regions swap nuts, chocolate, or different caramel types; some Southern versions layer butterscotch or use sweetened condensed milk. This style of layered bar reflects the practical creativity of home cooks: it’s an economical way to create complex textures without individually shaping cookies or candies.
In cooler months, fold in toasted pecans and a pinch of cinnamon for a warming touch. For summer gatherings, lighten the bars with lemon-scented shortbread base and a thinner caramel drizzle, or top with macerated berries for contrast. Holiday versions are ideal for gifting — wrap individual bars in wax paper and tie with twine; add orange zest to the caramel for a festive note.
Prepare the dough ahead and refrigerate for up to 24 hours; when ready to bake, press chilled dough into the pan and add the caramel. Alternatively, bake the base layer alone, cool, freeze briefly, then warm the caramel and assemble before a final brief bake — this yields a slightly different texture but is excellent for staging multiple batches. Use a sharp bench scraper to cut portions quickly and evenly for grab-and-go lunches or dessert trays.
These caramel cookie bars are a warm, forgiving recipe that consistently earns second helpings. Make them your own with nuts, chocolate, or a sprinkle of sea salt, and enjoy the simple pleasure of sharing a tray with friends and family.
Use room-temperature eggs so they emulsify smoothly with the melted butter and sugar for a tender crumb.
Allow caramel to cool slightly before spreading; too-warm caramel can sink into the dough.
Chill the finished slab briefly for cleaner slices and to prevent the caramel from running.
If you want a firmer caramel layer, stir in 2 tablespoons of finely chopped chocolate to thicken it slightly.
This nourishing caramel cookie bars recipe is sure to be a staple in your kitchen. Enjoy every moist, high protein slice — it is perfect for breakfast or as a wholesome snack any time.
Yes. Cool the bars completely and store in an airtight container at room temperature for up to 48 hours. For longer storage, refrigerate up to 5 days or freeze up to 3 months.
Chill the slab for 20–30 minutes after cooling and wipe the knife between cuts. Short chilling firms the caramel and gives cleaner slices.
This Caramel Cookie Bars recipe makes perfectly juicy, tender, and flavorful steak every time! Serve with potatoes and a side salad for an unforgettable dinner in under 30 minutes.
Preheat the oven to 350°F and line a 9x13-inch pan with parchment paper, leaving an overhang for easy removal; grease lightly.
Melt the butter, cool slightly, then whisk with brown and granulated sugar until smooth and glossy.
Beat in eggs one at a time, then stir in vanilla until fully incorporated into the batter.
Sift together flour, baking soda, and salt; fold into the wet ingredients until just combined to avoid overworking the dough.
Press half the dough evenly into the pan, then drizzle or spread the caramel sauce over the base, leaving a small border.
Drop remaining dough over the caramel, spread gently, and bake 22–27 minutes until golden. Cool before slicing.
Last Step: Please leave a rating and comment letting us know how you liked this recipe! This helps our business to thrive and continue providing free, high-quality recipes for you.
Leave a comment & rating below or tag
@royalrecipe on social media!

Learn how a 5-minute prep transforms a whole garlic bulb into silky, caramelized cloves in the air fryer. Perfect as a spread, mix-in, or flavor booster that elevates weeknight meals and party plates.

Golden, melty pizza rolls made in the air fryer—crispy outside, gooey inside, ready in under 20 minutes. Perfect for snacks, parties, or quick dinners.

Crispy, light rolls filled with vermicelli, tofu or shrimp, and crisp vegetables—air-fried for a healthier crunch and quick prep.
Leave a comment & rating below or tag @royalrecipe on social media!
Enjoyed this recipe? Share it with friends and family, and don't forget to leave a review!
This recipe looks amazing! Can't wait to try it.
Comments are stored locally in your browser. Server comments are displayed alongside your local comments.

Join to receive our email series which contains a round-up of some of our quick and easy family favorite recipes.
