
Cheesy Garlic Chicken Wraps

A fast, comforting wrap of shredded chicken tossed in garlicky aioli, melted cheddar, and warm tortillas — ready in minutes for a satisfying lunch or snack.
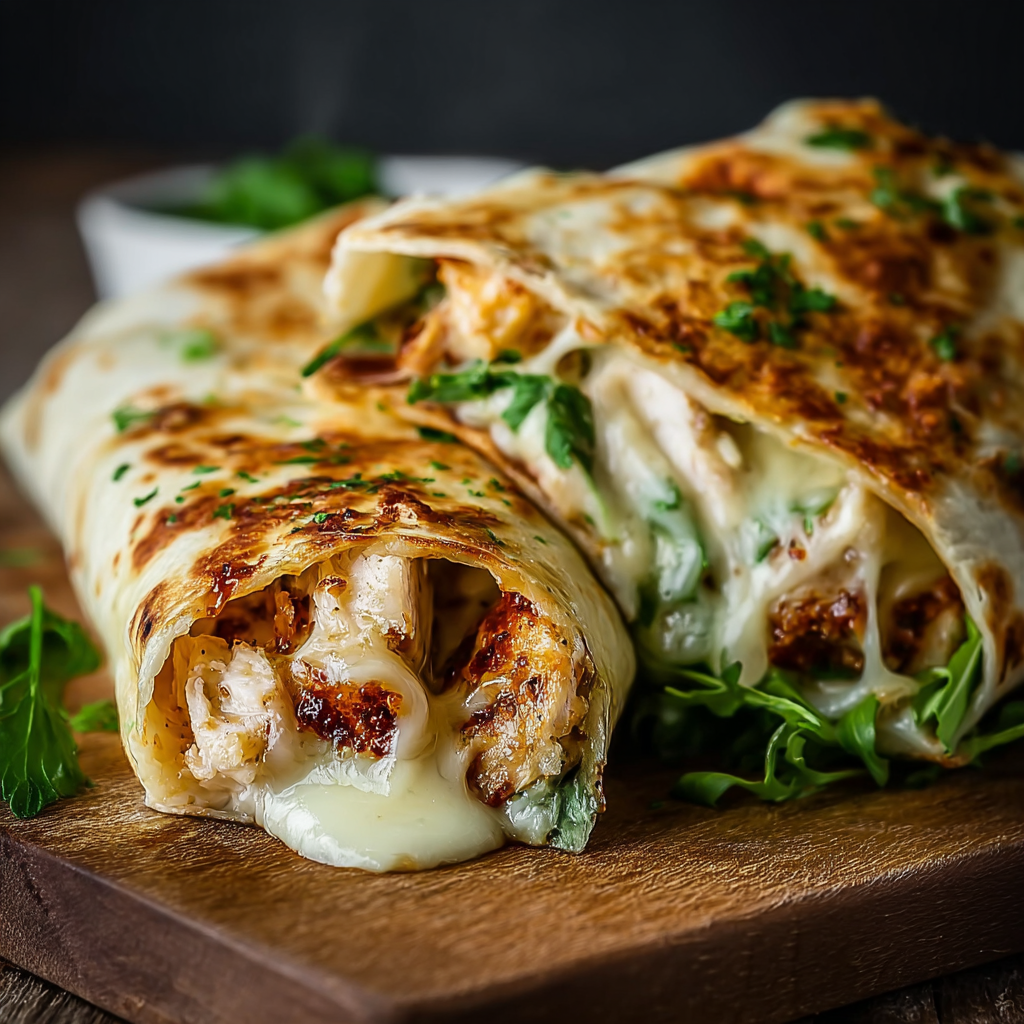
This Cheesy Garlic Chicken Wraps recipe has been my go-to when I want something quick, comforting, and reliably loved by everyone at the table. I first put this combination together on a weeknight when leftover roasted chicken met a jar of garlic aioli and a bag of tortillas in my pantry. The result was a warm, cheesy package with a crisp outside and a tender, flavorful inside. The garlic aioli brings a bright, silky tang and the sharp cheddar melts into pockets of creamy goodness that transform simple ingredients into something unexpectedly special.
These wraps are perfect for a busy day when you need a satisfying meal in under 20 minutes. They are the sort of food that sends my kids back for a second helping and that friends ask for at casual gatherings. Texturally they are a study in contrasts: the toasted tortilla offers a gentle crunch, the filling is moist and savory, and the melted cheese gives a luscious, stringy finish when you pull a slice apart. I love making an extra batch to keep in the fridge for lunches; reheated briefly in a skillet they remain excellent.
Why You'll Love This Recipe
- Fast and reliable: Ready in about 16 minutes from start to finish, perfect for busy weeknights or quick lunches.
- Pantry-friendly: Uses common staples — cooked chicken, aioli, shredded cheddar, and large tortillas — so you can assemble without a special grocery run.
- Crowd-pleasing: The combination of garlic and sharp cheddar appeals to most palates, making it a favorite for kids and adults alike.
- Make-ahead friendly: Filling can be mixed and refrigerated for up to two days, and wraps reheat beautifully in a skillet for fresh-crisp results.
- Customizable: Easy to adjust for heat, herbs, or additional veggies without complicating the technique.
- Portable and shareable: Great as hand-held bites for casual gatherings or packed lunches that stay tidy and satisfying.
Personally, the first time I served these at a small get-together everyone asked for the recipe. I learned that using a good quality garlic aioli makes a huge difference. A simple upgrade in that one ingredient elevated the whole dish and turned a quick assembly into a memorable bite.
Ingredients
- Cooked chicken, shredded: 2 cups. Use leftover roasted or rotisserie chicken for best flavor. Shred by hand for irregular pieces that trap sauce; packaged pre-shredded works in a pinch.
- Garlic aioli: 1/2 cup. Choose a creamy, high-quality aioli with real garlic pieces for depth. If you prefer, mix 1/2 cup mayonnaise with 1 teaspoon garlic paste for a house version.
- Cheddar cheese, shredded: 1 cup. Sharp cheddar melts well and balances the aioli. Pre-shredded is convenient, but shredding a block delivers a fresher melt.
- Large tortillas: 4. Use 10-inch flour tortillas for pliability and even toasting. For a lighter texture, whole wheat or spinach tortillas are good alternatives.
- Salt and pepper: To taste. A pinch of salt and a few grinds of black pepper bring the filling to life; adjust depending on how salty your aioli and cheese are.
Instructions
Mix the filling: Place 2 cups of shredded cooked chicken in a medium bowl and add 1/2 cup garlic aioli. Use a fork to combine gently so the chicken stays flaky. Season lightly with salt and 1/4 teaspoon black pepper, taste, and adjust. Aim for a creamy but not runny texture so the filling stays contained when wrapping. If your chicken is dry, add an extra tablespoon of aioli. Assemble the wraps: Lay a large tortilla flat and spoon about 1/2 cup of the chicken mixture down the center. Sprinkle roughly 1/4 cup shredded cheddar over the top so the cheese will be between the chicken and the tortilla when you fold. Fold the two sides in, then roll tightly from one end to the other to form a secure wrap. Repeat for remaining tortillas. Warm the skillet: Heat a non-stick skillet or cast-iron pan over medium heat. Add a light brush of oil or a small knob of butter to help browning. The pan is ready when a drop of water sizzles and evaporates on contact. This ensures a golden crisp exterior without burning. Grill the wraps: Place wraps seam-side down in the hot skillet. Cook for 2 to 3 minutes per side until the tortilla is golden brown and crisp. Press gently with a spatula to encourage even contact. Flip and cook another 2 to 3 minutes until cheese is fully melted and the interior is heated through. Total skillet time should be about 6 minutes. Slice and serve: Transfer wraps to a cutting board and let rest for 1 minute to avoid too-hot cheese oozing. Slice diagonally and serve warm. Pair with extra aioli, a simple green salad, or pickles for a bright contrast.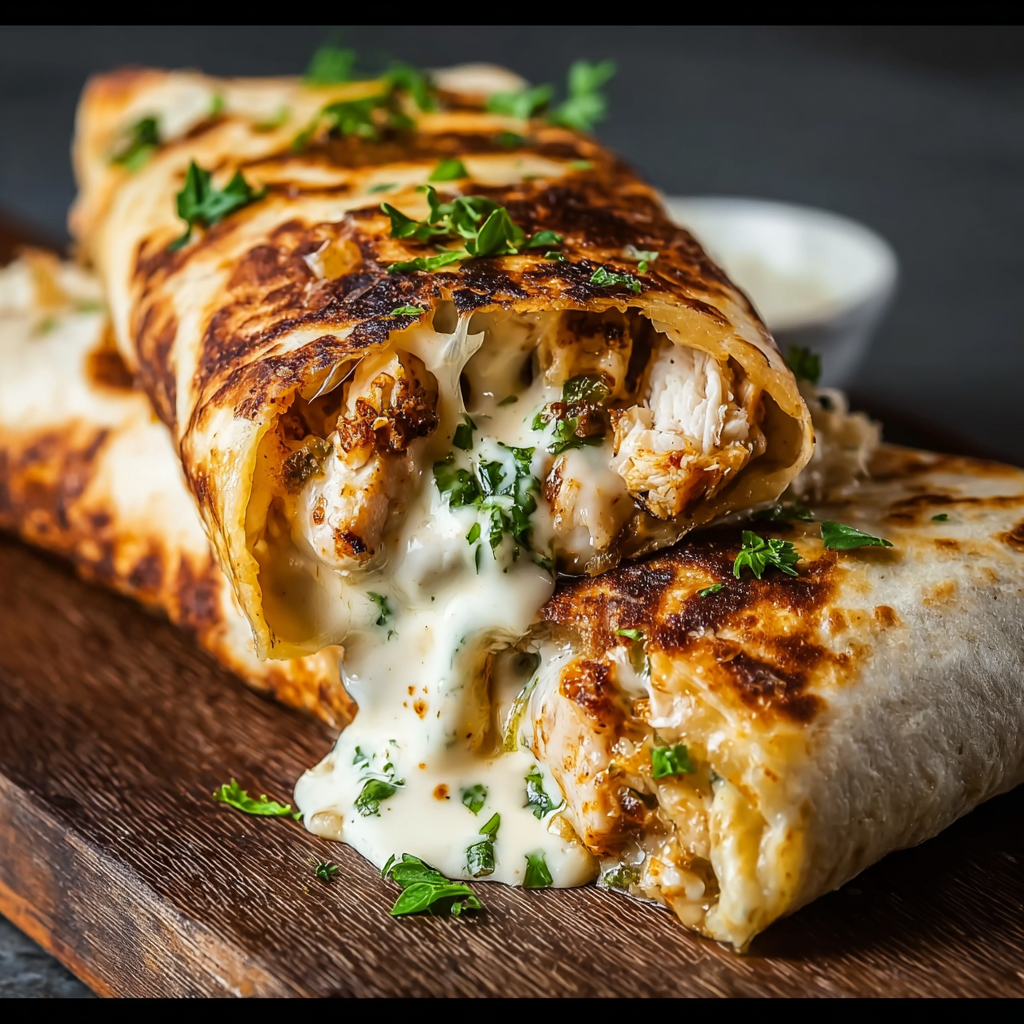
You Must Know
- Nutrition note: Each wrap is hearty and fairly calorie-dense due to the aioli and cheddar. Expect approximately 580 calories per wrap depending on exact brands.
- Storage: Filling keeps covered in the refrigerator for up to 48 hours. Assembled but ungrilled wraps can be refrigerated for several hours but are best grilled just before serving.
- Make-ahead: Mix the filling up to two days ahead. For best texture, assemble and grill just before eating.
- Freezing: Grilled wraps can be frozen for up to 1 month. Reheat in a 350 degrees F oven until warmed through and crisp, about 15 to 20 minutes frozen or 10 minutes thawed.
My favorite aspect is how quickly this turns humble leftovers into something that feels like a treat. At a recent potluck, these were gone within 20 minutes, and guests loved the balance of bright garlic and melty cheddar. The simple technique of pressing and toasting in a skillet produces the best texture — crisp outside, gooey inside.

Storage Tips
Store the filling in an airtight container in the refrigerator for up to two days. If you plan to make wraps ahead, assemble them tightly, wrap each in foil or plastic wrap, and refrigerate for up to 8 hours. For longer storage, grill first, then cool completely and freeze wrapped tightly for up to one month. To reheat from frozen, unwrap and place on a baking sheet in a 350 degrees F oven until warmed through and the tortilla is crisp, usually 15 to 20 minutes. Avoid microwaving from frozen as the tortilla will become rubbery.
Ingredient Substitutions
Swap the garlic aioli for plain mayonnaise plus 1 teaspoon garlic paste if you prefer to control sodium. For a lighter version, use Greek yogurt mixed with a little lemon and grated garlic, though the texture will be tangier and less rich. Replace cheddar with Monterey Jack for a milder melt, pepper jack for heat, or a dairy-free cheese if needed. Use corn tortillas for gluten-free needs, though they will be smaller and require different folding. For added vegetables, mix in some drained canned corn, finely chopped bell pepper, or shredded lettuce just before serving to maintain crispness.
Serving Suggestions
Serve these warm with a crisp green salad dressed in a simple vinaigrette to cut the richness. Pickled jalapenos or sliced dill pickles add a bright, acidic contrast. For a party, slice each wrap into thirds and secure with a toothpick for easy finger food. They pair nicely with tomato soup as a comforting combo, or with sweet potato fries for a heartier spread. Garnish with a sprinkle of chopped fresh parsley or chives to add color and a fresh herb note.
Cultural Background
While not tied to a single traditional cuisine, these wraps borrow elements from modern American and casual bistro fare. The idea of combining shredded roasted protein with a flavored mayo and cheese has roots in many quick meals across the United States. The portability and hand-held format reflect trends in casual dining and street food. Using aioli instead of plain mayonnaise nods to Mediterranean and European flavors while keeping the overall dish rooted in familiar comfort food.
Seasonal Adaptations
In spring and summer, add bright herbs like cilantro or basil and include fresh tomatoes or thin cucumber slices for freshness. In autumn, swap cheddar for smoked gouda and fold in roasted squash or apple for a seasonal touch. For winter gatherings, spice the aioli with 1/4 teaspoon smoked paprika and add caramelized onions to the filling for depth. These small swaps adapt the wraps to seasonal produce without changing the quick technique.
Meal Prep Tips
To prep for the week, shred a large batch of roasted chicken, mix with aioli, and portion into containers for easy assembly. Pack cheese separately to prevent moisture; assemble and grill on the day you plan to eat for the best texture. For lunch boxes, grill the wraps in the morning and wrap in foil to keep warm. If you prefer crispness, include a small microwave-safe container with extra aioli for dipping instead of spreading it inside before reheating.
These Cheesy Garlic Chicken Wraps are a dependable, heartwarming dish that translates leftover chicken into lively, shareable food. They are simple enough for everyday meals but tasty enough to be a star at casual gatherings. Try the variations and keep the base filling on hand; you will find yourself reaching for this combination again and again.
Pro Tips
If your chicken is dry, add an extra tablespoon of aioli to keep the filling moist.
Press the wrap seam-side down in the skillet first to seal it and prevent unrolling while grilling.
For extra crispness, brush the outside of the tortilla lightly with oil or melted butter before toasting.
Shred chicken by hand rather than pulsing in a food processor to preserve texture.
This nourishing cheesy garlic chicken wraps recipe is sure to be a staple in your kitchen. Enjoy every moist, high protein slice — it is perfect for breakfast or as a wholesome snack any time.
Tags
Cheesy Garlic Chicken Wraps
This Cheesy Garlic Chicken Wraps recipe makes perfectly juicy, tender, and flavorful steak every time! Serve with potatoes and a side salad for an unforgettable dinner in under 30 minutes.
Ingredients
Main
Instructions
Mix the filling
Combine 2 cups shredded cooked chicken with 1/2 cup garlic aioli in a bowl. Season with salt and pepper and mix until evenly coated. Adjust aioli if the chicken seems dry.
Assemble the wraps
Lay a 10-inch tortilla flat and place roughly 1/2 cup of the chicken mixture down the center. Sprinkle 1/4 cup shredded cheddar over the filling, fold the sides in, and roll tightly to secure.
Heat the skillet
Warm a non-stick skillet or cast-iron pan over medium heat and add a light brush of oil or butter. Test heat by sprinkling a drop of water; it should sizzle.
Grill the wraps
Place wraps seam-side down in the skillet and cook 2 to 3 minutes per side until golden and cheese melts. Press gently with a spatula for even browning.
Slice and serve
Let wraps rest for one minute, slice diagonally, and serve warm with extra aioli or a simple side salad.
Last Step: Please leave a rating and comment letting us know how you liked this recipe! This helps our business to thrive and continue providing free, high-quality recipes for you.
Nutrition
Did You Make This?
Leave a comment & rating below or tag
@royalrecipe on social media!
Categories:
You might also like...

5-Minute Air Fryer Roasted Garlic Magic That Wows
Learn how a 5-minute prep transforms a whole garlic bulb into silky, caramelized cloves in the air fryer. Perfect as a spread, mix-in, or flavor booster that elevates weeknight meals and party plates.

Air-Fried Pizza Rolls
Golden, melty pizza rolls made in the air fryer—crispy outside, gooey inside, ready in under 20 minutes. Perfect for snacks, parties, or quick dinners.

Air-Fried Rice Paper Noodle Rolls
Crispy, light rolls filled with vermicelli, tofu or shrimp, and crisp vegetables—air-fried for a healthier crunch and quick prep.
Did You Make This?
Leave a comment & rating below or tag @royalrecipe on social media!
Rate This Recipe
Share This Recipe
Enjoyed this recipe? Share it with friends and family, and don't forget to leave a review!
Comments (1)
This recipe looks amazing! Can't wait to try it.
Comments are stored locally in your browser. Server comments are displayed alongside your local comments.

Hi, I'm Riley!
What's Popular

30-Minute Meals!
Join to receive our email series which contains a round-up of some of our quick and easy family favorite recipes.