
Chocolate Peppermint Cookie Cups

Tender chocolate cookie cups filled with peppermint cheesecake, perfect for holiday gatherings and festive dessert tables.

This batch of Chocolate Peppermint Cookie Cups began as a holiday experiment that quickly became a family tradition. I first combined a deeply chocolatey cookie with a bright peppermint cheesecake filling on a wet December afternoon when the house smelled like pine and orange zest. The idea was simple: take a chewy, slightly fudgy cookie, shape it into a cup, and fill it with a creamy peppermint center that was light enough not to overwhelm the chocolate. The first time I served them, my niece declared them "a thousand times better than a candy cane," and at that point they were added to our annual cookie list.
What makes these so special is the contrast of textures and flavors: the cookie shell has a tender crumb with a slightly crisp edge, thanks to the cocoa blend and the quick bake time, while the peppermint filling is airy and tangy from full-fat cream cheese and chilled heavy cream. The salt in the cookie dough brightens the chocolate, and a touch of red gel turns the filling festive without affecting flavor. They are approachable to make yet impressive on a dessert board, and they travel well for parties or cookie exchanges. If you love classic chocolate and peppermint combinations, these little cups are a delightful way to serve both in one bite.
Why You'll Love This Recipe
- Ready in about 45 minutes from start to finish, including minimal cooling time, which makes them great for quick holiday baking and last-minute party trays.
- Uses pantry staples for the cookie base and a handful of simple ingredients for the filling, so you can whip them up without a special trip to the store.
- Make-ahead friendly: the cookie shells can be baked a day ahead and stored in an airtight container, while the filling keeps well refrigerated for 2 days before piping.
- Crowd-pleasing presentation: each portion is single-serve and easy to plate, making them ideal for cookie exchanges, office parties, or family gatherings.
- Customizable for dietary needs by swapping cream cheese and cream for dairy-free alternatives, or by omitting the crushed candy canes for a less sweet finish.
In my experience these cups have been the first to disappear at every holiday gathering. Neighbors, friends, and family have all come back for a second one, and I love how adaptable the recipe is. Little changes like crushed candy canes on top or a drizzle of melted chocolate let you tailor them to any occasion.
Ingredients
- Chocolate Cookie Cups: All-purpose flour 2 cups. Choose a good brand like King Arthur or Gold Medal for consistent structure. The flour provides the base and chew; spoon and level when measuring for accuracy.
- Chocolate Cookie Cups: Dutch-processed cocoa powder 1/4 cup, sifted. Dutch cocoa brings a smooth chocolate flavor and deep color without acidity.
- Chocolate Cookie Cups: Black cocoa powder 1/4 cup. Black cocoa deepens the color and adds a pleasant roasted note; use sparingly as it can be intense.
- Chocolate Cookie Cups: Baking soda 1 teaspoon and salt 1/2 teaspoon. The soda gives just enough lift to keep the shells tender while salt balances the sweetness.
- Chocolate Cookie Cups: Unsalted butter 1 cup at room temperature. Real butter is essential for flavor and proper creaming with the sugars.
- Chocolate Cookie Cups: Granulated sugar 1/2 cup and light brown sugar 1 cup packed. The brown sugar adds moisture and chew while granulated sugar helps with crisping edges.
- Chocolate Cookie Cups: Large eggs 2, room temperature. Eggs provide structure and richness; bringing them to room temperature helps them incorporate smoothly.
- Chocolate Cookie Cups: Vanilla extract 1 teaspoon. Use real vanilla for depth of flavor.
- Peppermint Cheesecake Filling: Heavy whipping cream 1 cup, chilled. Chilling improves whipping volume and stability.
- Peppermint Cheesecake Filling: Cream cheese 8 ounces, full fat, softened slightly for easy whipping. Full-fat gives the best texture and flavor.
- Peppermint Cheesecake Filling: Granulated sugar 1/2 cup. Adjust to taste if you prefer less sweet.
- Peppermint Cheesecake Filling: Peppermint extract 1 teaspoon. Peppermint extract is strong; add cautiously and taste.
- Peppermint Cheesecake Filling: Red color gel a drop or two for that holiday hue; gel concentrates color without thinning the filling.
- Garnish: Candy canes chopped for topping. Use crushed candy canes for crunch and festive appearance.
Instructions
Preheat and Prep: Preheat the oven to 350 degrees F. Generously spray two regular sized 12-cup muffin tins with cooking spray or brush with melted butter. Lining with nonstick spray helps the chocolate cups release cleanly after cooling. Have a large cookie scoop and a small jar or circular tool ready to press the centers. Dry Ingredients: In a medium bowl, whisk together 2 cups all-purpose flour, 1/4 cup sifted Dutch-processed cocoa, 1/4 cup black cocoa, 1 teaspoon baking soda, and 1/2 teaspoon salt. Sifting the Dutch cocoa avoids lumps and the black cocoa mixes more evenly when whisked. Cream Butter and Sugars: In a stand mixer fitted with a paddle or in a large bowl with a hand mixer, beat 1 cup room-temperature unsalted butter with 1/2 cup granulated sugar and 1 cup light brown sugar on medium-high until light and fluffy, about 2 to 3 minutes. Scrape the bowl occasionally to ensure even creaming; this step traps air that helps the cups keep a tender crumb. Incorporate Eggs and Vanilla: Reduce speed to low and add the 2 large eggs one at a time, mixing until each is fully incorporated. Add 1 teaspoon vanilla extract and beat just until combined. Overbeating here can make the dough too soft, so stop as soon as the ingredients are joined. Combine Dough: Add the dry ingredients to the wet mix and fold on low speed or with a rubber spatula until just combined. The dough should be soft but hold its shape when scooped. Avoid overmixing to keep the texture tender. Scoop into Tins: Using a large cookie scoop (about 3 tablespoons), portion dough into the prepared muffin tins, filling each cavity nearly to the top. Leave a little space for pressing; the dough will spread slightly during baking. Bake and Form Cups: Bake for approximately 10 to 13 minutes, until the cookies are mostly set but still slightly soft in the center. Immediately remove from the oven and, while warm, press down in the center of each cookie with the bottom of a small jar or similar round tool to create a well. This step sets the cup shape while the cookie is pliable. Cool: Cool the cookie cups in the pans for 10 minutes. To loosen them, gently twist each cup in the pan and cool for an additional 5 minutes before removing to a wire rack to cool completely. Cooling fully ensures the shells hold their shape when filled. Make Peppermint Filling: Chill a mixing bowl and beaters briefly for best results. In a cold bowl, whip 1 cup chilled heavy whipping cream to stiff peaks. In a separate bowl, beat 8 ounces softened cream cheese with 1/2 cup granulated sugar until smooth. Fold in the whipped cream, 1 teaspoon peppermint extract, and a drop or two of red gel for color. Keep chilled until ready to pipe. Assemble and Garnish: Once the cookie cups are completely cool, transfer the peppermint filling to a piping bag fitted with your preferred tip and pipe into each shell. Top with chopped candy canes for crunch and a festive look. Refrigerate until serving to keep the filling firm.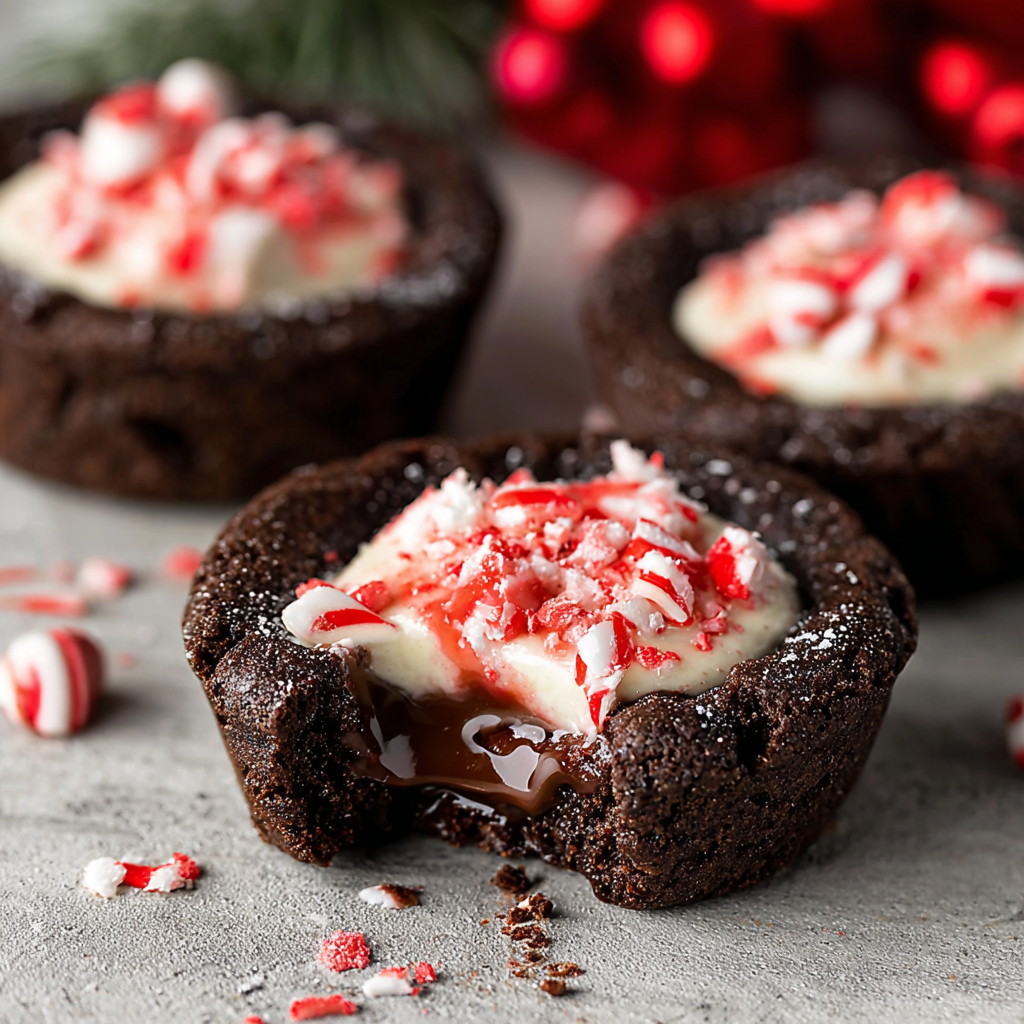
You Must Know
- These cups freeze well for up to 3 months if baked and cooled, then stored in a single layer in a freezer-safe container. Add filling after thawing in the refrigerator.
- The recipe yields about 24 cookie cups when using a 3 tablespoon scoop and two 12-cup tins; adjust scoop size for fewer, larger cups.
- High in fat and sugars, the filling and shell are rich; serving them chilled reduces perceived richness and brightens the peppermint flavor.
- Keep assembled cups refrigerated and consume within 3 days for best texture and freshness.
My favorite part is watching how the peppermint filling lightens the chocolate bite. Family members often tell me they like the contrast between the fudgy shell and the airy center. When I first tested adding crushed candy canes on top, the crunch transformed the mouthfeel and instantly made the cups more festive.

Storage Tips
Store cooled cookie shells in an airtight container at room temperature for up to 2 days or in the refrigerator for up to 5 days. If assembled, keep the filled cups refrigerated and cover loosely with plastic wrap or in a sealed container to prevent the candy canes from absorbing moisture. For freezing, place cooled shells in a single layer on a baking sheet and freeze until solid, then transfer to a freezer-safe bag; fill after thawing in the refrigerator overnight. To serve from frozen, thaw in the fridge for several hours to maintain shape and texture.
Ingredient Substitutions
For a dairy-free version, use a plant-based butter substitute suitable for baking and a vegan cream cheese with stabilized aquafaba or coconut cream whipped in place of heavy cream. Keep in mind that flavor and texture will be slightly different. To reduce sweetness, cut the sugars in the filling by 25 percent and add a teaspoon of lemon juice to balance the flavor. If black cocoa is unavailable, use an extra 1/4 cup Dutch cocoa and slightly reduce flour by 1 tablespoon to keep the dough consistency similar.
Serving Suggestions
Serve chilled on a dessert platter alongside hot cocoa, coffee, or a bright citrus tea to cut through richness. Garnish with crushed candy canes, a dusting of sifted cocoa, or a drizzle of melted semi-sweet chocolate. These are perfect for cookie swaps, after-dinner bites, or as part of a holiday dessert buffet. For a plated dessert, serve two cookie cups with a few fresh raspberries and a mint sprig for contrast.
Cultural Background
The chocolate and peppermint pairing is a classic in American holiday baking, drawing on traditions of spiced and mint-flavored confections popular during winter festivals. Chocolate cookie cups are a modern adaptation of filled cookie techniques; similar filled-cookie traditions appear across cultures where small pastries are used to combine contrasting textures. These cups marry the American love of both chocolate cookies and peppermint candy canes, creating a festive, single-bite experience.
Seasonal Adaptations
For other seasons, swap the peppermint extract for orange or almond extract and replace candy canes with toasted almond slivers or citrus zest. In summer, reduce the amount of cream and add a dollop of fruit curd to the center for a bright, refreshing variation. For a Valentine’s twist, tint the filling pink and top with freeze-dried strawberries.
Meal Prep Tips
Make the cookie shells up to two days ahead and store in an airtight container at room temperature. Prepare the filling on the day you plan to serve and pipe just before guests arrive to maintain a fresh appearance. Use a piping bag with a wide tip to fill quickly, and keep filled cups chilled on a tray lined with parchment until serving time. For larger gatherings, bake multiple batches and assemble in shifts to keep the filling stable.
These Chocolate Peppermint Cookie Cups combine ease and elegance, making them a dependable favorite every holiday season. Share them at your next gathering and enjoy the satisfied looks that follow each bite.
Pro Tips
Chill the mixing bowl and beaters briefly before whipping the heavy cream for quicker and more stable peaks.
Press the centers immediately after baking while the cookies are warm to ensure the cup shape holds as they cool.
Use room-temperature eggs and butter to ensure even mixing and a consistent dough texture.
If the dough feels too soft for scooping, chill for 10 minutes to firm it up slightly before portioning.
Test one cup for bake time: ovens vary, and starting with one trial helps avoid overbaking all shells.
This nourishing chocolate peppermint cookie cups recipe is sure to be a staple in your kitchen. Enjoy every moist, high protein slice — it is perfect for breakfast or as a wholesome snack any time.
FAQs about Recipes
Can I make the shells ahead of time and freeze them?
Yes. Bake the shells, cool completely, freeze in a single layer until solid, then transfer to a freezer-safe bag. Thaw in the refrigerator overnight before filling.
How do I fill the cookie cups without making a mess?
Use a piping bag or a small spoon to fill the cooled cups. Chill filled cups for at least 30 minutes before serving to let the filling set.
Tags
Chocolate Peppermint Cookie Cups
This Chocolate Peppermint Cookie Cups recipe makes perfectly juicy, tender, and flavorful steak every time! Serve with potatoes and a side salad for an unforgettable dinner in under 30 minutes.
Ingredients
Chocolate Cookie Cups
Peppermint Cheesecake Filling
Instructions
Preheat and Prep
Preheat oven to 350 degrees F. Spray two regular sized muffin tins with cooking spray. Have a 3 tablespoon scoop and a small jar ready to press centers immediately after baking.
Whisk Dry Ingredients
Combine 2 cups all-purpose flour, 1/4 cup sifted Dutch-processed cocoa, 1/4 cup black cocoa, 1 teaspoon baking soda, and 1/2 teaspoon salt in a bowl and whisk to combine.
Cream Butter and Sugars
Beat 1 cup unsalted butter with 1/2 cup granulated sugar and 1 cup light brown sugar on medium-high until light and fluffy, about 2 to 3 minutes. Scrape the bowl down once or twice.
Add Eggs and Vanilla
Reduce speed and add 2 eggs one at a time, then 1 teaspoon vanilla. Mix until just combined to avoid overworking the dough.
Combine Dough
Add the dry ingredients to the butter mixture and mix on low until just combined. The dough should be soft but scoopable.
Scoop and Bake
Scoop dough into prepared muffin tins using a 3 tablespoon scoop. Bake for 10 to 13 minutes until mostly set but slightly soft in the center.
Form the Cups
Immediately after removing from the oven, press down the center of each warm cookie with a small jar or round tool to create a well. Cool in pans for 10 minutes, then loosen and cool on a wire rack.
Prepare Filling
Whip 1 cup chilled heavy cream to stiff peaks. Beat 8 ounces softened cream cheese with 1/2 cup sugar until smooth, then fold in whipped cream, 1 teaspoon peppermint extract, and red gel for color. Keep chilled.
Assemble and Serve
Pipe the peppermint filling into cooled cookie cups, top with chopped candy canes, and refrigerate until serving. Store assembled cups in the refrigerator for up to 3 days.
Last Step: Please leave a rating and comment letting us know how you liked this recipe! This helps our business to thrive and continue providing free, high-quality recipes for you.
Nutrition
Did You Make This?
Leave a comment & rating below or tag
@royalrecipe on social media!
Categories:
You might also like...

5-Minute Air Fryer Roasted Garlic Magic That Wows
Learn how a 5-minute prep transforms a whole garlic bulb into silky, caramelized cloves in the air fryer. Perfect as a spread, mix-in, or flavor booster that elevates weeknight meals and party plates.

Air-Fried Pizza Rolls
Golden, melty pizza rolls made in the air fryer—crispy outside, gooey inside, ready in under 20 minutes. Perfect for snacks, parties, or quick dinners.

Air-Fried Rice Paper Noodle Rolls
Crispy, light rolls filled with vermicelli, tofu or shrimp, and crisp vegetables—air-fried for a healthier crunch and quick prep.
Did You Make This?
Leave a comment & rating below or tag @royalrecipe on social media!
Rate This Recipe
Share This Recipe
Enjoyed this recipe? Share it with friends and family, and don't forget to leave a review!
Comments (1)
This recipe looks amazing! Can't wait to try it.
Comments are stored locally in your browser. Server comments are displayed alongside your local comments.

Hi, I'm Riley!
What's Popular

30-Minute Meals!
Join to receive our email series which contains a round-up of some of our quick and easy family favorite recipes.