
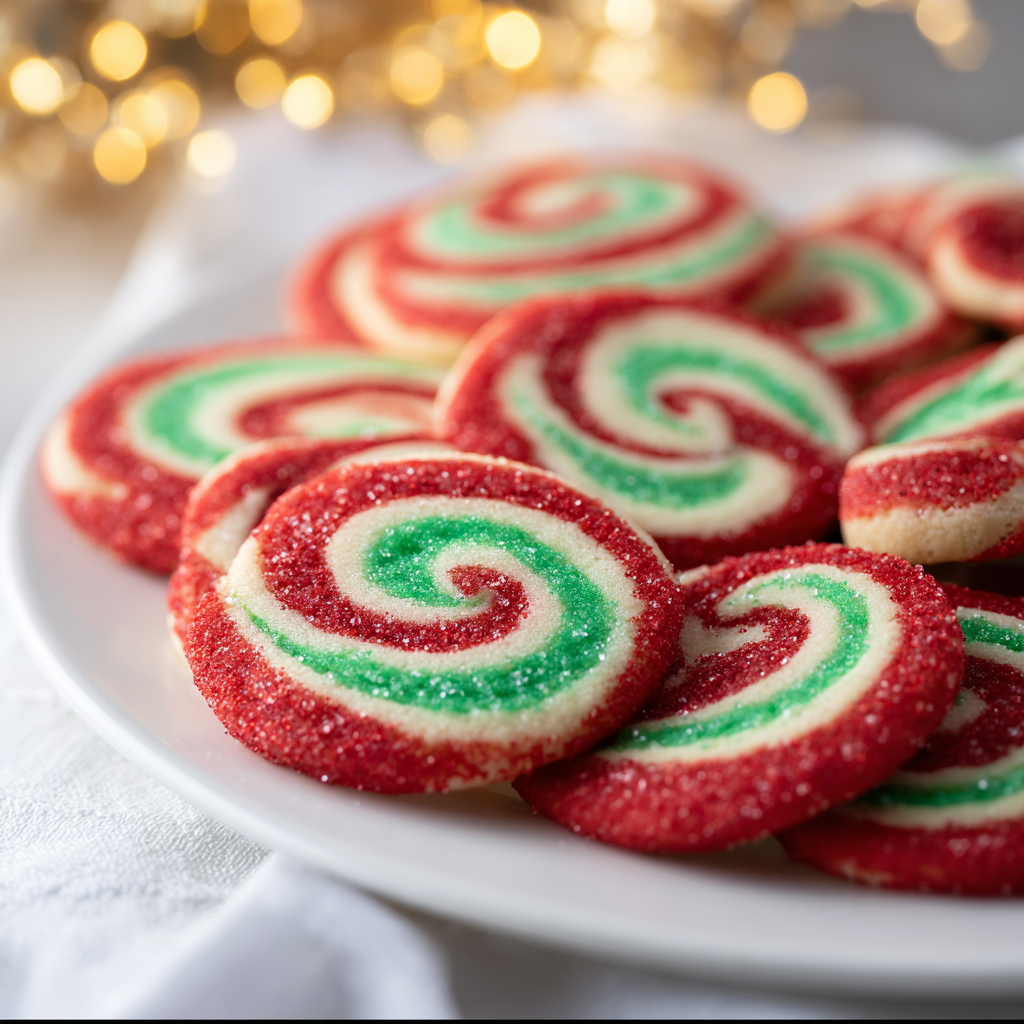
Christmas Pinwheel Cookies

Swirled red, green, and vanilla pinwheel cookies—classic holiday cookies with crisp edges, tender centers, and a festive sanding sugar sparkle.

This recipe has been my go-to holiday activity ever since I first rolled out the dough with my niece on a snowy afternoon. I remember the kitchen buzzing with holiday music, the counter dusted with flour, and tiny hands carefully pressing red and green dough together. The result was more than a cookie; it was a memory that tastes like butter, vanilla, and celebration. These pinwheel cookies balance a crisp, slightly buttery edge with a tender, melt-in-your-mouth center and a lively ribbon of color that feels right for every holiday platter.
I discovered this particular balance of ingredients when I wanted a simple dough that would hold its shape but still slice cleanly after chilling. The combination of two thirds cup butter and two thirds cup sugar makes the biscuit just sweet enough without overwhelming the delicate vanilla. The 1 3/4 cups all-purpose flour gives structure while keeping the cookies tender. I love how a little gel color and a sprinkle of sanding sugar turn a humble biscuit into a festive showpiece. Over the years these cookies have become a requested treat at family gatherings, school parties, and cookie exchanges because they look fancy but are surprisingly simple to make.
Why You'll Love This Recipe
- Easy-to-make dough that holds swirl patterns well so your spirals stay distinct after slicing and baking.
- Uses pantry staples: butter, sugar, egg, flour, and a splash of vanilla—no special flours or expensive ingredients required.
- Make-ahead friendly: dough can be refrigerated or frozen at several stages to fit your holiday schedule.
- Kid-friendly assembly: coloring and rolling are great activities to get children involved in holiday baking.
- Appeals to crowds: festive look makes them perfect for cookie exchanges, and they store well for gifting.
- Quick bake time: once chilled, slices bake in about 10 to 12 minutes so you can produce large batches without long oven time.
In my experience these cookies are always the first to disappear at parties. My mother calls them her favorite because they look like a bakery cookie but are made from a simple home dough. Packing them in tins layered with parchment keeps them fresh and helps me deliver holiday gifts to neighbors without worrying about damage in transit.
Ingredients
- Unsalted butter (2/3 cup; softened): Use high-quality European-style butter if you want a rich flavor and slightly firmer texture; bring to room temperature so it creams easily with sugar.
- Granulated sugar (2/3 cup): Standard white sugar gives clean sweetness and helps create crisp edges; do not substitute entirely with brown sugar or the texture will change.
- Egg (1 large): Adds structure and moisture; for best results use a large egg at room temperature so it incorporates evenly.
- Vanilla extract (1 teaspoon): Pure vanilla extract enhances the buttery flavor; avoid imitation for the best aroma.
- All-purpose flour (1 3/4 cups): Provides structure; spoon and level when measuring for accuracy. King Arthur or Gold Medal brands work well.
- Kosher salt (1/2 teaspoon): Balances sweetness and amplifies flavor; if using table salt use 1/4 teaspoon instead.
- Baking soda (1/4 teaspoon): Light lift to keep the cookies tender rather than flat; measure carefully.
- Red and green gel food coloring: Gel colors produce bright swirls without adding extra liquid that would soften the dough.
- Red sanding sugar: For garnish—adds sparkle and crunch on top of the spiral slices before baking.
Instructions
Cream the butter and sugar: In the bowl of a stand mixer fitted with the paddle attachment, beat the softened butter and granulated sugar at medium speed until light and creamy, about 3 to 4 minutes. This step incorporates air for a tender crumb. Scrape down the bowl to ensure even mixing. Add egg and vanilla: Reduce speed to medium-low and add the large egg and vanilla extract. Beat until fully combined and the mixture looks glossy, another 30 seconds to a minute. The batter should be smooth and homogeneous. Combine dry ingredients and mix: Whisk together 1 3/4 cups all-purpose flour, 1/2 teaspoon kosher salt, and 1/4 teaspoon baking soda in a medium bowl. With the mixer on low, gradually add the flour mixture until a soft dough forms. Avoid overworking; stop once there are no dry streaks. Divide and color the dough: Turn the dough out and divide into three even portions. Return one third to the cleaned mixer bowl and knead in red gel food coloring until evenly colored. Wipe the bowl, repeat with the second third using green gel coloring. Leave the final third uncolored for the vanilla layer. Shape each into a ball, wrap tightly in plastic, and chill for 1 hour to firm up for rolling. Roll into squares and chill: Remove chilled dough from the refrigerator. Working with one ball at a time between two sheets of parchment paper, roll each into a 7-inch square about 1/8 to 1/4 inch thick. Refrigerate the rolled sheets for 15 minutes to set so they layer cleanly. Layer and roll the sheets: Place the uncolored square on your work surface, top with the green square, then the red square. Press gently to adhere, then lift the parchment and roll tightly from one edge to form a firm log. Wrap in plastic and chill at least 30 minutes or until firm enough to slice cleanly. Slice and bake: Preheat the oven to 350 degrees Fahrenheit. Slice the chilled log into 1/4-inch rounds using a sharp knife. Arrange on parchment-lined baking sheets about 1 inch apart. Sprinkle lightly with red sanding sugar. Bake 10 to 12 minutes until the edges are set and just beginning to color. Cool on the sheet 5 minutes, then transfer to a wire rack to finish cooling.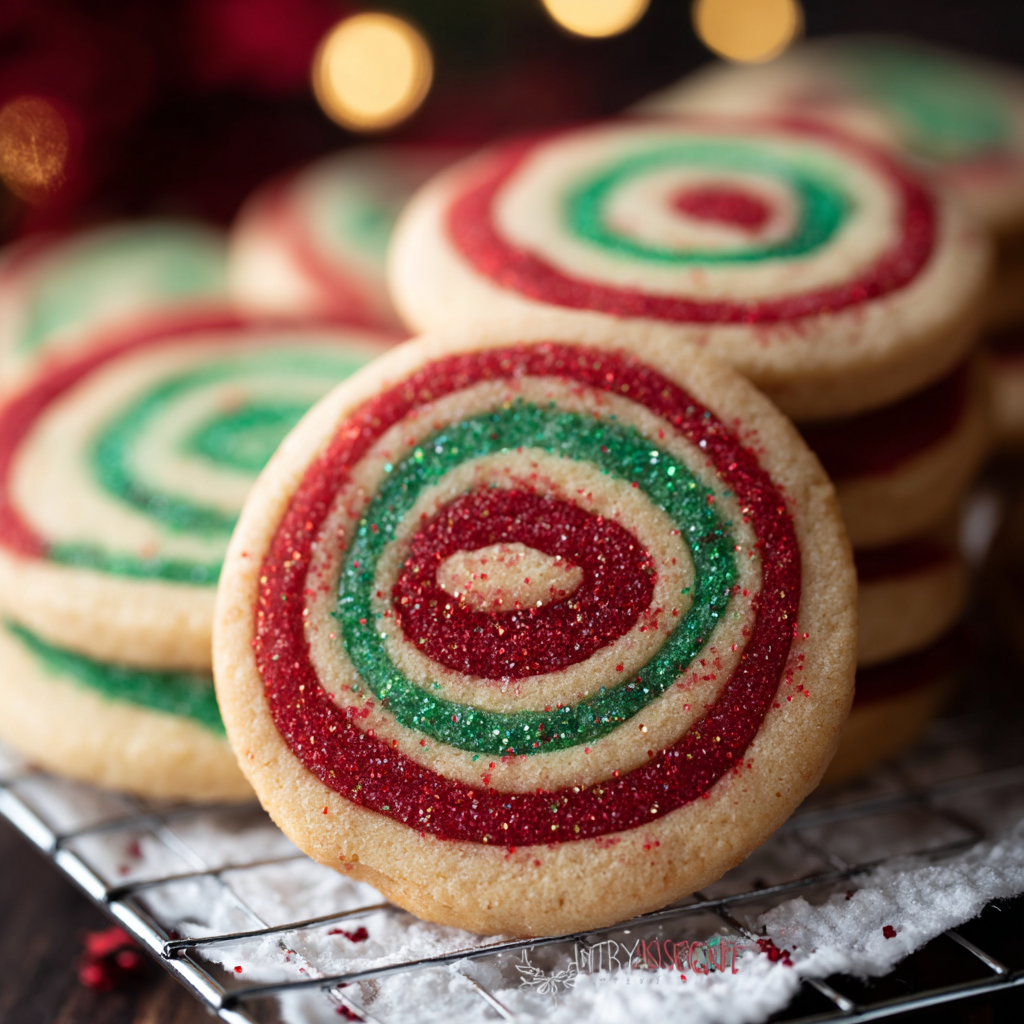
You Must Know
- These cookies freeze well: wrap the log tightly in plastic and foil for up to 3 months; slice and bake from frozen adding an extra 1 to 2 minutes to bake time.
- High in simple carbohydrates and moderate fat due to butter and sugar; portioning keeps treats reasonable.
- Store baked cookies in an airtight container at room temperature for up to 5 days or refrigerate for up to 10 days.
- Use gel food coloring to avoid softening the dough; liquid colors can make the layers spread.
My favorite aspect is the reveal when a slice is cut. Friends always comment on the crisp swirl and how the sanding sugar sparkles like tiny holiday lights. One year I made three logs in different color combinations and arranged them on a platter — guests loved sampling every color and none suspected the dough was the same simple mixture each time.
Storage Tips
Once cooled completely, arrange the cookies in a single layer in an airtight tin or container lined with parchment. For longer storage, separate layers with parchment to avoid sticking. At room temperature they keep fresh for about five days. For up to two weeks keep them in the refrigerator in an airtight container. To freeze baked cookies, flash-freeze them in a single layer on a tray until firm, then transfer to a zip-top bag or airtight container for up to three months. Thaw at room temperature and refresh in a 325 degrees Fahrenheit oven for 3 to 5 minutes if you want them warm and crisp.
Ingredient Substitutions
If you need dairy-free options, use a high-quality plant-based butter stick measured cup for cup and note the flavor will shift slightly. For egg-free, a commercial egg replacer or a flax egg may be used but expect a denser texture; reduce liquid slightly if using a flax egg. Swap granulated sugar for a 1:1 sugar substitute only if it measures like sugar; otherwise the texture and spread will change. For a whole-wheat twist, replace up to 1/3 of the flour with white whole-wheat flour but keep an eye on moisture and add a teaspoon of milk if the dough feels dry.
Serving Suggestions
These swirls look wonderful on a holiday cookie platter paired with ginger snaps, chocolate crinkles, and shortbread. Serve with small cups of hot cocoa, spiced tea, or coffee for a cozy pairing. Garnish each plate with sprigs of fresh rosemary or a few cranberries to add a festive green and red contrast. They also make excellent edible gifts—stack six to eight cookies in small cellophane bags and tie with ribbon for neighbors and teachers.
Cultural Background
Swirled cookies have roots in European decorative baking where layered doughs were rolled to create visual patterns. Variations appear in many cultures as a way to make simple cookie dough appear ornate for celebrations. In America, the pinwheel became a popular mid-20th century staple for holiday cookie collections because the method is simple and produces a dramatic result without complex ingredients.
Seasonal Adaptations
For other holidays change the color palette: pastel colors for spring or blue and white for winter themed parties. Add a teaspoon of finely grated orange zest to the uncolored dough for a citrus lift, or fold a tablespoon of finely chopped peppermint candy into the red layer for a minty finish. For autumn swap green for orange and use cinnamon sugar instead of sanding sugar for a warm seasonal twist.
Meal Prep Tips
Make the dough up to one week ahead and keep wrapped in the refrigerator. For a time-saving approach, form and freeze logs and then slice and bake directly from frozen—this is perfect for last-minute entertaining. Use a ruler to mark even thickness on the log to help get uniform cookie slices. Keep a serrated knife chilled in the freezer for cleaner cuts without dragging the layers.
These cookies capture the joy of holiday baking—simple techniques that yield a pretty and delicious result. Share them, package them, and make them your family’s new staple for festive occasions. Happy baking and may your kitchen be warm and full of laughter.
Pro Tips
Chill the dough well between steps so the layers remain distinct and slices are clean.
Use gel food coloring to avoid adding liquid that would soften the dough and blur the swirl.
Slice the log with a sharp, chilled knife for neat rounds and minimal squashing.
If the log becomes too soft while slicing, return it to the refrigerator for 10 to 15 minutes.
This nourishing christmas pinwheel cookies recipe is sure to be a staple in your kitchen. Enjoy every moist, high protein slice — it is perfect for breakfast or as a wholesome snack any time.
Tags
Christmas Pinwheel Cookies
This Christmas Pinwheel Cookies recipe makes perfectly juicy, tender, and flavorful steak every time! Serve with potatoes and a side salad for an unforgettable dinner in under 30 minutes.
Ingredients
Cookie Dough
Instructions
Cream butter and sugar
In a stand mixer fitted with the paddle attachment, beat the softened butter and sugar at medium speed until light and creamy, about 3 to 4 minutes. Scrape the bowl as needed.
Add egg and vanilla
Add the large egg and vanilla and beat on medium-low until combined and glossy, about 30 to 60 seconds. Ensure the mixture is homogeneous.
Mix dry ingredients
Whisk together flour, kosher salt, and baking soda. With the mixer on low, gradually add the dry ingredients until a soft dough forms; do not overmix.
Divide and color
Divide the dough into three equal portions. Color one portion red and one portion green using gel food coloring, leaving the third uncolored. Form into balls, wrap, and chill for 1 hour.
Roll sheets
Between sheets of parchment, roll each chilled ball into a 7-inch square about 1/8 to 1/4 inch thick. Chill the sheets for 15 minutes to set.
Layer and roll into a log
Layer the plain, green, then red squares and press gently. Starting from one edge, roll tightly into a firm log, wrap in plastic, and chill at least 30 minutes.
Slice and bake
Preheat oven to 350 degrees Fahrenheit. Slice the chilled log into 1/4-inch rounds, place on parchment-lined baking sheets, sprinkle with sanding sugar, and bake 10 to 12 minutes until edges are set. Cool briefly on the pan then transfer to a wire rack.
Last Step: Please leave a rating and comment letting us know how you liked this recipe! This helps our business to thrive and continue providing free, high-quality recipes for you.
Nutrition
Did You Make This?
Leave a comment & rating below or tag
@royalrecipe on social media!
Categories:
You might also like...

5-Minute Air Fryer Roasted Garlic Magic That Wows
Learn how a 5-minute prep transforms a whole garlic bulb into silky, caramelized cloves in the air fryer. Perfect as a spread, mix-in, or flavor booster that elevates weeknight meals and party plates.

Air-Fried Pizza Rolls
Golden, melty pizza rolls made in the air fryer—crispy outside, gooey inside, ready in under 20 minutes. Perfect for snacks, parties, or quick dinners.

Air-Fried Rice Paper Noodle Rolls
Crispy, light rolls filled with vermicelli, tofu or shrimp, and crisp vegetables—air-fried for a healthier crunch and quick prep.
Did You Make This?
Leave a comment & rating below or tag @royalrecipe on social media!
Rate This Recipe
Share This Recipe
Enjoyed this recipe? Share it with friends and family, and don't forget to leave a review!
Comments (1)
This recipe looks amazing! Can't wait to try it.
Comments are stored locally in your browser. Server comments are displayed alongside your local comments.

Hi, I'm Riley!
What's Popular

30-Minute Meals!
Join to receive our email series which contains a round-up of some of our quick and easy family favorite recipes.