
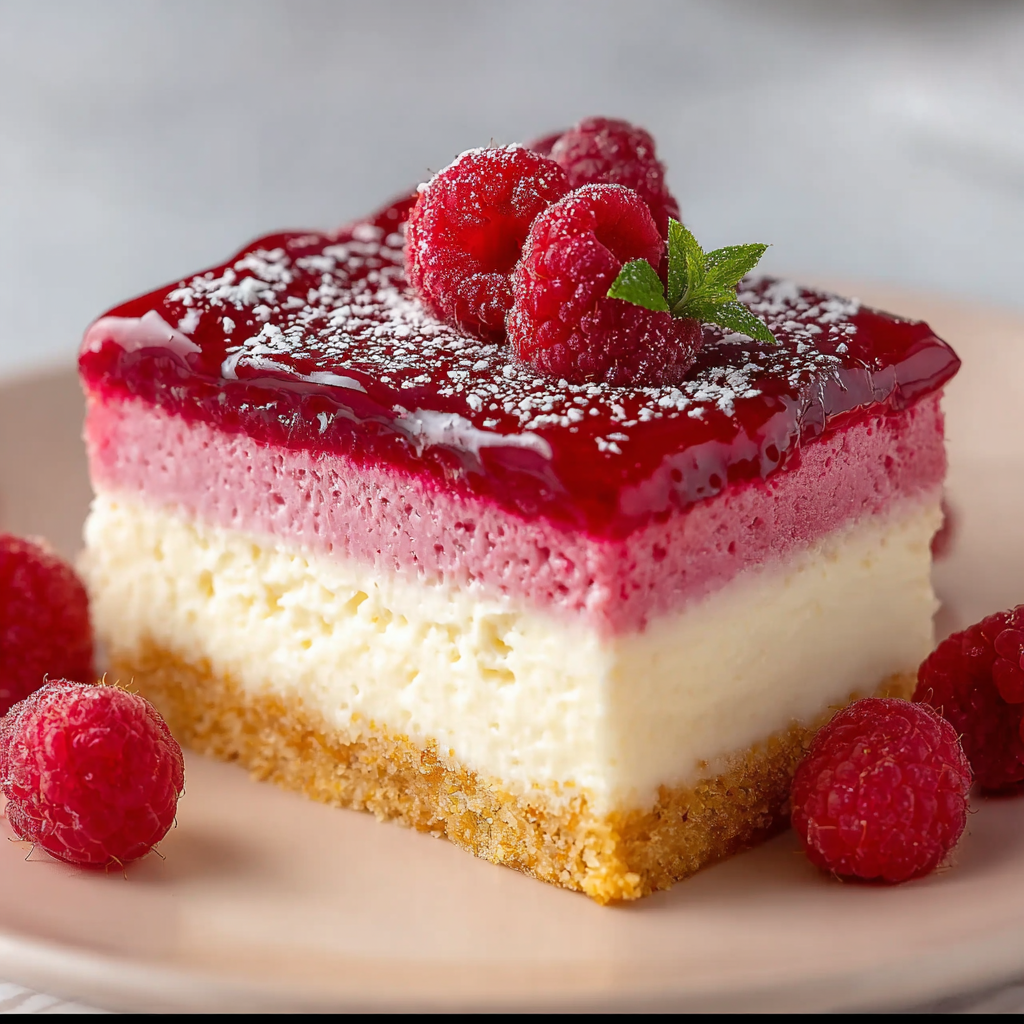
Creamy Raspberry Cheesecake

A no-bake, silky-smooth cheesecake layered with bright raspberry filling — light enough for spring, indulgent enough for guests.

This creamy raspberry cheesecake has become one of my favorite desserts to bring to potlucks and weekend dinners. I discovered this no-bake combination on a rainy afternoon when I wanted something that felt luxurious but didn't require the oven; the result was a velvety cream layer set atop a buttery graham crust, finished with a glossy, bright raspberry layer. What makes it special is the texture contrast: a crisp, slightly crunchy base, an airy, melt-in-your-mouth cream layer, and a jewel-toned raspberry topping that balances sweetness with a little bright tartness.
I remember the first time I served it to a crowd — my aunt asked for the recipe twice and my neighbor declared it the best no-bake dessert they'd ever had. The recipe is forgiving: you can use store-bought whipped topping for convenience or whip fresh cream for a richer finish. The raspberry layer cooks quickly on the stove and the cornstarch gives it a jam-like set that holds its shape when spooned over the cream. This is the kind of dessert that looks impressive but comes together with pantry staples and minimal hands-on time.
Why You'll Love This Recipe
- Ready with about 25 minutes of active work and a few hours chilling time — perfect for planning ahead and freeing up your oven for mains.
- Uses pantry staples like graham crackers and cornstarch; fresh raspberries make it brilliant in summer, frozen work year-round.
- No-bake cream layer means no risk of cracks or overbaked edges; the texture stays silky and smooth when chilled properly.
- Make-ahead friendly — assemble it a day ahead for best flavor and easiest serving at gatherings.
- Flexible: swap whipped topping for freshly whipped cream for a richer mouthfeel, or make the crust with digestive biscuits for a different flavor profile.
I first learned to balance the sweetness by testing a few batches: more confectioners' sugar yields a dessert for true sweet-tooths, while a touch more lemon in the raspberry layer brightens the whole dessert. My family loved the slightly tangy finish; after one dinner, my sister requested it for her birthday table — a great testament to how crowd-pleasing this combination is.
Ingredients
- Graham cracker crumbs (1 1/2 cups): For an even, compact crust, use finely crushed crackers (Nabisco or store brand). Pulse in a food processor or place in a sealed bag and crush with a rolling pin; fine crumbs bind better with melted butter.
- Sugar for crust (1/4 cup): Regular granulated sugar helps the crumbs compact and gives a subtle sweetness to balance the cream.
- Butter (1/2 cup, melted): Use unsalted butter melted and cooled slightly; this binds the crumbs and firms the crust when chilled. European-style butter adds depth if you prefer richer flavor.
- Whipped topping (16 oz) or fresh whipped cream (4 cups): Cool Whip or similar gives a reliably light texture and longer holding time; for decadent results, whip 2 cups heavy cream to stiff peaks for every 8 oz equivalent the recipe calls for.
- Cream cheese (11 oz, softened): Full-fat brick-style cream cheese (Philadelphia or store equivalent) at room temperature blends smoothly into a pillowy filling. Avoid low-fat cream cheese to preserve texture.
- Vanilla extract (1 tsp): Madagascar or pure vanilla intensifies flavor; don’t substitute imitation if you want the clean, fragrant finish.
- Confectioners’ sugar (1 1/2 cups): Sift before measuring to prevent lumps and ensure a smooth filling; it also helps stabilize the cream layer.
- Milk (3 tbsp): Adds slight looseness for easy spreading; use whole milk or 2% for best texture.
- Raspberries (2 cups): Fresh are ideal for brightness, but frozen raspberries thawed produce nearly identical flavor when simmered into the filling.
- Water, sugar, lemon juice, cornstarch: These pantry items transform the raspberries into a glossy, spoonable topping that sets firm enough to slice.
Instructions
Prepare the crust: Combine 1 1/2 cups finely crushed graham cracker crumbs and 1/4 cup granulated sugar in a bowl. Stir in 1/2 cup melted butter until all crumbs are evenly moistened. Press mixture firmly into the bottom (and slightly up the sides, if you like) of a 9-inch springform pan using the back of a measuring cup for an even, compact layer. Chill 10–15 minutes to set. Make the cream layer: In a large bowl, beat 11 oz softened cream cheese until smooth and lump-free (about 2–3 minutes). Add 1 tsp vanilla, 1 1/2 cups sifted confectioners’ sugar, and 3 tbsp milk; beat until silky. Fold in 16 oz whipped topping gently to retain air, or fold in 4 cups freshly whipped cream for a richer finish. Spread the cream mixture over the chilled crust evenly. Return to fridge while you prepare the raspberry topping — at least 20 minutes. Cook the raspberry filling: In a small saucepan, combine 2 cups raspberries, 1/2 cup water, and 1/2 cup sugar. Bring to a simmer over medium heat, stirring occasionally. Mix 2 tbsp cornstarch with 2 tbsp cold water to make a slurry, then whisk into simmering raspberries along with 1 tsp lemon juice. Cook until the mixture thickens and becomes glossy (about 2–4 minutes). Remove from heat and cool to lukewarm before spreading. Assemble and chill: When raspberry filling is warm but not hot, spoon it over the chilled cream layer and smooth with a spatula. Chill the assembled dessert at least 4 hours or overnight to allow the filling to set properly; this ensures clean slices.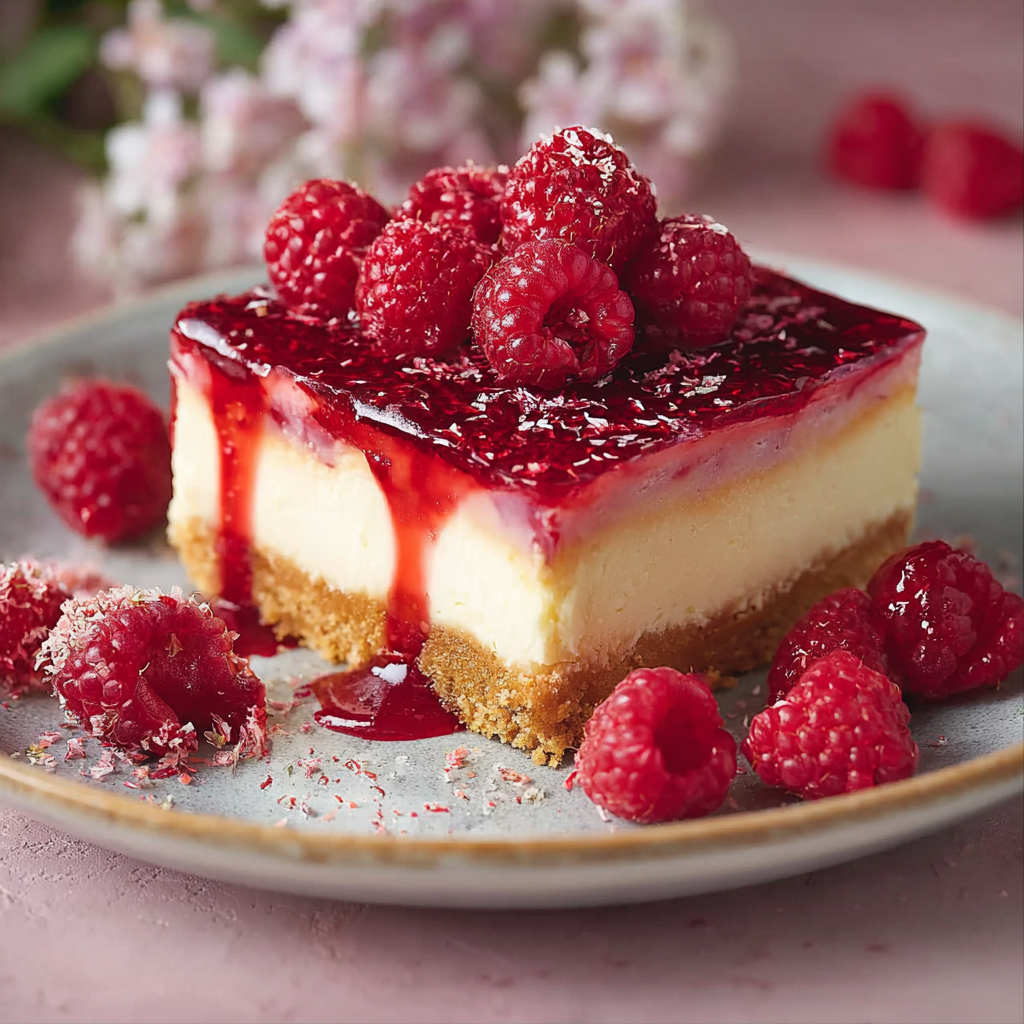
You Must Know
- Chill time is essential: the cream layer needs several hours to firm; plan for at least 4 hours or chill overnight for best texture.
- Frozen raspberries are a great stand-in and often more economical out of season — thaw and drain any excess liquid before cooking to reduce dilution.
- To slice cleanly, run a sharp knife under hot water, dry it, and make deliberate sweeps between cuts to get neat slices.
- The dessert keeps well in the fridge for 3 days; do not freeze after assembly as the texture will degrade.
One of my favorite aspects is how well this dessert travels: assembled in a springform pan and kept in a cooler, it arrives perfectly intact for backyard gatherings. My family loves that it bridges elegant and casual — a dessert that fits a holiday table yet is simple enough for weeknight celebrations. I once brought this to a summer lunch where the host suggested adding toasted almond flakes for crunch — a delightful variation that prompted many repeat requests.
Storage Tips
Store leftovers covered with plastic wrap or in an airtight container in the refrigerator for up to 3 days. If using a springform pan, remove the outer ring and place the base on a flat plate, then cover gently to avoid pressing on the raspberry layer. To keep slices pristine longer, place them in single layers on a tray separated with wax paper inside a shallow container. Avoid freezing assembled slices: the whipped cream layer will lose its texture and the raspberry topping can separate upon thawing.
Ingredient Substitutions
If you don’t have graham crackers, use digestive biscuits or vanilla wafers in a 1:1 swap for the crumbs; reduce added sugar slightly if using sweet cookies. For a dairy-free version, substitute the cream cheese with a full-fat vegan cream cheese and use stabilized coconut cream whipped topping; note texture will be slightly different and chilling time may increase. To reduce sugar, use a sugar substitute appropriate for cooking in both the crust and raspberry layer, and taste the filling before adding the full amount of confectioners’ sugar.
Serving Suggestions
Serve chilled slices with a few fresh raspberries and a mint leaf for color contrast. It pairs beautifully with a small scoop of lemon sorbet to cut the richness, or a light sparkling wine for celebrations. For a brunch option, serve mini versions in mason jars topped with granola and fresh berries for a playful presentation. I like to add a sprinkle of toasted sliced almonds or white chocolate shavings for textural contrast when entertaining.
Seasonal Adaptations
In summer, use peak fresh raspberries and reduce added sugar by 10–15% because ripe berries are sweeter. For winter, frozen berries are an excellent choice — they intensify flavor when cooked and are usually less expensive. Consider swapping raspberries for strawberries or blueberries; adjust cornstarch slightly if using very juicy fruit (add an extra 1 tsp if necessary) to ensure a firm set.
Meal Prep Tips
Assemble the crust and cream layer a day ahead, cover, and keep chilled; prepare the raspberry topping the morning of serving and add it a couple hours before guests arrive. Portion into individual jars for easy grab-and-go servings: use 4 oz jars and layer crust, cream, and raspberry topping — they keep well for 2–3 days refrigerated and are ideal for picnics. Label containers with the assembly date and consume within 72 hours for best quality.
There’s something joyful about serving a dessert that looks like it needed hours of fuss but actually comes together in a short, pleasant afternoon. I hope this version becomes a staple for your gatherings; tweak the sweetness and topping to make it your own and enjoy the bright raspberry finish that lifts every bite.
Pro Tips
Sift confectioners' sugar before measuring to avoid lumps in the cream layer.
Use a warm, dry knife wiped between cuts for neat slices.
Press the crust firmly and chill it before adding the cream layer to prevent sogginess.
This nourishing creamy raspberry cheesecake recipe is sure to be a staple in your kitchen. Enjoy every moist, high protein slice — it is perfect for breakfast or as a wholesome snack any time.
FAQs about Recipes
Can I use frozen raspberries?
Yes — frozen raspberries work well. Thaw them and drain any excess liquid before cooking; cook as directed and taste for sweetness.
How long does it need to chill?
Chill at least 4 hours, preferably overnight. For quick firming, place in the coldest part of the fridge and avoid opening the door frequently.
Tags
Creamy Raspberry Cheesecake
This Creamy Raspberry Cheesecake recipe makes perfectly juicy, tender, and flavorful steak every time! Serve with potatoes and a side salad for an unforgettable dinner in under 30 minutes.
Ingredients
Crust
Cream layer
Raspberry filling
Instructions
Prepare the crust
Mix graham crumbs, sugar, and melted butter. Press evenly into a 9-inch springform pan and chill 10–15 minutes to set.
Make the cream layer
Beat softened cream cheese until smooth, add vanilla, confectioners' sugar, and milk. Fold in whipped topping or fresh whipped cream and spread over chilled crust.
Cook the raspberry filling
Simmer raspberries, water, and sugar. Stir in cornstarch slurry and lemon juice, cook until glossy and thickened, then cool to lukewarm.
Assemble and chill
Spoon raspberry filling over cream layer, smooth, and chill at least 4 hours or overnight for clean slices.
Last Step: Please leave a rating and comment letting us know how you liked this recipe! This helps our business to thrive and continue providing free, high-quality recipes for you.
Nutrition
Did You Make This?
Leave a comment & rating below or tag
@royalrecipe on social media!
Categories:
You might also like...

5-Minute Air Fryer Roasted Garlic Magic That Wows
Learn how a 5-minute prep transforms a whole garlic bulb into silky, caramelized cloves in the air fryer. Perfect as a spread, mix-in, or flavor booster that elevates weeknight meals and party plates.

Air-Fried Pizza Rolls
Golden, melty pizza rolls made in the air fryer—crispy outside, gooey inside, ready in under 20 minutes. Perfect for snacks, parties, or quick dinners.

Air-Fried Rice Paper Noodle Rolls
Crispy, light rolls filled with vermicelli, tofu or shrimp, and crisp vegetables—air-fried for a healthier crunch and quick prep.
Did You Make This?
Leave a comment & rating below or tag @royalrecipe on social media!
Rate This Recipe
Share This Recipe
Enjoyed this recipe? Share it with friends and family, and don't forget to leave a review!
Comments (1)
This recipe looks amazing! Can't wait to try it.
Comments are stored locally in your browser. Server comments are displayed alongside your local comments.

Hi, I'm Riley!
What's Popular

30-Minute Meals!
Join to receive our email series which contains a round-up of some of our quick and easy family favorite recipes.