
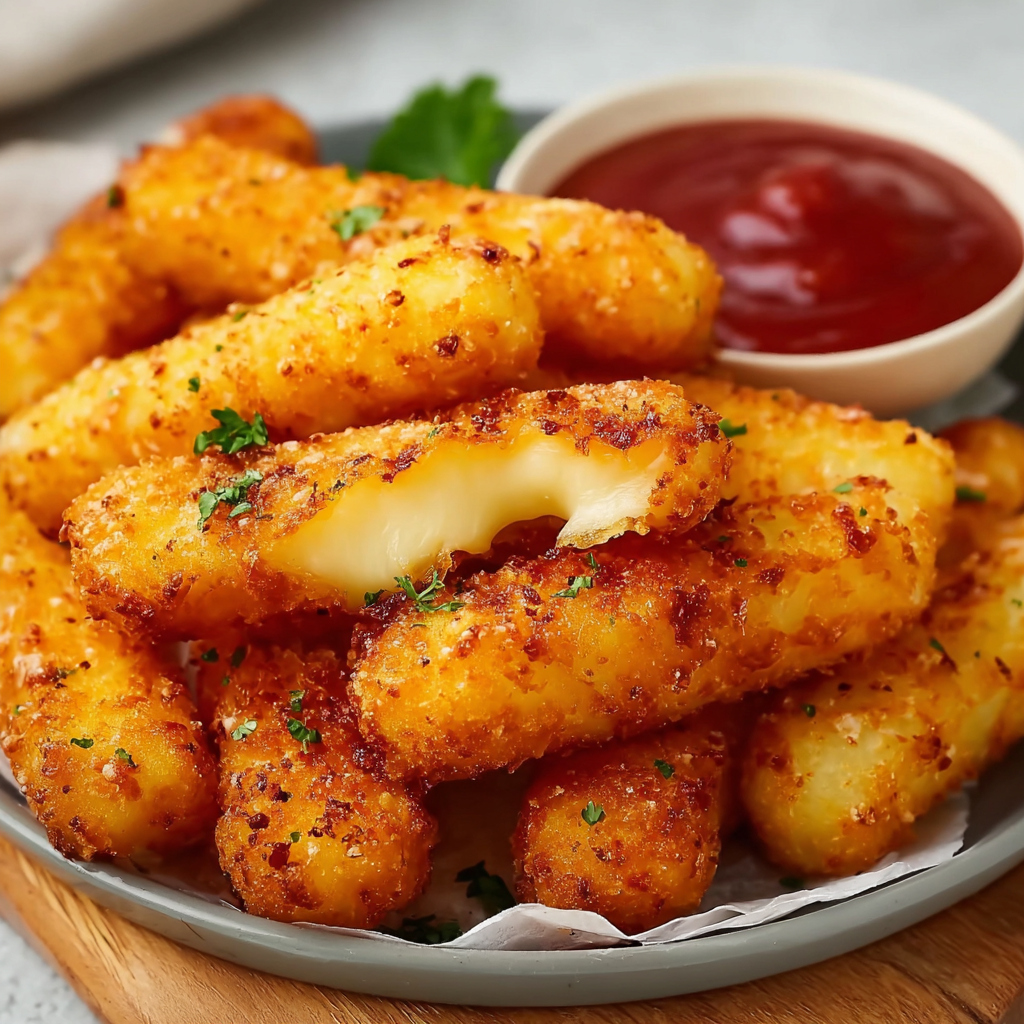
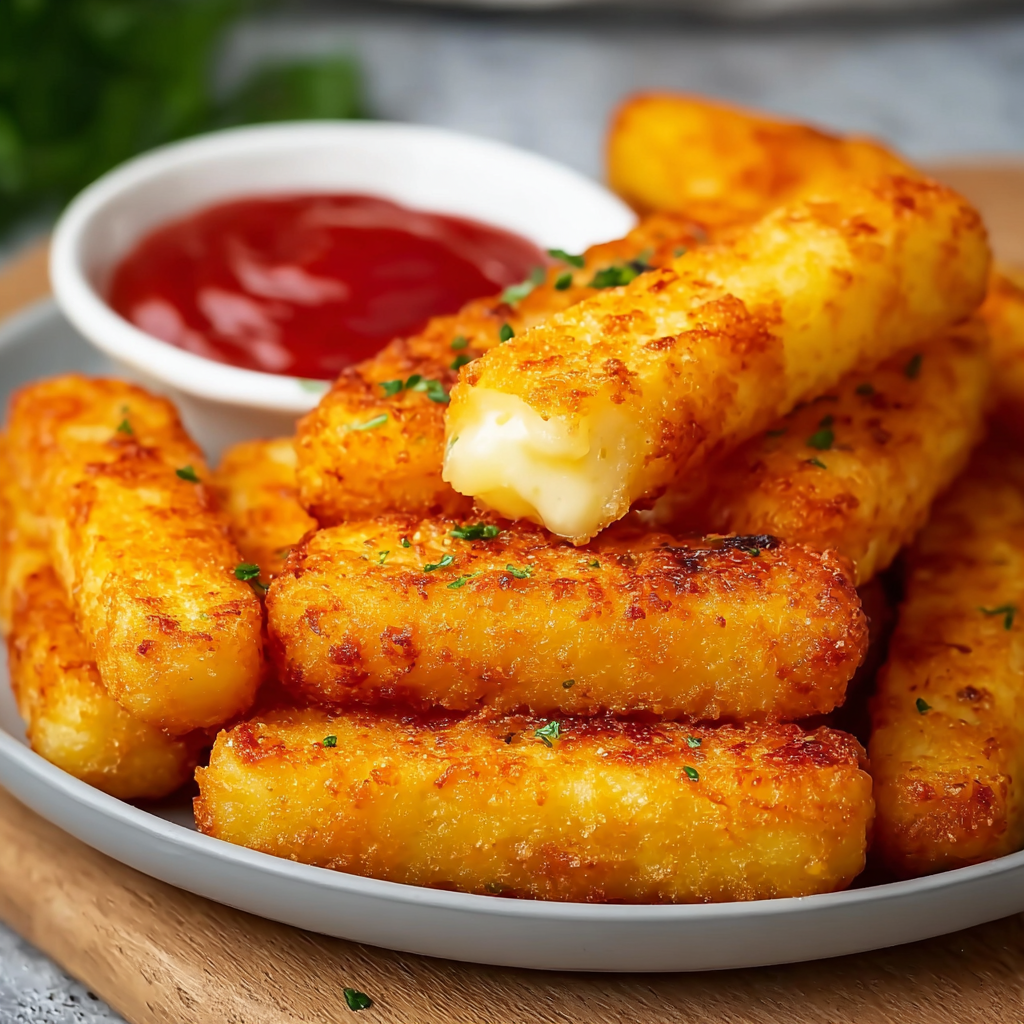
Crispy Cheese Potato Fingers

Golden, cheesy potato fingers with a crispy panko shell and a tender, savory interior—perfect for party platters, weeknight snacks, or cozy comfort nights.
This recipe was born from a weekend of leftovers and a craving for something crunchy and comforting. I first made these crispy cheese potato fingers on a rainy Saturday after roasting a few russets for dinner; the mash sat in the fridge and begged for reinvention. I folded in sour cream, green onion and a little bacon, wrapped cheesy batons, and gave them a triple-coating before frying. The result was an addictive contrast: a satisfyingly crisp exterior and a soft, cheesy center. From the very first bite my family declared them snack-time royalty, and they quickly became our go-to finger food for casual get-togethers and rainy-day treats.
What makes this version special is the balance of textures and simple pantry-friendly ingredients. Russet potatoes give a fluffy interior, sharp cheddar offers bright flavor and good melting behavior, and panko breadcrumbs create a light, shattering crust. I like this recipe because it’s flexible—use leftover cooked potatoes, swap the bacon for a vegetarian friendly smoked option, and adjust the size to make appetizer bites or hearty snack portions. Every time I make them, someone asks for the recipe, and they vanish from the platter faster than I can plate them.
Why You'll Love This Recipe
- Crowd-pleasing texture contrast: crunchy panko shell outside, soft potato and molten cheese inside; perfect for parties and family nights.
- Quick to assemble using cooked potatoes—ready in about 40 minutes from start to finish when potatoes are pre-cooked.
- Uses pantry staples: cornstarch, flour, egg, panko, and a block of cheddar—no fancy specialty items required.
- Make-ahead friendly: shape and chill the fingers in advance, then fry just before serving to keep them ultra-crispy.
- Customizable: swap cheddar for mozzarella for extra stretch or add herbs and spices to suit different tastes and dietary needs.
- Great for dipping: pairs beautifully with sour cream and chive dip, spicy ketchup, or a mustard-mayo sauce for variety.
In my experience, these little hands-on bites bring people together. I first served them at a small holiday movie night; neighbors showed up early, eyes on the platter, and within minutes the room smelled of frying potato and melted cheese. My kids loved the crispy shell so much they insisted on making them once a month. Observing how the recipe travels across seasons—lighter with herbs in spring, richer with bacon in winter—has been one of the small joys of sharing this formula.
Ingredients
- Russet potatoes (3 medium, cooked and cubed): Choose starchy potatoes for a fluffy interior; roast or boil until fork-tender, cool completely before using to avoid a gummy texture.
- Cheddar cheese (1 block, ~8 ounces): Pick a sharp cheddar for bold flavor; cut into 3-inch by 1/2-inch strips so the cheese melts inside without leaking out during frying.
- Bacon (1/4 cup cooked, diced): Use thick-cut for a meatier bite; cook until just crisp and drain well so the filling isn’t greasy.
- Sour cream (1/2 cup): Adds creaminess and tang to bind the potato; full-fat yields the best mouthfeel, but light works in a pinch.
- Green onion (1/4 cup, diced): Adds brightness and a mild onion note—use both white and green parts for texture and color.
- Cornstarch (2/3 cup): Helps dry and bind the potato surface so the coating adheres; measure by spooning into a cup for accuracy.
- All-purpose flour (about 1 cup): For the initial dredge to help the egg stick; keep some extra on hand for dusting.
- Egg (1 large, beaten): Acts as the glue between flour and panko layers for a secure, even crust.
- Panko breadcrumbs (about 1 cup): Use coarse panko for the crispiest shell; if using seasoned panko, reduce added salt slightly.
- Salt (1 teaspoon) and pepper (1/2 teaspoon): Essential seasoning—adjust to taste, especially if bacon is salty.
- Vegetable or canola oil (about 4 cups, for frying): Use a neutral oil with a high smoke point; peanut oil works well but avoid if there are nut allergies.
Instructions
Prepare the potatoes and mix the filling: Cube the fully cooked and cooled russets into roughly 1/2-inch pieces. In a large bowl, mash lightly with a fork—leave a few small chunks for texture. Fold in sour cream, diced bacon, green onion, salt and pepper until everything is evenly distributed. The mixture should hold together but not be overly wet; if it’s too moist, add a tablespoon of cornstarch. Cut and prepare the cheese: Slice the cheddar block into uniform 3-inch by 1/2-inch strips. Wrap each cheese strip with about 2 tablespoons of potato mixture, forming a compact finger. Press seams gently to seal so cheese doesn’t ooze during frying. Chill on a baking sheet for 15–20 minutes to firm up the shape—this helps keep them intact while breading. Set up the breading station: Arrange three shallow dishes: one with flour, one with beaten egg, and one with panko breadcrumbs. For best adhesion, toss the chilled potato fingers lightly in flour, dip into the egg, then press into panko, ensuring full coverage. For extra crunch, repeat the egg and panko step for a double crust. Heat the oil and test temperature: Pour about 4 cups of oil into a heavy pot and heat to 350°F (175°C). Use a thermometer for accuracy. Fry in small batches—do not overcrowd—so oil temperature stays steady. Each batch will take about 2–3 minutes until the coating is deep golden brown. Fry and drain: Gently lower the breaded fingers into the hot oil using a slotted spoon. Turn as needed for even color. Remove to a wire rack set over a baking sheet to drain—paper towels will make the bottom soggy. Serve hot with dips of your choice.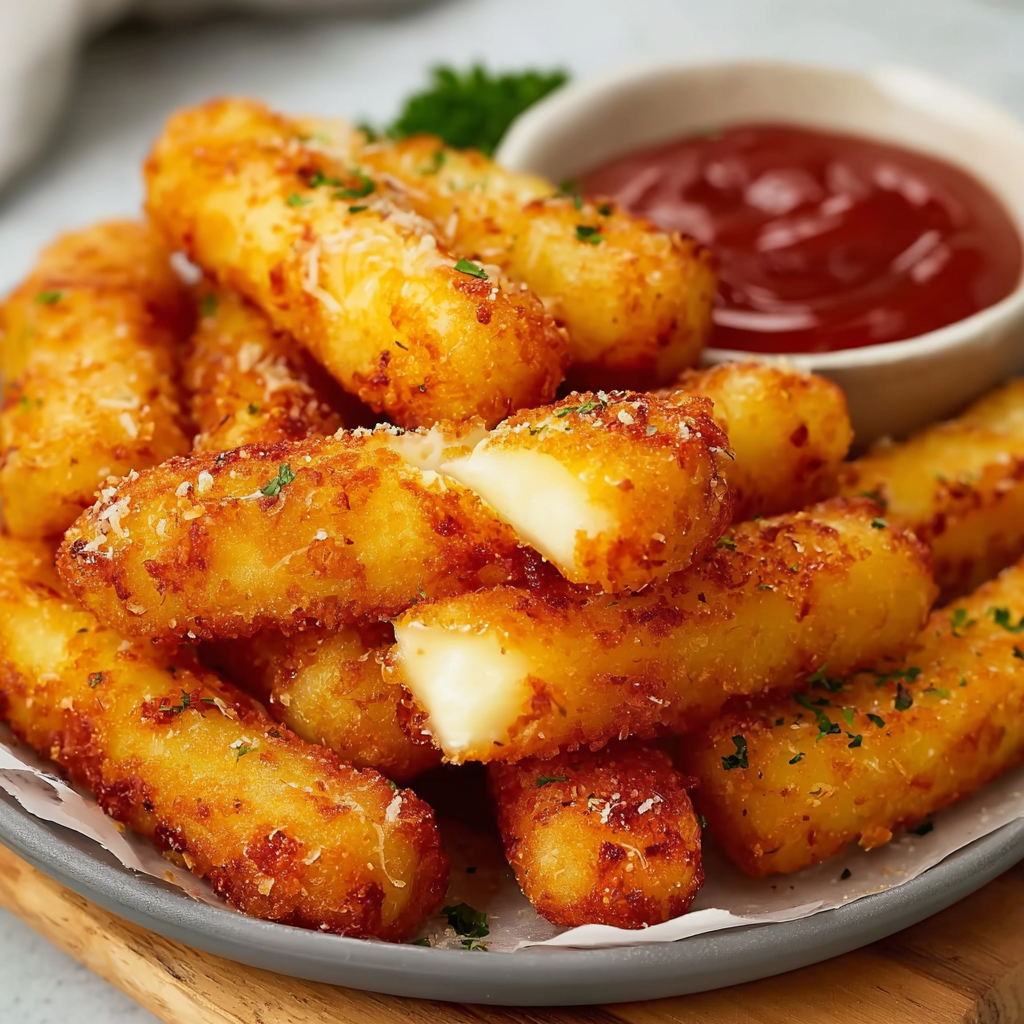
You Must Know
- These keep well in the refrigerator for up to 3 days if stored airtight; re-crisp in a 375°F oven for 8–10 minutes.
- They freeze beautifully: flash-freeze on a tray then transfer to a bag for up to 3 months; fry frozen fingers straight from the freezer, adding an extra minute to cooking time.
- High in comforting carbs and fat—serve alongside a fresh salad or veg to balance the plate.
- Be cautious with oil temperature: below 325°F leads to greasy fingers, above 375°F browns too quickly without heating the center.
My favorite part of these bites is watching guests break one open and see that molten cheese ribbon. One New Year’s Eve a friend joked they were the best cure for a champagne hangover—funny, but true: salty and rich comfort with bright onion notes makes everything better. They’re a small luxury that’s easy to prepare and impossible to resist.
Storage Tips
Store cooled pieces in an airtight container in the refrigerator for up to three days. For short-term storage, place on a wire rack in a single layer so they don't steam and lose crispness. To reheat, preheat the oven to 375°F and bake on a wire rack set over a sheet pan for 8–10 minutes until crisp and warmed through. If you froze them, skip thawing—fry directly from frozen and allow an extra minute or two of cook time. Avoid microwaving as it will make them soggy.
Ingredient Substitutions
If you want to reduce dairy, try a smoked vegan cheese and replace sour cream with a thick non-dairy yogurt; the texture will be slightly different but still tasty. For a gluten-free version, use gluten-free panko and a gluten-free flour blend; cornstarch already helps with binding. Swap bacon for smoked mushrooms or tempeh for a vegetarian variation—sauté the substitute until nicely browned to maintain savory depth. For lower fat, bake at 425°F on a lightly oiled rack for 12–15 minutes, flipping once for even browning.
Serving Suggestions
Arrange on a platter with a trio of dips: tangy sour cream and chive, spicy sriracha mayo, and a smoky tomato ketchup. Pair with crisp pickles or a simple arugula salad to cut the richness. These work as a party appetizer, game-day snack, or as a side for burgers and grilled meats. Garnish with extra diced green onion and a sprinkle of flaky sea salt just before serving for a professional finish.
Cultural Background
Comfort food featuring potatoes and cheese appears in many cuisines—from croquettes in Europe to stuffed and fried bites across Latin America. These fingers borrow from croquette techniques (mashed filling shaped and breaded) and combine it with the crowd-pleasing American love of fried cheese. The addition of bacon and sour cream points to classic American diner influences, while panko breadcrumbs give a lighter, crispier crust derived from Japanese-style frying methods.
Seasonal Adaptations
In spring, add fresh herbs like chives, parsley or tarragon to brighten flavors; in autumn, fold in roasted squash purée or a pinch of smoked paprika for warmth. For holiday parties, make smaller, bite-sized versions and serve with cranberry mustard for a festive pairing. In summer, omit bacon and add grilled corn kernels to keep the bites lighter and seasonally appropriate.
Meal Prep Tips
Make the potato mixture a day ahead and shape the fingers in the morning or a few hours before frying. Chill shaped fingers on a tray, then cover and refrigerate—cold pieces hold together much better when breading. For gatherings, pre-bread and freeze them on a tray; transfer to a freezer bag and fry from frozen to serve hot and fresh with minimal last-minute work.
These crispy cheese potato fingers are a small experiment that rewards with big flavor and joy. Whether you’re feeding a crowd or satisfying a midnight craving, they’re forgiving, customizable, and utterly moreish—one of those recipes you’ll find yourself returning to again and again. Make them your own, and enjoy the smiles they bring.
Pro Tips
Chill shaped fingers before breading to help the coating stick and keep the shape.
Use a thermometer when frying to maintain 350°F for even, non-greasy results.
Double-dip in egg and panko for an extra-crunchy crust that holds up to dipping.
Pat cooked potatoes dry and allow cooling completely to prevent a gummy filling.
Drain fried fingers on a wire rack rather than paper towels to keep the undersides crisp.
This nourishing crispy cheese potato fingers recipe is sure to be a staple in your kitchen. Enjoy every moist, high protein slice — it is perfect for breakfast or as a wholesome snack any time.
FAQs about Recipes
Can I freeze the prepared fingers?
Yes. If freezing, flash-freeze the shaped and breaded fingers on a tray, then transfer to a freezer bag for up to 3 months. Fry from frozen and add 1–2 minutes to the cook time.
What is the best oil temperature for frying?
Use a thermometer and keep the oil at 350°F (175°C). Too cool and they absorb oil; too hot and the crust will brown before the center is warm.
Tags
Crispy Cheese Potato Fingers
This Crispy Cheese Potato Fingers recipe makes perfectly juicy, tender, and flavorful steak every time! Serve with potatoes and a side salad for an unforgettable dinner in under 30 minutes.
Ingredients
Potato mixture
Cheese
Coating
Frying
Instructions
Prepare and mash potatoes
Cube cooked, cooled russets and lightly mash in a large bowl leaving some texture. Fold in sour cream, bacon, green onion, salt and pepper until evenly combined. If mixture seems loose, add a tablespoon of cornstarch.
Assemble cheese fingers
Slice cheddar into uniform strips and wrap each with about 2 tablespoons of the potato mixture, sealing seams and forming compact fingers. Chill on a sheet for 15–20 minutes to firm up.
Set up breading station
Place flour in one dish, beaten egg in another, and panko in a third. Dredge each chilled finger in flour, dip in egg, then press into panko. Repeat egg and panko for a double coating if desired.
Heat oil and fry
Heat oil in a heavy pot to 350°F (175°C). Fry in small batches for 2–3 minutes until deep golden brown, turning if necessary. Remove with a slotted spoon and drain on a wire rack.
Serve
Serve hot with dipping sauces such as sour cream and chive, spicy mayo, or ketchup. Garnish with extra diced green onion and flaky sea salt.
Last Step: Please leave a rating and comment letting us know how you liked this recipe! This helps our business to thrive and continue providing free, high-quality recipes for you.
Nutrition
Did You Make This?
Leave a comment & rating below or tag
@royalrecipe on social media!
Categories:
You might also like...

5-Minute Air Fryer Roasted Garlic Magic That Wows
Learn how a 5-minute prep transforms a whole garlic bulb into silky, caramelized cloves in the air fryer. Perfect as a spread, mix-in, or flavor booster that elevates weeknight meals and party plates.

Air-Fried Pizza Rolls
Golden, melty pizza rolls made in the air fryer—crispy outside, gooey inside, ready in under 20 minutes. Perfect for snacks, parties, or quick dinners.

Air-Fried Rice Paper Noodle Rolls
Crispy, light rolls filled with vermicelli, tofu or shrimp, and crisp vegetables—air-fried for a healthier crunch and quick prep.
Did You Make This?
Leave a comment & rating below or tag @royalrecipe on social media!
Rate This Recipe
Share This Recipe
Enjoyed this recipe? Share it with friends and family, and don't forget to leave a review!
Comments (1)
This recipe looks amazing! Can't wait to try it.
Comments are stored locally in your browser. Server comments are displayed alongside your local comments.

Hi, I'm Riley!
What's Popular

30-Minute Meals!
Join to receive our email series which contains a round-up of some of our quick and easy family favorite recipes.