
Crispy Irish Chicken Thighs

Juicy, bone-in chicken thighs marinated in buttermilk and coated in a seasoned panko crust for an extra-crisp finish—an easy, comforting weeknight winner.
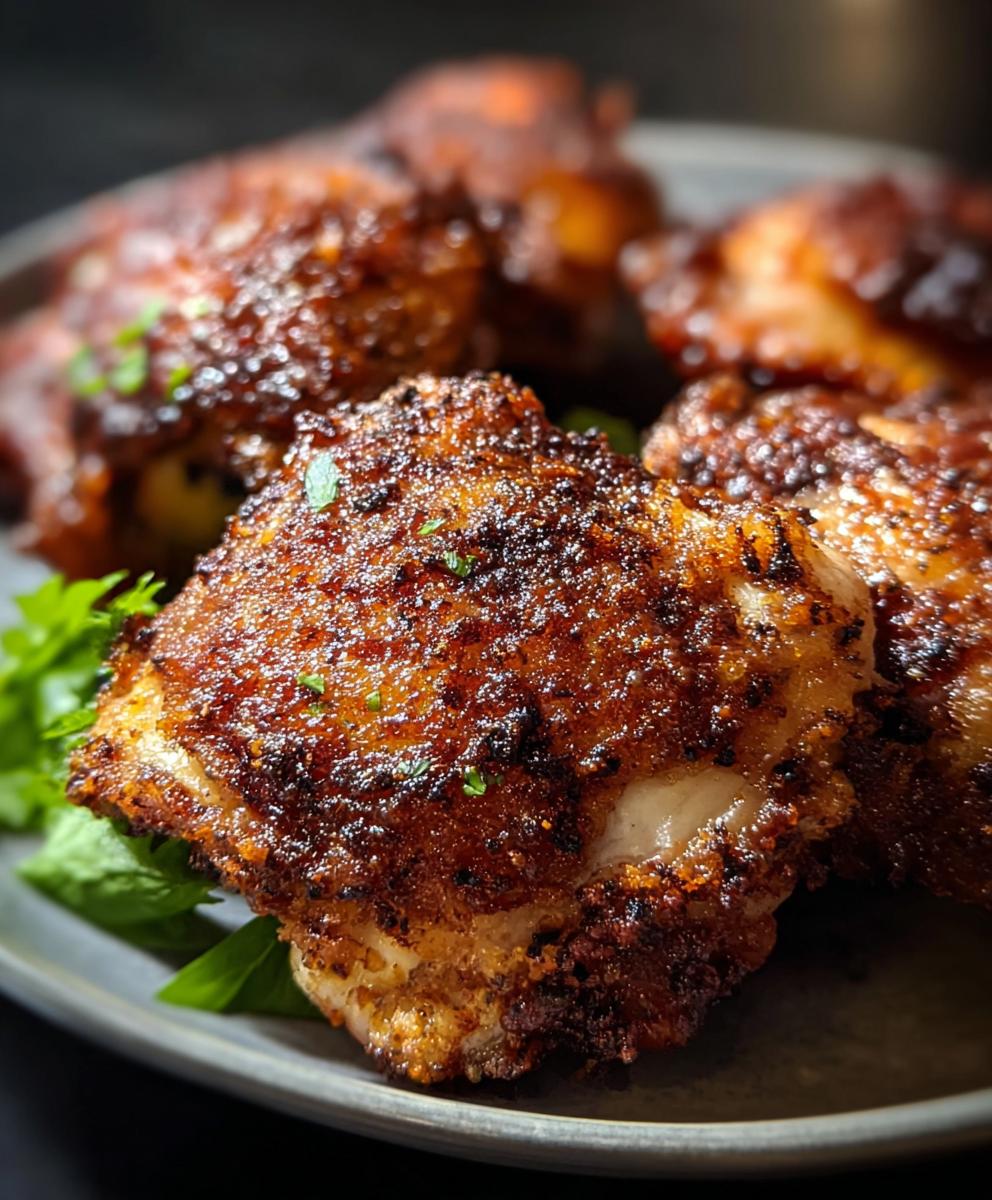
This recipe for Crispy Irish Chicken Thighs has become my go-to when I want something comforting yet impressive with very little fuss. I first developed this combination on a rainy Sunday afternoon when I had a craving for crunchy skin and tender meat but didn't want to deep-fry. The buttermilk tenderizes the thighs while the panko creates an airy, crackling crust that stands up perfectly in the oven. It’s a simple technique that turns ordinary chicken into something that always earns compliments.
I discovered the balance of smoked paprika and dried thyme while experimenting with pantry spices from a weekend market near Dublin; the result evokes a warm, rustic flavor that pairs beautifully with roasted root vegetables or a bright salad. The thighs remain juicy beneath their golden armor, and the aroma of butter and thyme baking on the skin always draws everyone to the kitchen. This method works whether you’re feeding a small family or entertaining friends—easy scaling, straightforward timing, and reliably delicious results.
Why You'll Love This Recipe
- Ready in about an hour from start to finish, including a short buttermilk soak that tenderizes and seasons the meat quickly.
- Uses pantry staples—panko, flour, smoked paprika—so it’s easy to pull together without specialty shopping.
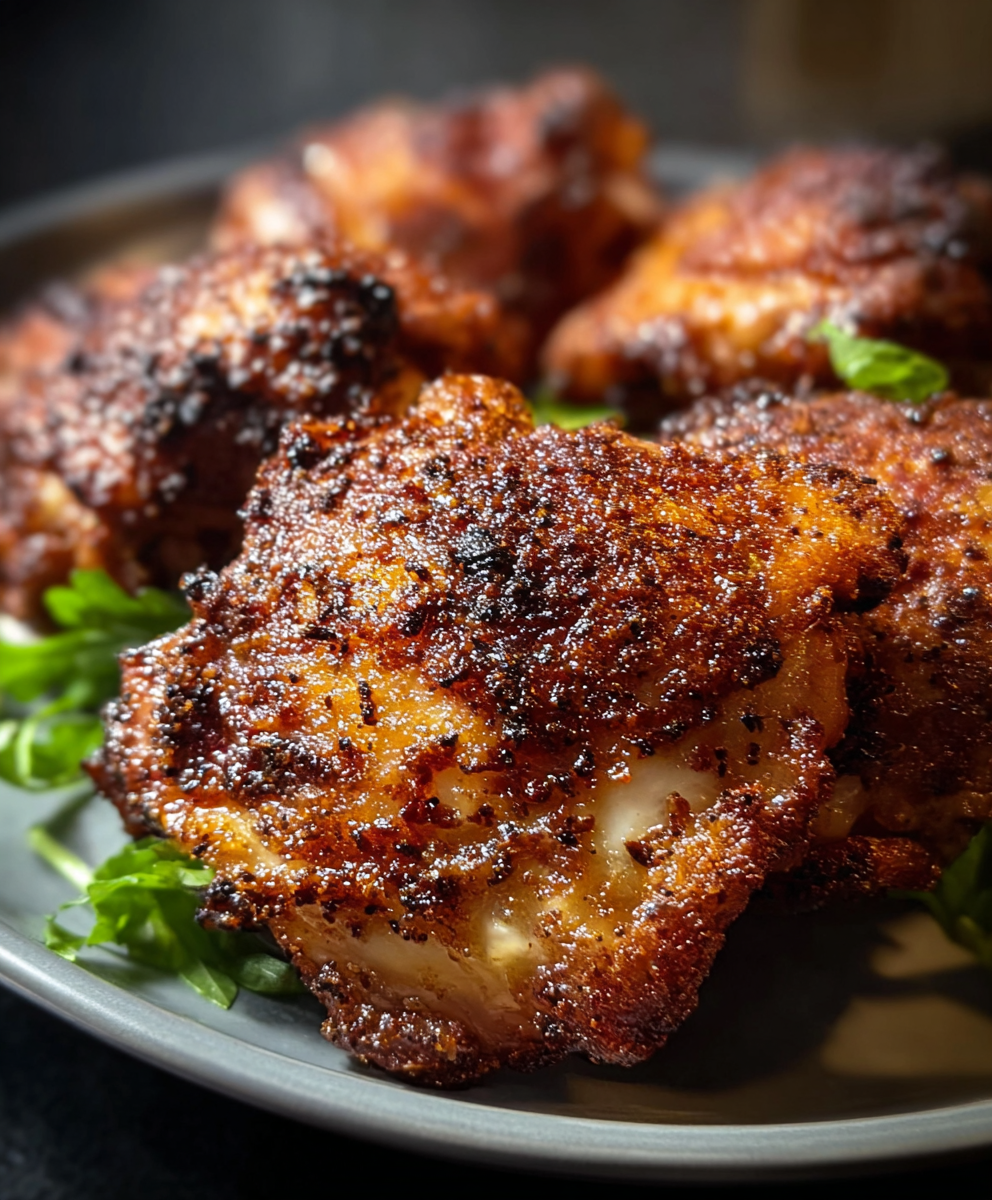
- Bakes in the oven for less mess than frying but still delivers a dependable, extra-crispy skin thanks to the panko and a drizzle of melted butter.
- Flexible: accept easy swaps for dairy or gluten if needed, and doubles or triples well for a crowd without changing technique.
- Great for meal prep: leftovers reheat beautifully in a hot oven or air fryer and keep texture better than many breaded recipes.
- Family-friendly flavors with a gentle smoky depth from smoked paprika and an herbal lift from dried thyme.
I’ve served these thighs at casual dinners and small celebrations; they’re the first dish to disappear. My partner insists on serving them with a simple mashed potato and braised cabbage, which makes for a cozy, slightly Irish-inspired plate that always feels like home.
Ingredients
- 8 bone-in, skin-on chicken thighs: Choose evenly sized thighs for consistent cooking—about 6 to 8 ounces each. Look for fresh, well-trimmed pieces from a trusted butcher or brand; the skin is essential for crispiness and flavor.
- 1 cup buttermilk: Buttermilk tenderizes and adds tang. Use full-fat buttermilk for best moisture; if you don't have it, make a quick substitute by adding 1 tablespoon lemon juice or white vinegar to 1 cup milk and letting it sit 5 minutes.
- 1 ½ cups panko breadcrumbs: Panko provides the airy crunch that distinguishes this crust. Japanese-style panko (brands like Kikkoman or generic supermarket panko) works best for light, crisp texture.
- 1 cup all-purpose flour: Helps the crumb mixture adhere to the buttermilk-coated skin. Spoon and level for accuracy if measuring by cup.
- 2 teaspoons salt: Use kosher salt for seasoning the coating and to help draw out moisture from the skin surface for better browning.
- 1 teaspoon black pepper: Freshly ground black pepper gives subtle heat and balance.
- 1 teaspoon smoked paprika: Adds a warm, slightly smoky flavor that complements roasted or sautéed sides.
- 1 teaspoon dried thyme: The herb note pairs with butter and chicken; use dried thyme for consistency or swap to 1 tablespoon fresh thyme leaves if available.
- ½ teaspoon garlic powder: For a gentle, rounded garlic flavor that won’t burn in the oven.
- 2 tablespoons melted butter: Brushed over the crust before baking to encourage deep browning and extra crunch. Clarified butter also works if you want less milk solids.
Instructions
Preheat the oven:Set the oven to 425°F (220°C). Line a large baking sheet with parchment paper and lightly grease the parchment with a neutral oil or nonstick spray—this prevents sticking and promotes even browning. Position a middle rack so heat circulates evenly around the thighs.Marinate the thighs:Place the chicken thighs in a large bowl and pour 1 cup buttermilk over them, turning to coat. Let sit at room temperature for at least 15 minutes; for deeper flavor and tenderness, refrigerate up to 4 hours. The lactic acid gently breaks down connective tissue for a more tender bite.Mix the dry coating:In a shallow dish combine 1 ½ cups panko, 1 cup flour, 2 teaspoons salt, 1 teaspoon freshly ground black pepper, 1 teaspoon smoked paprika, 1 teaspoon dried thyme, and ½ teaspoon garlic powder. Whisk to ensure spices are evenly distributed and to avoid clumping.Dredge the thighs:Working one at a time, lift a thigh from the buttermilk and allow excess to drip off—too much liquid will make the coating soggy. Press each piece into the dry mixture, turning to coat all sides and pressing gently so the panko adheres evenly to the skin and exposed meat.Arrange and butter:Place the coated thighs skin-side up on the prepared baking sheet with a little space between them for air circulation. Drizzle or brush 2 tablespoons melted butter over the top of the thighs to encourage a golden, crisp crust. For an even crisper finish, you can spritz the top lightly with oil.Bake to finish:Bake at 425°F (220°C) for about 40 minutes, rotating the pan once at 20 minutes for even color. The thighs are done when they are deeply golden and a meat thermometer inserted into the thickest part (without touching bone) reads 165°F (74°C). Rest 5 minutes before serving to allow juices to redistribute.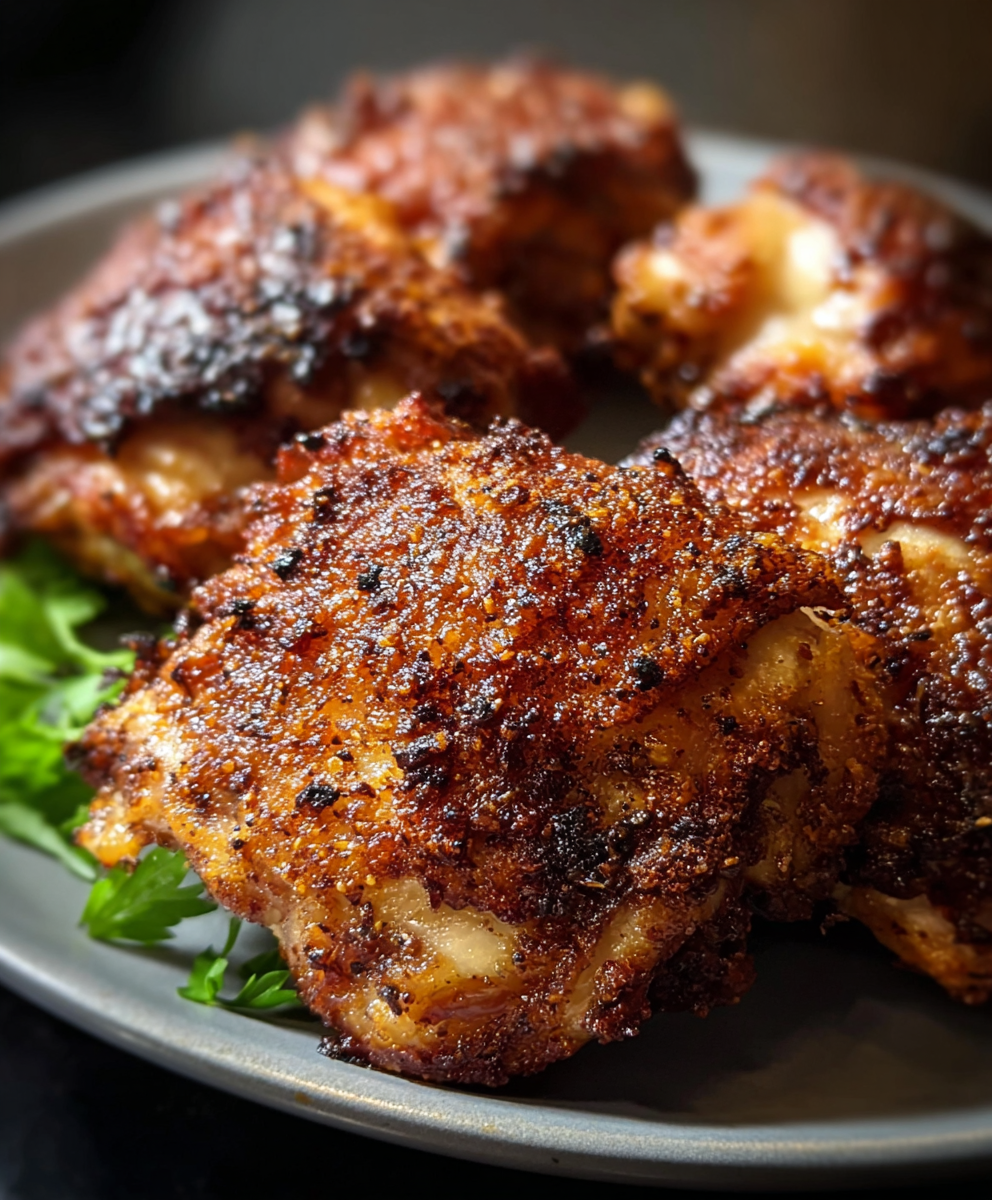
You Must Know
- This keeps well: refrigerate cooked thighs in an airtight container for up to 3 days, and freeze for up to 3 months. Reheat in a 375°F oven or air fryer to preserve crispiness.
- Internal temperature is the safest doneness cue—165°F (74°C) at the thickest part is the target for food safety and juicy texture.
- Because the crust contains flour and panko, this is not gluten-free and is not dairy-free unless you substitute ingredients.
- The buttermilk step is short and flexible; even 15 minutes improves texture, but an overnight soak in the refrigerator will deepen the flavor.
My favorite part of this method is how forgiving it is: even when I’ve been distracted and slightly overbaked the thighs, the panko crust shields the meat and keeps it pleasantly moist. One Sunday I tried a lemon-thyme variation for guests, and everyone asked for the recipe—especially when the pan left behind browned butter bits that became an impromptu gravy.
Storage Tips
Cool cooked thighs to room temperature no longer than two hours, then transfer to a shallow airtight container to speed cooling in the fridge. Store in the refrigerator up to 3 days. For longer storage, wrap tightly in aluminum foil and place in a freezer-safe bag; freeze up to 3 months. To reheat, use a 375°F oven for 10–15 minutes or an air fryer set to 350°F for 6–8 minutes, flipping once. Avoid microwaving if you want to keep the crust crisp—microwaves steam the crust and soften it quickly.
Ingredient Substitutions
If you need a dairy-free option, substitute plain unsweetened plant-based yogurt thinned with a splash of milk alternative to reach buttermilk-like consistency. For gluten-free, use certified gluten-free panko and a 1:1 gluten-free flour blend. Swap smoked paprika for sweet paprika plus 1/4 teaspoon liquid smoke if you want a less pronounced smoke note. For a lower-salt version, reduce salt to 1 teaspoon and add finishing salt to taste after baking. If you prefer herb-forward flavors, swap dried thyme for equal amounts of chopped fresh parsley and rosemary.
Serving Suggestions
Serve the thighs warm with creamy mashed potatoes and braised cabbage for a cozy plate inspired by Irish flavors, or pair with a crisp green salad and lemon vinaigrette to cut the richness. For a casual spread, offer soft rolls and a quick coleslaw; the crunch of the crust contrasts beautifully with a tangy slaw. Garnish with lemon wedges and chopped parsley for brightness. These thighs also work well sliced over buttery noodles or served alongside roasted carrots and parsnips in colder months.

Cultural Background
While not a strictly traditional Irish recipe, this dish uses humble ingredients and a no-fuss roasting method that resonates with rustic Irish home cooking: simple, satisfying, and designed to feed a family. The smoked paprika nods to modern flavor influences and pairs with thyme—a herb commonly used in Irish stews and roasts—creating a bridge between classic comfort and contemporary crisping techniques. It’s an interpretation rather than an authentic regional recipe, inspired by the conviviality of Irish kitchens and the desire for golden, hearty meals.
Seasonal Adaptations
In winter, serve with roasted root vegetables and a generous gravy; add chopped sage to the breadcrumb mix for autumnal warmth. In spring and summer, lighten the plate with a fennel-orange salad and swap the butter drizzle for olive oil and lemon zest to keep flavors bright. For holiday gatherings, add a pinch of ground mustard and chopped fresh rosemary to the coating for aromatic interest. The method remains the same; only the accompaniments shift with the seasons.
Meal Prep Tips
For make-ahead convenience, coat the thighs and arrange them single-layer on a tray, then cover and refrigerate up to 24 hours—bring to room temperature for 20 minutes before baking. Alternatively, bake fully then cool and portion into meal containers; reheat in the oven or air fryer to preserve texture. If you prefer prepping just the dry mixture in advance, store it in an airtight jar for up to two weeks so assembly is quick on a busy night. Label containers with date and reheat instructions for simple weekday dinners.
These thighs are about comfort, flavor, and ease—once you master the steps, you’ll find yourself turning to this method whenever you want reliable crispiness without the fuss of frying. Share them with friends, serve them hot from the oven, and enjoy the simple pleasure of good food made with a few thoughtful techniques.
Pro Tips
Pat thighs dry briefly before the buttermilk step if they are excessively wet—moisture can dilute the coating.
Press panko into the skin gently for even adhesion; don’t overwork the coating or it will become dense.
Use an instant-read thermometer to avoid overcooking—remove at 165°F (74°C) and rest for juicier results.
For extra crunch, toss the panko with a tablespoon of melted butter before coating.
Rotate the baking sheet once during roasting for uniform browning.
This nourishing crispy irish chicken thighs recipe is sure to be a staple in your kitchen. Enjoy every moist, high protein slice — it is perfect for breakfast or as a wholesome snack any time.
FAQs about Recipes
How do I know the thighs are cooked through?
Yes. Let the thighs rest 5 minutes after baking; use an instant-read thermometer inserted into the thickest part to confirm 165°F (74°C).
Can I coat the thighs ahead of time?
Yes. Prepare through coating and keep covered in the refrigerator for up to 24 hours. Bake straight from chilled following the same oven temperature, adding a few extra minutes if chilled.
What's the best way to reheat leftovers?
Reheat in a 375°F oven or air fryer to restore crispness. Microwaving will make the crust soggy.
Tags
Crispy Irish Chicken Thighs
This Crispy Irish Chicken Thighs recipe makes perfectly juicy, tender, and flavorful steak every time! Serve with potatoes and a side salad for an unforgettable dinner in under 30 minutes.
Ingredients
Marinade
Breading
Finish
Instructions
Preheat and prepare pan
Preheat oven to 425°F (220°C). Line a baking sheet with parchment paper and lightly grease it to prevent sticking and promote even browning.
Marinate thighs
Place chicken thighs in a large bowl and pour 1 cup buttermilk over them. Turn to coat and let sit at room temperature for at least 15 minutes or refrigerate up to 4 hours for deeper flavor.
Mix dry coating
In a shallow dish combine 1 1/2 cups panko, 1 cup flour, 2 teaspoons salt, 1 teaspoon black pepper, 1 teaspoon smoked paprika, 1 teaspoon dried thyme, and 1/2 teaspoon garlic powder. Whisk to blend evenly.
Dredge thighs
Remove each thigh from buttermilk, allowing excess to drip off, then press thoroughly into the breadcrumb mixture to coat all sides evenly.
Arrange and butter
Place coated thighs skin-side up on the prepared pan. Drizzle or brush 2 tablespoons melted butter over the top to encourage crisp browning.
Bake and rest
Bake for about 40 minutes, rotating pan once at 20 minutes. The thighs are done when golden brown and an instant-read thermometer reads 165°F (74°C). Rest 5 minutes before serving.
Last Step: Please leave a rating and comment letting us know how you liked this recipe! This helps our business to thrive and continue providing free, high-quality recipes for you.
Nutrition
Did You Make This?
Leave a comment & rating below or tag
@royalrecipe on social media!
Categories:
You might also like...

5-Minute Air Fryer Roasted Garlic Magic That Wows
Learn how a 5-minute prep transforms a whole garlic bulb into silky, caramelized cloves in the air fryer. Perfect as a spread, mix-in, or flavor booster that elevates weeknight meals and party plates.

Air-Fried Pizza Rolls
Golden, melty pizza rolls made in the air fryer—crispy outside, gooey inside, ready in under 20 minutes. Perfect for snacks, parties, or quick dinners.

Air-Fried Rice Paper Noodle Rolls
Crispy, light rolls filled with vermicelli, tofu or shrimp, and crisp vegetables—air-fried for a healthier crunch and quick prep.
Did You Make This?
Leave a comment & rating below or tag @royalrecipe on social media!
Rate This Recipe
Share This Recipe
Enjoyed this recipe? Share it with friends and family, and don't forget to leave a review!
Comments (1)
This recipe looks amazing! Can't wait to try it.
Comments are stored locally in your browser. Server comments are displayed alongside your local comments.

Hi, I'm Riley!
What's Popular

30-Minute Meals!
Join to receive our email series which contains a round-up of some of our quick and easy family favorite recipes.