
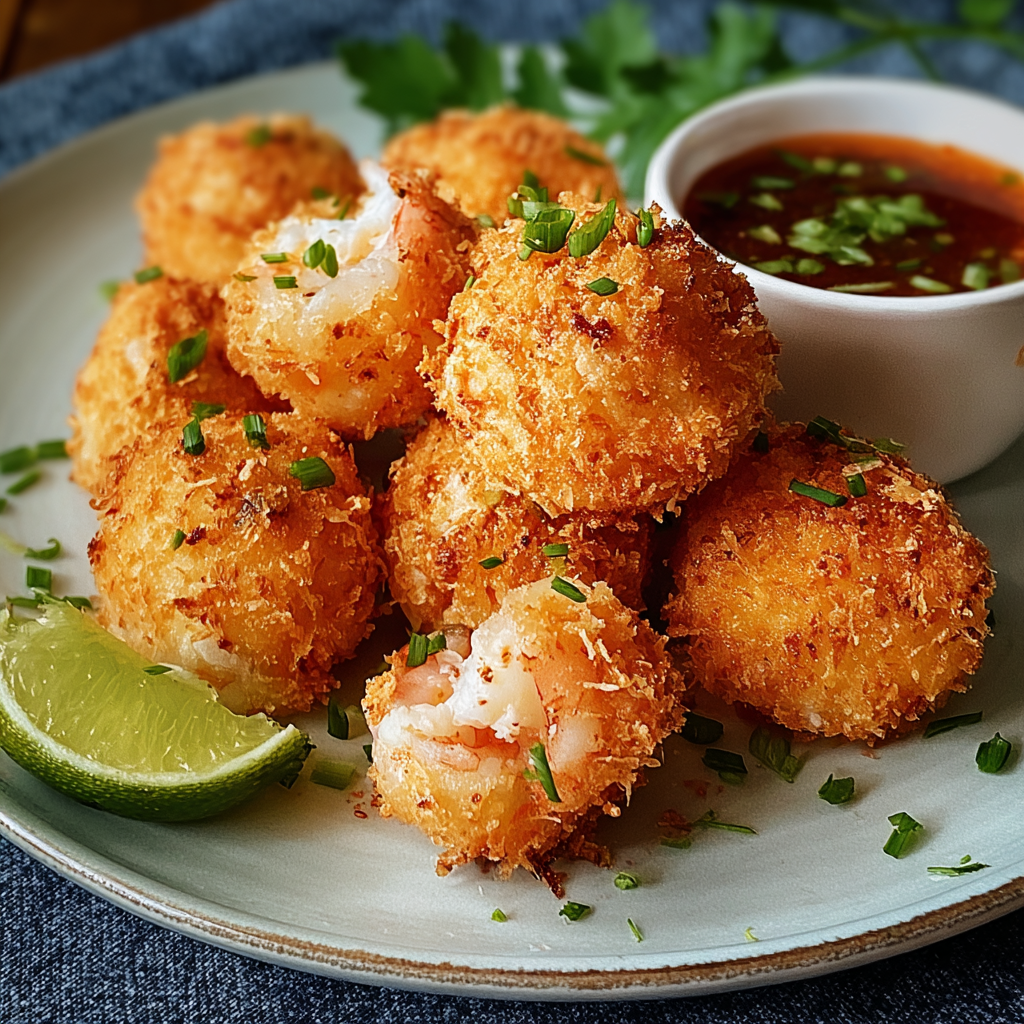
Crispy Shrimp Balls

Golden, juicy shrimp balls flavored with garlic, ginger, and scallions — a perfect appetizer or weeknight treat that’s quick to make and utterly satisfying.
This recipe for Shrimp Balls has been a touchstone in my kitchen for years: a quick, crowd-pleasing appetizer that doubles as a weeknight main when paired with rice or a big salad. I first landed on this exact combination the winter a friend brought a plate of fried seafood to a potluck; the flavors were bright, the texture was crisp, and the shrimp stayed tender even after cooling. That night I begged for the method and adapted it over a few experiments until the balance of ginger, garlic, and a whisper of sesame felt just right.
What makes these shrimp balls special is their contrast of textures — the exterior crisps to a light golden shell while the interior remains springy and juicy. The breadcrumbs (panko works especially well) give that desirable crunch, while a beaten egg and a touch of cornstarch bind everything without making them dense. They’re forgiving to shape and quick to fry, and once you master one batch you’ll find yourself thinking of new dipping sauces and serving ideas. I love making a double batch for parties because guests always go back for more.
Why You'll Love This Recipe
- Fast to assemble: from raw shrimp to ready-to-fry mixture in about 10 to 15 minutes, and ready to eat in under 30 minutes total.
- Pantry-friendly: uses common staples like breadcrumbs, an egg, and basic aromatics so you can pull it together without a special shopping run.
- Versatile: works as an appetizer, lunch with a dipping sauce, or a main when served with noodles or steamed rice.
- Make-ahead friendly: you can shape the balls and refrigerate for a day or freeze for longer storage, then fry straight from chilled or partially frozen.
- Crowd-pleaser: mild, comforting flavors with bright notes from ginger and cilantro — easy for picky eaters yet interesting enough for foodies.
I often double this recipe for gatherings; family members have described these as "addictive" and I learned early on to hide a small plate so there’s always a few left for me. The balance of textures and little pops of green onion always gets compliments.
Ingredients
- 1 pound raw shrimp, peeled and deveined: Choose medium to large shrimp for the best texture. If possible buy wild-caught or a reliable brand you trust; fresh or thawed frozen shrimp both work. The shrimp provide the sweet, firm protein base and a clean seafood flavor.
- 1/2 cup panko breadcrumbs: Panko yields a lighter, airier crumb and gives a crisp exterior. If you only have regular breadcrumbs, pulse them to larger flakes or use about the same volume.
- 1 large egg, beaten: Acts as a binder and adds richness; room-temperature egg incorporates easier for a smooth mixture.
- 1/4 cup green onions, finely chopped: Use the tender green and white parts for a mild onion flavor and peppery freshness.
- 2 cloves garlic, minced: Fresh garlic brightens the filling. Mince finely so it distributes without creating harsh lumps.
- 1 tablespoon fresh ginger, grated: Adds warmth and a citrusy note that lifts seafood. Microplane or finely grate for even distribution.
- 1 tablespoon soy sauce: Provides savory depth and seasoning; low-sodium soy works fine if you prefer.
- 1 teaspoon sesame oil: A small amount goes a long way for aroma — toasted sesame oil is ideal.
- 1/2 teaspoon salt and 1/2 teaspoon black pepper: Start here and adjust after you test-cook one small ball for seasoning.
- 1/4 cup cilantro, chopped (optional): Fresh cilantro adds a bright herbaceous finish; omit or swap with parsley if you’re not a cilantro fan.
- 1 tablespoon cornstarch (optional): Helps bind the mixture if it feels loose, especially if your shrimp were very wet.
- Vegetable oil for frying: Use neutral oil with a high smoke point such as canola, peanut, or sunflower oil.
Instructions
Chop the shrimp: Roughly chop the raw shrimp into small pieces, about 1/4-inch to 1/2-inch pieces, or pulse briefly in a food processor for a finer texture. If using a food processor, pulse in short bursts so you don’t create a paste; you want some tooth and visible pieces so the balls stay springy once cooked. Cold shrimp are easier to handle and less sticky. Combine the ingredients: In a large bowl, mix the chopped shrimp with the panko, beaten egg, green onions, garlic, grated ginger, soy sauce, sesame oil, salt, and pepper. If using, add chopped cilantro and a tablespoon of cornstarch. Stir with a fork or fold by hand until evenly distributed. Test the mixture by forming a small ball and frying it to check seasoning and texture; adjust salt or soy sauce as needed. Form the balls: Moisten your hands slightly and roll the mixture into 1- to 1.5-inch balls. The recipe should yield roughly 20 to 25 balls depending on size. Keep a tray lined with parchment or a lightly oiled plate ready as you work. If the mixture sticks too much, chill it for 15 minutes to firm it up before rolling. Heat the oil: Pour enough vegetable oil into a large skillet to cover the bottom by about 1/4 to 1/2 inch. Heat over medium-high until the oil registers 350°F on a thermometer or a small breadcrumb sizzles and browns within 8 to 10 seconds. Maintain steady heat; if the oil smokes, lower the heat slightly. Fry the shrimp balls: Working in batches, add the balls to the hot oil without overcrowding. Fry for about 3 to 4 minutes per side, turning gently so they brown evenly and reach an internal temperature of 145°F. The exterior should be golden brown and crisp while the interior remains opaque and tender. Adjust heat between batches to keep the oil temperature consistent. Drain and rest: Remove the cooked balls with a slotted spoon and transfer to a paper towel-lined plate or wire rack to drain excess oil. Let them rest for a minute or two before serving so the interior sets and the crunch stays intact.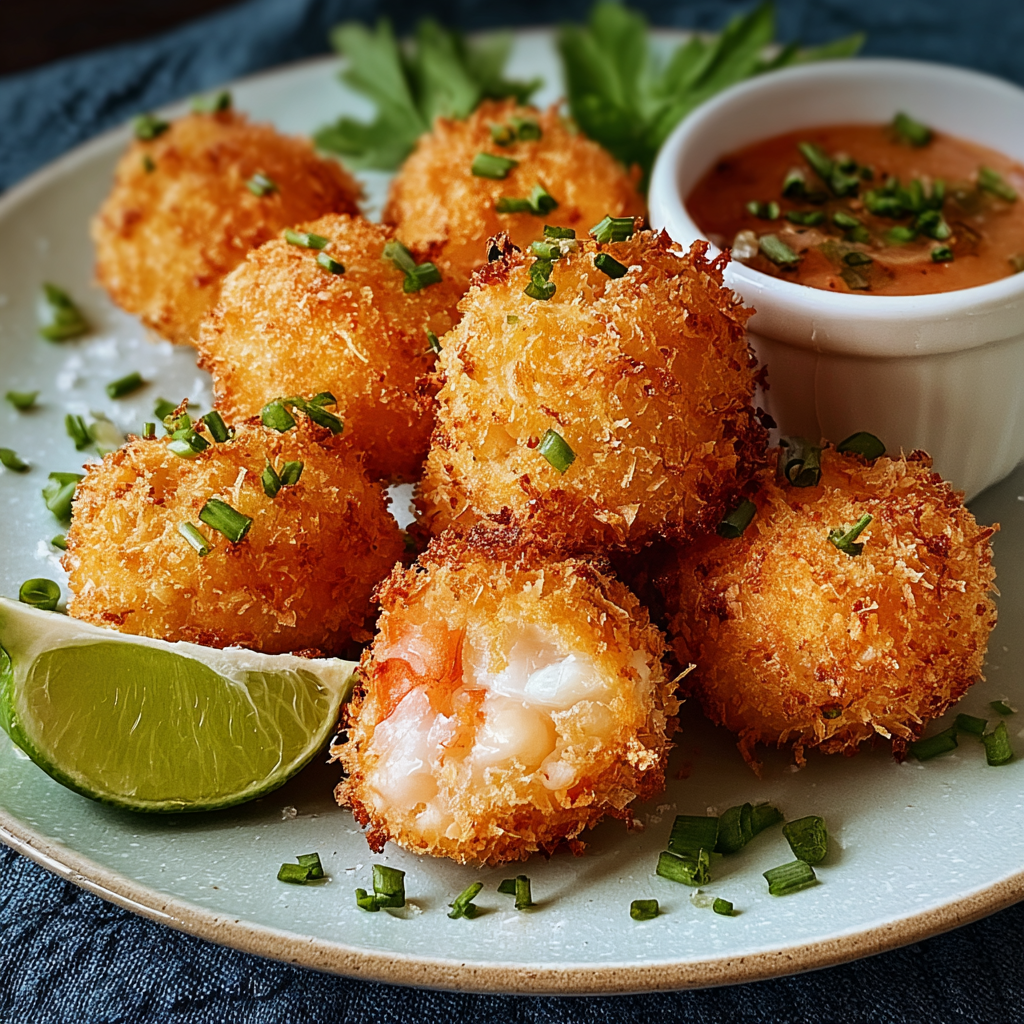
You Must Know
- These are high in protein and make a satisfying appetizer; shaped and stored properly they keep well in the refrigerator for up to 2 days and freeze for up to 3 months.
- To reheat, bake in a 350°F oven for 8 to 10 minutes or air-fry at 350°F for 5 to 7 minutes — avoid microwaving if you want to preserve the crisp exterior.
- Be mindful of allergens: shellfish, egg, soy, and gluten if you use regular breadcrumbs.
- If you’re watching fat intake, shallow fry until golden and then finish on a paper towel and oven bake to absorb extra oil; they still remain flavorful and moist.
My favorite thing about this method is how forgiving it is: small changes in size or breadcrumbs alter the final texture subtly, and you can easily adapt the flavor profile by swapping herbs or dipping sauces. Family members have compared them to dim sum favorites and asked me to bring them whenever we host game nights.

Storage Tips
Allow the cooked balls to cool to near room temperature before storing. For short-term, place in an airtight container and refrigerate for up to 48 hours. For freezing, flash-freeze the shaped raw balls on a tray until firm, then transfer to a freezer bag for up to 3 months; fry directly from frozen, adding a couple of minutes per side. Reheat cooked balls in a hot oven or air fryer for the best texture; the microwave will soften the crust.
Ingredient Substitutions
If you need gluten-free, substitute gluten-free breadcrumbs or crushed rice crackers. For lower sodium, use low-sodium soy sauce or a splash of coconut aminos. If you prefer a firmer texture, replace half the panko with finely chopped water chestnuts for crunch. Vegetarian alternatives include mashed firm tofu blended with finely chopped king oyster mushrooms and seasonings, though the texture will differ.
Serving Suggestions
Serve with classic sweet chili sauce, a soy-vinegar dipping mix, or a quick mayo-based sauce with lime and sriracha. For a meal, plate alongside steamed jasmine rice, a bright cucumber salad, or stir-fried vegetables. Garnish with extra scallions, cilantro, and a wedge of lime for freshness. These are perfect on a party board paired with pickled vegetables and sliced baguette if you want a fusion spread.
Cultural Background
Small fried seafood morsels appear across many coastal cuisines. These shrimp balls echo elements of East and Southeast Asian snacks where minced seafood is flavored with aromatics like ginger and scallion and fried or steamed. The use of panko and light batter hails from Japanese techniques of creating a delicate crunch, while dips such as sweet chili or soy-vinegar nod to Southeast Asian preferences.
Seasonal Adaptations
In spring and summer, fold in fresh herbs like basil or mint and serve with a cooling cucumber salad. In colder months, add a pinch of five-spice or replace cilantro with parsley and pair with warming miso-ginger broth. Holiday versions can be served as part of a larger finger-food spread alongside pork or vegetable bites.
Meal Prep Tips
For efficient meal prep: shape the balls and store them lined in a single layer in the fridge for up to 24 hours, or freeze in a single layer and then bag. Pre-fried balls heat quickly and keep well in meal prep boxes; include a small container of sauce to preserve the crispness until you’re ready to eat. Label frozen bags with date and contents to rotate properly.
These shrimp balls are a small, delicious project that rewards a little hands-on work with big flavor and crowd appeal. Give them a try the next time you want something fun to serve, and don’t be surprised if they become a regular request at your table.
Pro Tips
Pulse shrimp briefly in a food processor for a finer texture but avoid overprocessing to prevent a gummy paste.
If the mixture is too wet, add 1 tablespoon of cornstarch or a little extra panko and chill 10 to 15 minutes before shaping.
Maintain oil temperature around 350°F for even browning; adjust heat between batches to keep it steady.
Test one small ball first to check seasoning and texture; adjust salt or soy sauce before frying the rest.
For a lighter finish, drain on a wire rack over a tray rather than directly on paper towels to keep bottoms from steaming.
This nourishing crispy shrimp balls recipe is sure to be a staple in your kitchen. Enjoy every moist, high protein slice — it is perfect for breakfast or as a wholesome snack any time.
FAQs about Recipes
Can I freeze the shrimp balls?
Yes. Flash-freeze shaped raw balls on a tray then transfer to a sealed freezer bag; fry directly from frozen, adding a couple of minutes per side.
How do I tell when they are cooked through?
Check doneness by slicing a ball: the interior should be opaque and reach 145°F. Texture should be firm but springy.
Tags
Crispy Shrimp Balls
This Crispy Shrimp Balls recipe makes perfectly juicy, tender, and flavorful steak every time! Serve with potatoes and a side salad for an unforgettable dinner in under 30 minutes.
Ingredients
Main
Aromatics & Seasoning
For Frying
Instructions
Chop or Pulse Shrimp
Roughly chop shrimp into small pieces or pulse briefly in a food processor, keeping some texture; cold shrimp are easier to handle.
Mix Ingredients
Combine chopped shrimp with panko, beaten egg, green onions, garlic, ginger, soy sauce, sesame oil, salt, pepper, cilantro, and cornstarch if using. Stir until evenly distributed and adjust seasoning after a test fry.
Shape Balls
Moisten hands and roll mixture into 1 to 1.5 inch balls; place on a parchment-lined tray. Chill briefly if the mixture is too soft to handle.
Heat Oil
Heat vegetable oil in a large skillet to about 350°F, or until a breadcrumb sizzles and browns in 8 to 10 seconds. Maintain steady temperature while frying.
Fry in Batches
Fry balls in batches without overcrowding, about 3 to 4 minutes per side, until golden brown and internal temperature reaches 145°F. Adjust heat as needed.
Drain and Serve
Drain on paper towels or a wire rack and let rest 1 to 2 minutes before serving with preferred dipping sauces.
Last Step: Please leave a rating and comment letting us know how you liked this recipe! This helps our business to thrive and continue providing free, high-quality recipes for you.
Nutrition
Did You Make This?
Leave a comment & rating below or tag
@royalrecipe on social media!
Categories:
You might also like...

5-Minute Air Fryer Roasted Garlic Magic That Wows
Learn how a 5-minute prep transforms a whole garlic bulb into silky, caramelized cloves in the air fryer. Perfect as a spread, mix-in, or flavor booster that elevates weeknight meals and party plates.

Air-Fried Pizza Rolls
Golden, melty pizza rolls made in the air fryer—crispy outside, gooey inside, ready in under 20 minutes. Perfect for snacks, parties, or quick dinners.

Air-Fried Rice Paper Noodle Rolls
Crispy, light rolls filled with vermicelli, tofu or shrimp, and crisp vegetables—air-fried for a healthier crunch and quick prep.
Did You Make This?
Leave a comment & rating below or tag @royalrecipe on social media!
Rate This Recipe
Share This Recipe
Enjoyed this recipe? Share it with friends and family, and don't forget to leave a review!
Comments (1)
This recipe looks amazing! Can't wait to try it.
Comments are stored locally in your browser. Server comments are displayed alongside your local comments.

Hi, I'm Riley!
What's Popular

30-Minute Meals!
Join to receive our email series which contains a round-up of some of our quick and easy family favorite recipes.