
Crunchy Oven-Baked Chicken Taquitos

Crispy oven-baked taquitos stuffed with savory shredded chicken and melted cheddar and pepper jack — easy, crowd-pleasing finger food ready in about 40 minutes.

Why You'll Love This Recipe
- Ready in about 40 minutes from start to finish, making it ideal for impromptu guests or weeknight dinners when time is tight.
- Uses pantry staples and leftover rotisserie or shredded chicken, so you can pull it together without a long grocery list.
- Oven method keeps hands cleaner and reduces oil compared with frying while still delivering a satisfyingly crunchy texture.
- Make-ahead friendly: they bake straight from chilled or frozen, making them perfect for meal prep and freezer storage.
- Crowd-pleasing and versatile — serve as an appetizer, snack, or easy main with sides like salad, beans, or rice.
- Adjustable heat level by swapping pepper jack for Monterey Jack or adding diced green chiles for a smoky lift.
I remember watching my older sister try a version of these with corn tortillas years ago; her method of rolling tight and using a little oil on the outside stuck with me. At my last backyard party, a neighbor who claims to be a taquito snob admitted these were some of the best oven-baked ones she'd tried. It always surprises me how such simple ingredients can feel so celebratory when served hot and crunchy.
Ingredients
- Cooked shredded chicken: 2 cups of leftover rotisserie chicken or poached breasts shredded finely. Use skinless meat for easier rolling; shredded dark meat adds moisture if you prefer a richer bite. I like a rotisserie bird for convenience and flavor.
- Cheddar cheese: 1 cup shredded sharp cheddar provides that classic, salty cheesiness and helps bind the filling. Freshly shredding from a block melts better than pre-shredded blends.
- Pepper jack cheese: 1 cup shredded pepper jack adds creaminess and a subtle kick. Substitute Monterey Jack for a milder version or smoked cheddar for depth.
- Ground cumin: 1 teaspoon for earthy warmth. Use freshly ground for the brightest flavor; cumin is essential for a Tex-Mex profile.
- Chili powder: 1 teaspoon to round out the spice mix. Choose a mild or ancho chili powder for a smoky edge.
- Garlic and onion powders: 1/2 teaspoon each to boost savory notes without adding moisture; powdered forms keep the filling dry and easy to roll.
- Salt and pepper: To taste. Start with 1/2 teaspoon salt and 1/4 teaspoon black pepper and adjust after combining the filling.
- Cilantro: 1/4 cup chopped, stirred in at the end for bright, herbal lift. Omit or substitute parsley if you dislike cilantro's flavor.
- Tortillas: 12 small flour or corn tortillas. Flour tortillas are softer and easier to roll for beginners; corn tortillas give a more authentic flavor but may need warming to prevent cracking.
- Olive oil spray or olive oil: Light spray or 2 tablespoons olive oil to brush on the outside to promote even browning in the oven.
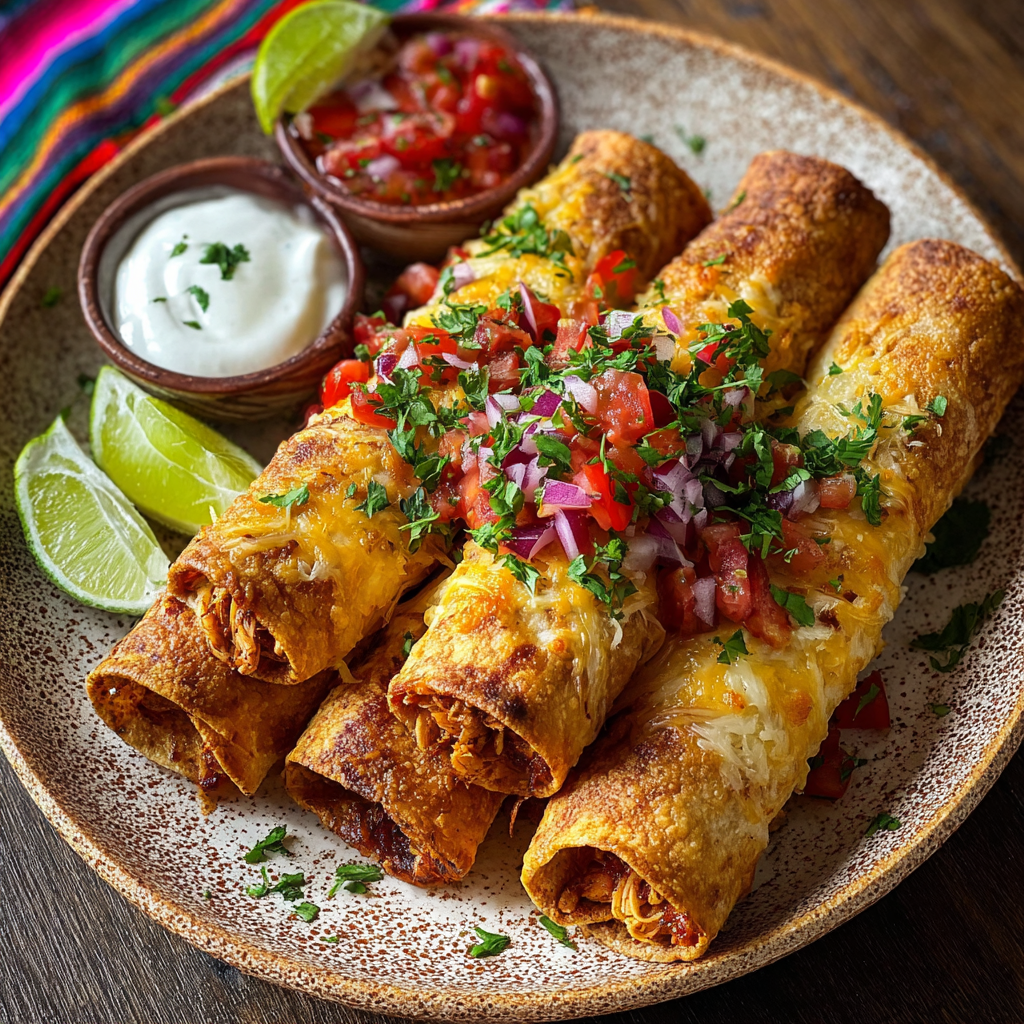
- Dips: Salsa, sour cream, and guacamole for serving — offer a range of options so guests can customize each bite.
Instructions
Preheat and prepare: Preheat the oven to 425°F (220°C). Line a baking sheet with parchment paper or a silicone mat to prevent sticking and make cleanup simple. If using corn tortillas, warm them for 20–30 seconds per side in a skillet or microwave covered with a damp towel for 30 seconds to make them pliable and less likely to crack while rolling. Make the filling: In a large bowl combine 2 cups shredded cooked chicken, 1 cup shredded cheddar, 1 cup shredded pepper jack, 1 teaspoon cumin, 1 teaspoon chili powder, 1/2 teaspoon garlic powder, 1/2 teaspoon onion powder, and salt and pepper to taste. Fold in 1/4 cup chopped cilantro. Mix until evenly distributed; the cheese helps the mixture hold together but avoid overmixing so the filling stays slightly loose and tender. Assemble the rolls: Spoon about 2 to 3 tablespoons of filling onto each tortilla near one edge, spreading to a 1-inch strip. Tuck the edge and roll tightly; place seam-side down on the prepared sheet. Repeat with remaining tortillas. If tortillas resist rolling, warm them briefly again. Brush or spray the outside lightly with olive oil so they crisp evenly in the oven. Bake until crisp: Bake at 425°F for 18–22 minutes, turning the pan halfway through for even browning. Look for a deep golden-brown color and bubbling cheese at the ends as visual cues. If you prefer extra crunch, broil for 1–2 minutes while watching closely to avoid burning. Rest and serve: Let the taquitos rest for 3–5 minutes after removing from the oven so the cheese sets slightly. Serve warm with bowls of salsa, sour cream, and guacamole. For garnish, sprinkle additional chopped cilantro and a squeeze of lime if desired.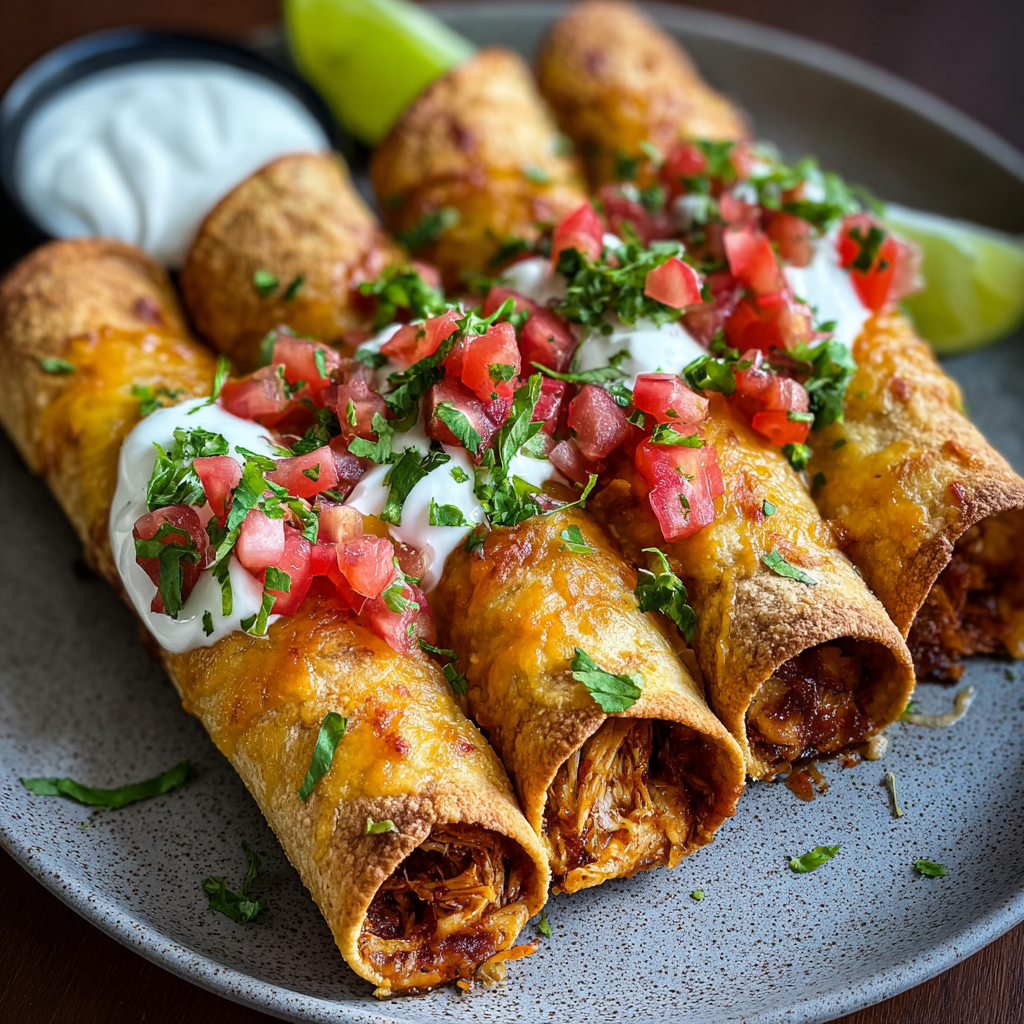
You Must Know
- These keep well in the refrigerator for up to 3 days in an airtight container and freeze for up to 3 months; reheat from frozen in a 400°F oven for 12–15 minutes.
- Each serving (about 3 taquitos) is roughly 350 calories; they're a good source of protein thanks to the chicken and cheese.
- Use flour tortillas for easier rolling; if using corn, warm them thoroughly to prevent cracking and consider brushing with a bit more oil for crispness.
- For a crispier texture, place taquitos on a wire rack set over the baking sheet so hot air circulates underneath while baking.
My favorite part of this recipe is how forgiving it is: uneven rolls still bake up beautifully, and family members always gravitate toward the ends where the cheese peeks out and caramelizes. At potlucks I’ve watched the plate empty faster than expected — these have a way of vanishing, which means they’re a reliable hit when you want easy, delicious finger food.
Storage Tips
Store cooled taquitos in an airtight container in the refrigerator for up to 3 days. For longer storage, freeze on a baking sheet until solid, then transfer to a freezer-safe bag or container for up to 3 months. Reheat refrigerated taquitos at 375°F for 8–10 minutes or frozen taquitos at 400°F for 12–15 minutes, flipping halfway through to re-crisp the exterior. Avoid microwaving from frozen as it can make the tortilla soggy; if you must microwave, follow with a minute under the broiler or in a hot skillet.
Ingredient Substitutions
If you want to reduce dairy, swap the cheeses for vegan shredded cheese and keep the same quantities; baking time and texture will be similar though melt characteristics vary by brand. To make them gluten-free use certified gluten-free corn or flour tortillas and confirm your chili powder blend is gluten-free. For a lighter version, replace half the cheddar with part-skim mozzarella. To change protein, try shredded rotisserie turkey or a black bean and corn filling for a vegetarian variation.
Serving Suggestions
Serve stacked on a platter with small bowls of salsa, sour cream, and guacamole for dipping. Add pickled onions, sliced jalapeños, or a dollop of cilantro-lime crema for brightness. For a meal, pair with a crisp green salad, Mexican-style street corn, or a pot of seasoned black beans and rice. Garnish with lime wedges and extra cilantro to make the presentation pop for guests.
Cultural Background
Taquitos trace their roots to Mexican street food traditions, where small rolled tacos are filled and fried until crisp. The oven-baked version is a modern adaptation that preserves the compact, handheld appeal while reducing oil and effort. Regional variations include different fillings such as beef, potato, or cheese, and in the United States taquitos have become a popular appetizer and convenience food, often served at parties and casual gatherings with Tex-Mex influences on seasoning and accompaniments.
Seasonal Adaptations
In summer, bulk up the filling with fresh corn kernels and diced tomatoes, or serve alongside a bright corn-and-black-bean salad. For fall and winter, swap in shredded roasted sweet potato and chipotle powder for warmth, or add a spoonful of pumpkin puree and smoked paprika for a cozy twist. Holiday gatherings benefit from prepping taquitos ahead and reheating for guests, offering a familiar comfort-food option with festive dips like cranberry-salsa blends or spicy apple chutney.
Meal Prep Tips
Assemble taquitos ahead and arrange them seam-side down on a tray, then cover and refrigerate for up to 24 hours before baking. To freeze, place assembled taquitos on a sheet pan and flash-freeze for an hour before packing into airtight bags; this prevents sticking and preserves shape. Label with the bake temperature and time for quick reheating. Portion into meal containers with a small tub of salsa for easy lunch or snack options throughout the week.
These crunchy oven-baked taquitos are a small, satisfying joy — simple to make, flexible to adapt, and reliably popular with family and friends. I hope you make them your own and enjoy the comforting crunch as much as we do.
Pro Tips
Warm corn tortillas before rolling to prevent cracking; wrap in a damp towel and microwave for 30 seconds.
Brush or lightly spray with oil for even browning; avoid drenching the tortillas which can make them soggy.
Use a wire rack over the baking sheet to crisp both sides simultaneously and prevent a soft bottom.
Freeze assembled taquitos flat on a sheet pan before bagging to keep them from sticking together.
This nourishing crunchy oven-baked chicken taquitos recipe is sure to be a staple in your kitchen. Enjoy every moist, high protein slice — it is perfect for breakfast or as a wholesome snack any time.
Tags
Crunchy Oven-Baked Chicken Taquitos
This Crunchy Oven-Baked Chicken Taquitos recipe makes perfectly juicy, tender, and flavorful steak every time! Serve with potatoes and a side salad for an unforgettable dinner in under 30 minutes.
Ingredients
Filling
Seasoning & Herbs
Wrapper & Finish
Instructions
Preheat and prepare
Preheat oven to 425°F and line a baking sheet with parchment paper. Warm corn tortillas briefly to make pliable if using corn.
Make the filling
In a large bowl combine shredded chicken, cheddar, pepper jack, cumin, chili powder, garlic powder, onion powder, salt, pepper, and cilantro; mix gently until combined.
Assemble the taquitos
Place 2–3 tablespoons of filling near the edge of each tortilla and roll tightly. Arrange seam-side down on the prepared baking sheet and brush or spray lightly with olive oil.
Bake until crisp
Bake at 425°F for 18–22 minutes, turning once for even browning, until deeply golden and crisp. Broil 1–2 minutes if extra color is desired.
Rest and serve
Let rest 3–5 minutes, then serve warm with salsa, sour cream, and guacamole. Garnish with additional cilantro and lime wedges if desired.
Last Step: Please leave a rating and comment letting us know how you liked this recipe! This helps our business to thrive and continue providing free, high-quality recipes for you.
Nutrition
Did You Make This?
Leave a comment & rating below or tag
@royalrecipe on social media!
Categories:
You might also like...

5-Minute Air Fryer Roasted Garlic Magic That Wows
Learn how a 5-minute prep transforms a whole garlic bulb into silky, caramelized cloves in the air fryer. Perfect as a spread, mix-in, or flavor booster that elevates weeknight meals and party plates.

Air-Fried Pizza Rolls
Golden, melty pizza rolls made in the air fryer—crispy outside, gooey inside, ready in under 20 minutes. Perfect for snacks, parties, or quick dinners.

Air-Fried Rice Paper Noodle Rolls
Crispy, light rolls filled with vermicelli, tofu or shrimp, and crisp vegetables—air-fried for a healthier crunch and quick prep.
Did You Make This?
Leave a comment & rating below or tag @royalrecipe on social media!
Rate This Recipe
Share This Recipe
Enjoyed this recipe? Share it with friends and family, and don't forget to leave a review!
Comments (1)
This recipe looks amazing! Can't wait to try it.
Comments are stored locally in your browser. Server comments are displayed alongside your local comments.

Hi, I'm Riley!
What's Popular

30-Minute Meals!
Join to receive our email series which contains a round-up of some of our quick and easy family favorite recipes.