
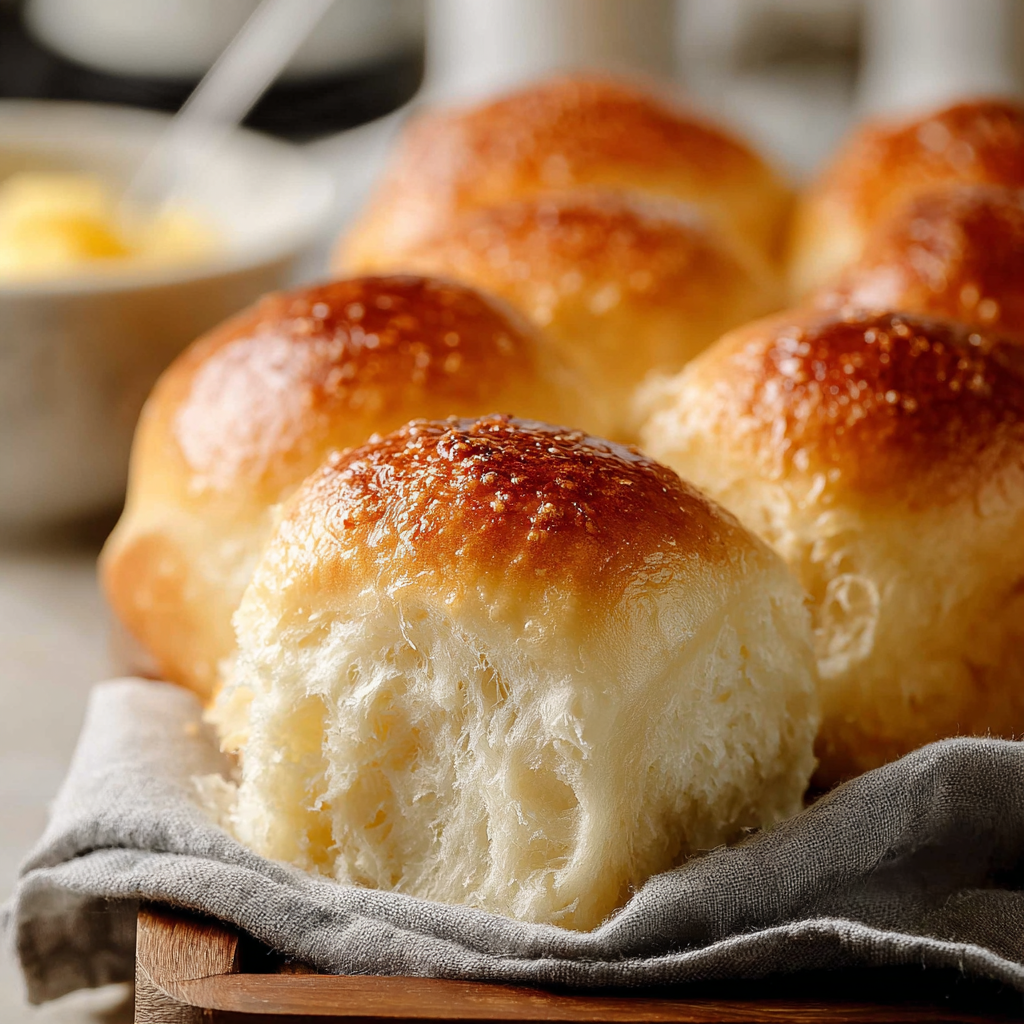
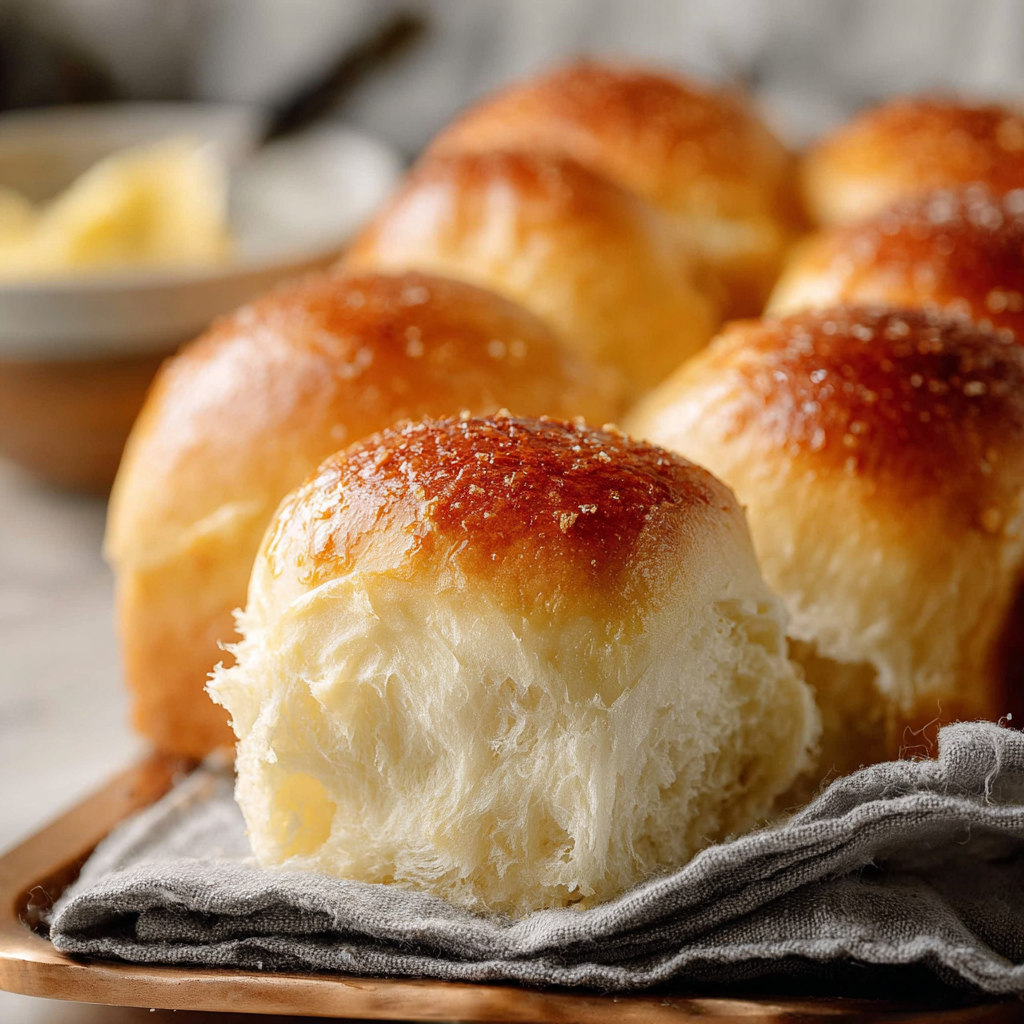
Irresistible Dinner Rolls

Soft, buttery dinner rolls with a tender crumb and shiny golden top—perfect for family dinners, holiday tables, and weeknight comfort.
Why You'll Love This Recipe
- Quick and approachable: ready to shape in under 30 minutes of active time and baked within an hour, making it great for last-minute meals.
- Minimal, pantry-friendly ingredients: uses basic staples like all-purpose flour, butter, milk, honey, and active dry yeast.
- Family-pleasing texture: soft, airy crumb with a thin, buttery crust that stays tender the next day when stored properly.
- Highly adaptable: shape into buns, sliders, or larger dinner rolls depending on the occasion.
- Make-ahead friendly: dough can be refrigerated for a slow rise, or the baked rolls freeze and reheat beautifully.
- Perfect for holidays and weeknight dinners: dependable results even for home bakers who don’t make bread often.
I’ve tested these across different ovens and minor ingredient swaps. My favorite discovery was that a short, warm rise produces a lighter interior than a single long overnight proof when you need rolls the same day. Family reactions are always the same: quick smiles, second helpings, and requests to freeze a few for later. A small trick I learned was to keep the towel lightly damp during the final rise to encourage a soft crust without sticking.
Ingredients
- Water (1 cup): Use warm water at about 110°F to wake the yeast without killing it. Tap water is fine if it sits briefly to reach temperature; use a kitchen thermometer for accuracy.
- Butter (2 tbsp melted + extra): Unsalted butter melted into the liquid adds richness; reserve additional melted butter for brushing finished rolls for shine and flavor. European-style butter gives a slightly richer result if available.
- Milk (1/2 cup): Whole milk yields a tender crumb and slight softness to the crust. You can use 2% for a lighter finish, but skim will produce a drier interior.
- Honey (2 tbsp): Provides a gentle sweetness and helps with browning; light or mild-flavored honey works best so it doesn't overpower savory dishes.
- Active dry yeast (1 tbsp): A reliable yeast that proofing in warm liquid ensures good activity. Check the packet date for freshness for best rise.
- All-purpose flour (3 1/2 to 4 cups): Start with 3 1/2 cups and add up to 4 cups as needed. The final dough should be slightly tacky but not wet. King Arthur or Gold Medal are solid all-purpose choices.
- Fine sea salt (1 tsp): Enhances flavor without drying the dough; measure precisely to maintain balance.
Instructions
Prepare Wet Ingredients: Grease a 9 x 13-inch baking dish with cooking spray and set it aside. In a microwave-safe bowl or saucepan, combine 1 cup water and 2 tablespoons melted butter. Add 1/2 cup milk and 2 tablespoons honey, stirring to blend. Heat gently until the liquid reaches about 110°F—microwave in 15-second bursts or warm over low heat. The liquid should feel warm but not hot to the touch; too hot will kill the yeast. Activate the Yeast: Pour the warm liquid into the bowl of a stand mixer or a large mixing bowl. Sprinkle 1 tablespoon active dry yeast evenly over the top and stir briefly. Let the mixture sit for 5 minutes until foamy; this is the visual cue that the yeast is alive. If no foam appears after 7 minutes, the yeast may be inactive—start over with fresh yeast. Mix and Knead the Dough: Add 3 1/2 cups all-purpose flour and 1 teaspoon fine sea salt to the activated yeast mixture. Use a dough hook on medium-low to bring the dough together. If it sticks to the bowl, add flour 1/4 cup at a time up to 4 cups. Knead on low for 4–5 minutes until smooth and slightly tacky. The dough should pull away from the bowl but remain soft to the touch. Shape into a ball and transfer to a well-greased bowl. First Dough Rise: Cover the bowl with a damp towel or paper towel and place in a warm draft-free spot. Let rise for 15 minutes—this short proof develops a light, airy crumb without a lengthy wait. The dough will puff slightly; it does not need to double in this quick method. Shape Rolls and Final Rise: Punch down the dough gently to release air. Divide into 15 equal pieces (use a scale or estimate) and shape each into a smooth ball by tucking edges under and rolling on the counter. Place the rolls evenly in the prepared 9 x 13-inch dish, cover with a lightly damp towel, and let rise 15–20 minutes until slightly puffy. For a soft crust, keep the towel moist without dripping. Bake: Preheat the oven to 375°F (190°C). Once the rolls are puffed, bake for 18–22 minutes until golden brown on top and hollow-sounding when tapped. Rotate the pan halfway through if your oven has hot spots. Internal temperature should reach about 190°F for fully set center. Finish and Serve: Brush hot rolls with additional melted butter right out of the oven for shine and extra flavor. Allow to cool briefly in the pan for 5–10 minutes, then serve warm. Leftovers reheat well in a 300°F oven wrapped in foil for 8–10 minutes.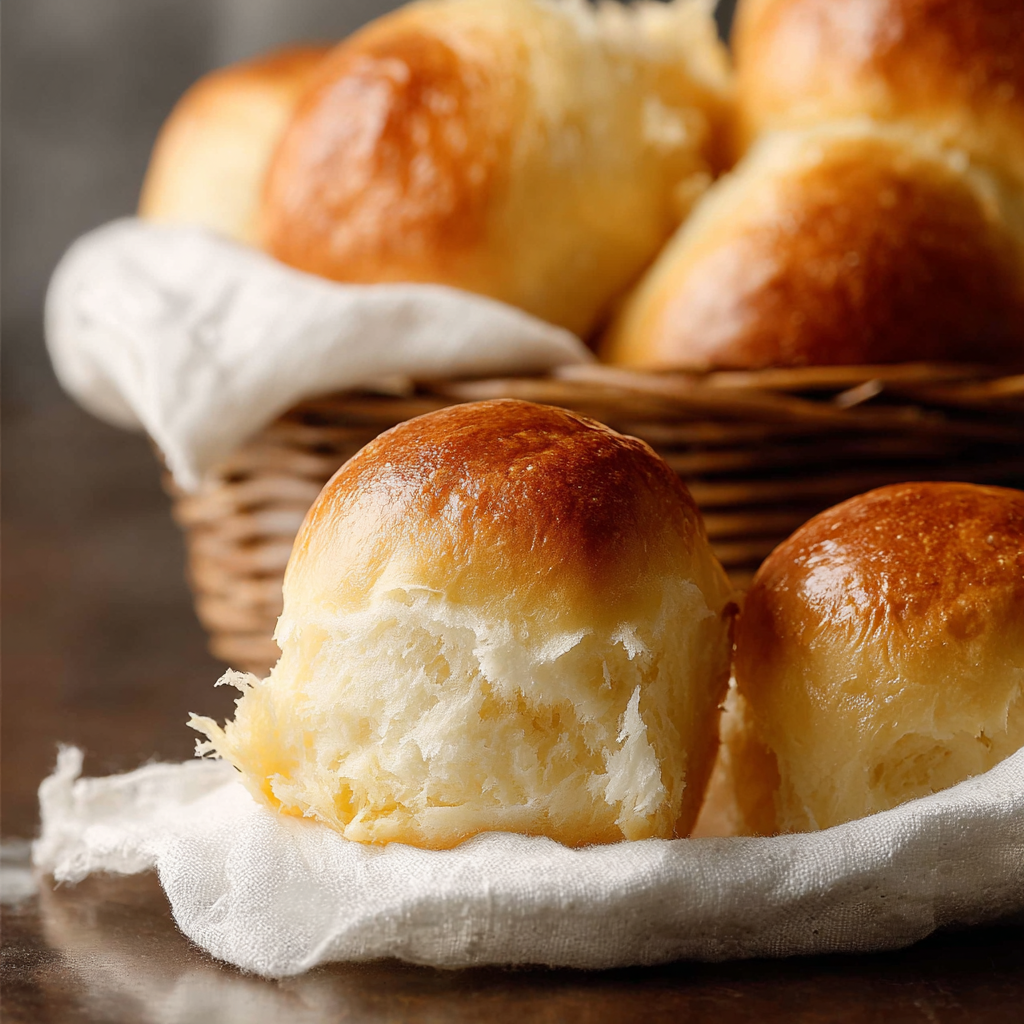
You Must Know
- These rolls freeze beautifully for up to 3 months; wrap tightly in plastic and then foil to protect against freezer burn.
- High in carbohydrates from flour and moderate fat from butter; they make a comforting side but are not low-carb.
- Store at room temperature up to 2 days in an airtight container; refrigerating will speed staling.
- Active dry yeast should be proofed at roughly 105–115°F; hotter liquids will inactivate the yeast and prevent rising.
My favorite aspect is how these rolls bring people together—there’s something about tearing into a warm roll that signals comfort. I’ve baked them for neighborhood potlucks, holiday feasts, and hurried weeknight dinners. One memorable evening, a power outage turned a planned dinner into a candlelit affair; the rolls, warmed on a grill, became the highlight of the night. Over time I’ve learned to trust visual cues—the dough’s tackiness, the shiny golden top—to decide when they’re done rather than relying solely on the oven timer.
Storage Tips
To keep rolls soft, store them in a sealed plastic container or a resealable bag at room temperature for up to 48 hours. If you want to keep them longer, cool completely then freeze in two layers of protection—plastic wrap followed by foil—so they don’t absorb odors. Reheat frozen rolls from thawed or straight from frozen: wrap in foil and warm at 300°F for 8–12 minutes, or microwave briefly under a damp paper towel for 10–15 seconds per roll for an instant soft texture. For best texture after freezing, finish with a quick brush of butter.
Ingredient Substitutions
If you need dairy-free rolls, replace milk with an equal amount of unsweetened plant milk (soy or oat gives similar tenderness) and use dairy-free margarine for brushing. For a slightly richer roll, swap 1/4 cup of the water for an extra 1/4 cup whole milk. To make the rolls whole wheat, substitute up to half the all-purpose flour with whole-wheat flour and add an extra 2–3 tablespoons of water to account for higher absorption; expect a denser crumb. If you only have instant yeast, reduce the activation time and add it directly to the flour with an extra 1–2 tablespoons of warm liquid to compensate.
Serving Suggestions
Serve warm rolls with a small dish of softened butter, herbed compound butter, or a savory honey-salted butter. They’re excellent alongside roasted chicken, pot roast, and creamy soups like tomato bisque or potato leek. For a party, split them and assemble mini sliders with sliced roast beef or roasted vegetables and a smear of mustard or aioli. Garnish with flaky sea salt or finely chopped fresh herbs for a simple yet elegant presentation.
Cultural Background
Soft dinner rolls are a staple in many Western home-cooking traditions, often appearing on Sunday tables and holiday spreads. Their roots trace back to enriched yeast breads made with milk and butter to create a tender crumb. Versions vary across regions—some lean toward denser milk buns, while others, like Parker House rolls, include folded edges and a richer butter glaze. This style of roll highlights comfort-food values: simple ingredients, approachable technique, and broad appeal for family meals.
Seasonal Adaptations
Adjust the flavor profile with seasonal ingredients: add 1 teaspoon cinnamon and 1/4 cup finely chopped dried apples for autumnal rolls, or fold in 2 tablespoons chopped fresh rosemary and a teaspoon lemon zest for spring and summer gatherings. For winter holidays, brush with a honey-butter glaze and sprinkle with chopped toasted pecans for crunch. These small seasonal swaps keep the basic method intact while aligning the rolls with seasonal flavors and menus.
Meal Prep Tips
To prepare ahead, complete the dough through shaping and place the shaped rolls in the baking dish tightly covered in the refrigerator overnight. Remove and allow to come to room temperature for 30–45 minutes before baking—this slow chill develops flavor and gives you fresh-baked rolls in the morning. For bulk meal prep, bake multiple pans and freeze fully cooled rolls in freezer bags. Reheat a stack of five to eight rolls in a foil-wrapped bundle to share with a meal or for lunches the next week.
These rolls are small acts of comfort that translate into memorable meals—easy enough for a weeknight, special enough for a holiday. Try making one batch and freezing half; you’ll be surprised how often those thawed rolls save a rushed dinner and draw the family together. Happy baking and pass one to a friend.
Pro Tips
Use a kitchen thermometer to bring the liquid to about 110°F for optimal yeast activation.
Keep the towel lightly damp during final proof to encourage a soft crust without sticking.
If dough feels too sticky, add flour in 1/4 cup increments until it pulls away from the bowl.
This nourishing irresistible dinner rolls recipe is sure to be a staple in your kitchen. Enjoy every moist, high protein slice — it is perfect for breakfast or as a wholesome snack any time.
Tags
Irresistible Dinner Rolls
This Irresistible Dinner Rolls recipe makes perfectly juicy, tender, and flavorful steak every time! Serve with potatoes and a side salad for an unforgettable dinner in under 30 minutes.
Ingredients
Dough
Finishing
Instructions
Prepare Wet Ingredients
Combine 1 cup warm water, 2 tablespoons melted butter, 1/2 cup milk, and 2 tablespoons honey. Heat to about 110°F using short microwave bursts or a low stovetop heat until warm to the touch but not hot.
Activate the Yeast
Pour the warm liquid into a mixing bowl and sprinkle 1 tablespoon active dry yeast over the surface. Stir briefly and let sit 5 minutes until foamy to confirm the yeast is active.
Mix and Knead the Dough
Add 3 1/2 cups all-purpose flour and 1 teaspoon fine sea salt. Use a dough hook on low to combine; add up to 4 cups flour if sticky. Knead 4–5 minutes until dough is smooth and slightly tacky.
First Dough Rise
Place dough ball in a well-greased bowl, cover with a damp towel, and let rise in a warm spot for 15 minutes to develop a light texture.
Shape Rolls and Final Rise
Punch down dough, divide into 15 pieces, shape into balls, and arrange in a greased 9 x 13-inch dish. Cover and let rise 15–20 minutes until slightly puffy.
Bake and Finish
Bake in a preheated 375°F oven for 18–22 minutes until golden. Brush with melted butter immediately after removing from the oven and serve warm.
Last Step: Please leave a rating and comment letting us know how you liked this recipe! This helps our business to thrive and continue providing free, high-quality recipes for you.
Nutrition
Did You Make This?
Leave a comment & rating below or tag
@royalrecipe on social media!
Categories:
You might also like...

5-Minute Air Fryer Roasted Garlic Magic That Wows
Learn how a 5-minute prep transforms a whole garlic bulb into silky, caramelized cloves in the air fryer. Perfect as a spread, mix-in, or flavor booster that elevates weeknight meals and party plates.

Air-Fried Pizza Rolls
Golden, melty pizza rolls made in the air fryer—crispy outside, gooey inside, ready in under 20 minutes. Perfect for snacks, parties, or quick dinners.

Air-Fried Rice Paper Noodle Rolls
Crispy, light rolls filled with vermicelli, tofu or shrimp, and crisp vegetables—air-fried for a healthier crunch and quick prep.
Did You Make This?
Leave a comment & rating below or tag @royalrecipe on social media!
Rate This Recipe
Share This Recipe
Enjoyed this recipe? Share it with friends and family, and don't forget to leave a review!
Comments (1)
This recipe looks amazing! Can't wait to try it.
Comments are stored locally in your browser. Server comments are displayed alongside your local comments.

Hi, I'm Riley!
What's Popular

30-Minute Meals!
Join to receive our email series which contains a round-up of some of our quick and easy family favorite recipes.