
Italian Herb and Cheese Bread

A warm, aromatic loaf studded with Italian herbs and melted cheeses, perfect for sandwiches, as a side, or torn warm from the oven.
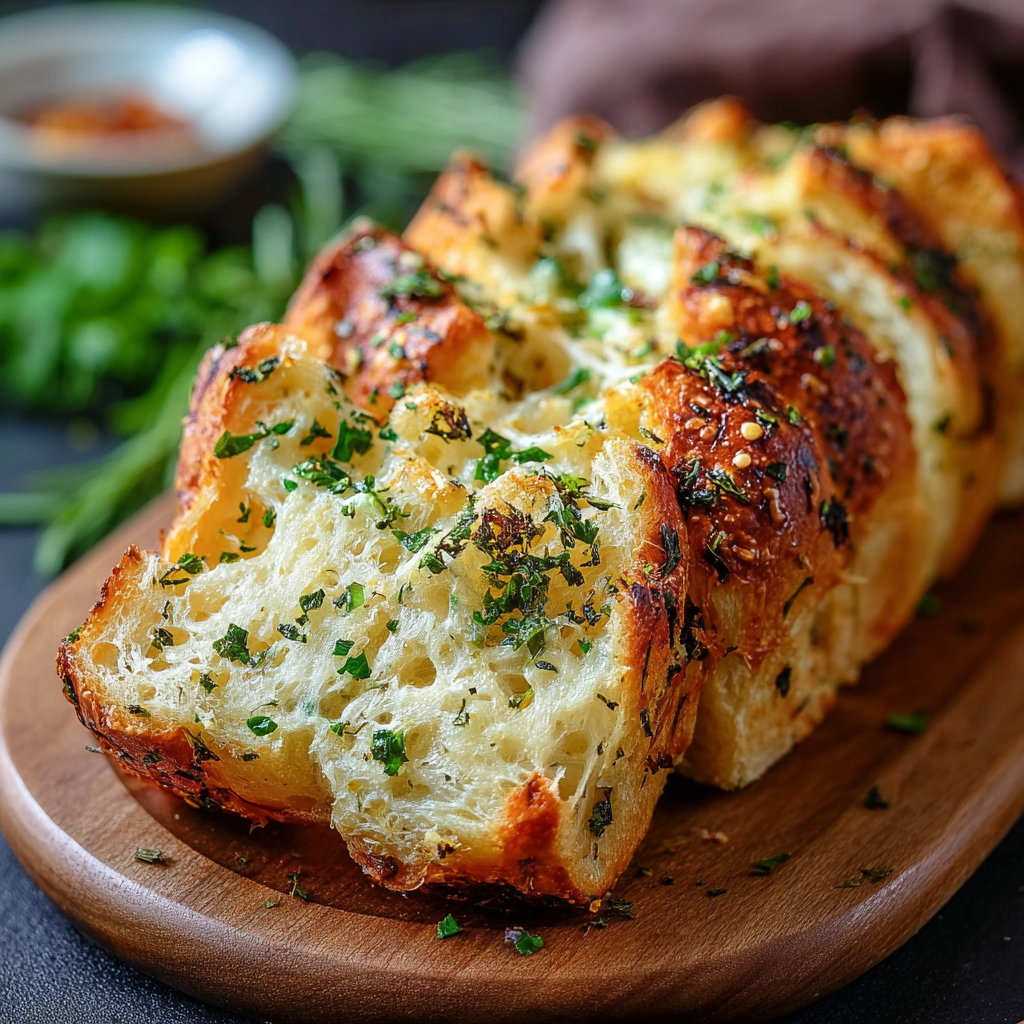
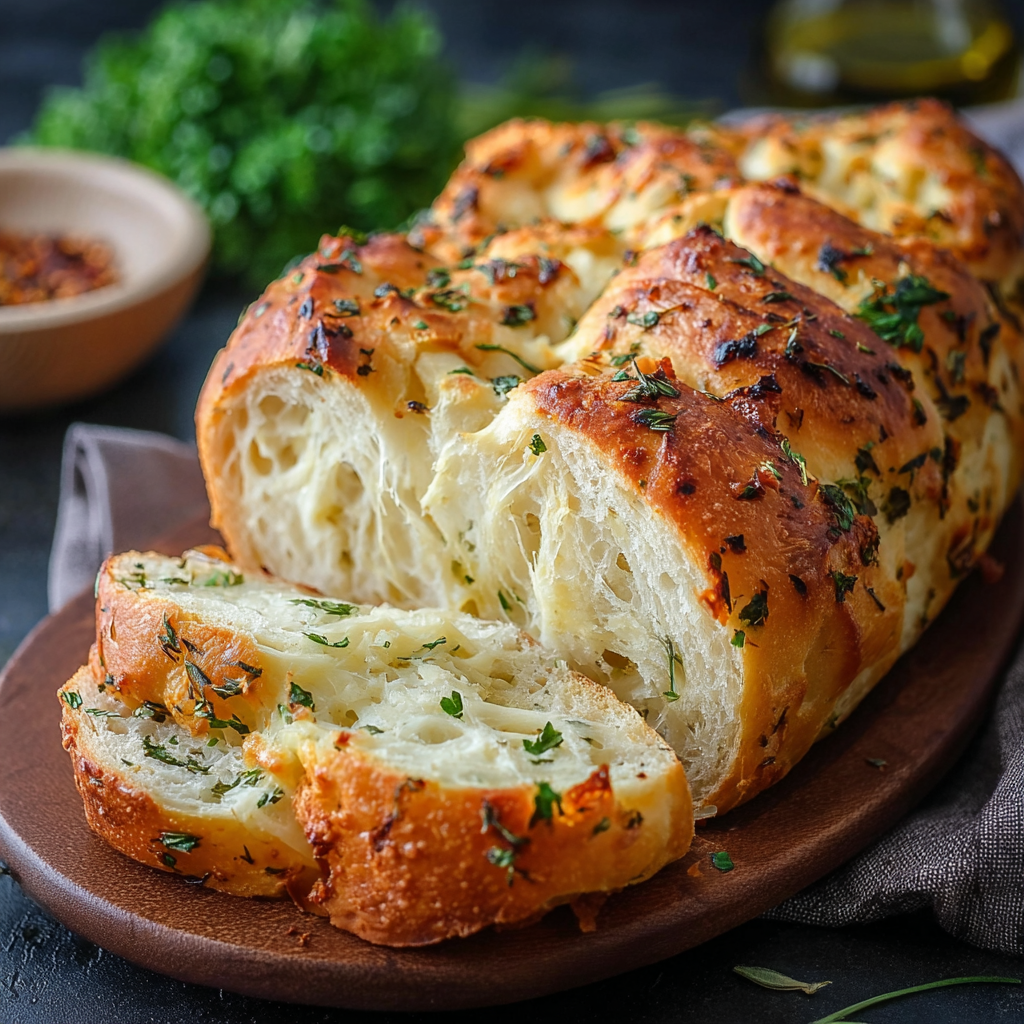
This Italian herb and cheese bread has been a kitchen favorite for years, a loaf that fills the house with an inviting aroma of toasted herbs and melting cheese. I stumbled upon this combination on a rainy afternoon while trying to use pantry staples and a bag of mozzarella begging to be used. The result was a golden loaf with a tender crumb, flecked with fragrant dried basil, oregano, thyme, and rosemary, that quickly became a weeknight staple for sandwiches and an easy centerpiece for soup nights.
What makes this loaf special is its simplicity and reliability. The dough is straightforward, forgiving for beginner bakers, and the combination of shredded mozzarella and grated Parmesan gives both creamy melt and a savory bite. I often bake this when friends drop in unexpectedly, because it is quick to mix, forgiving during rising, and always makes people ask for seconds. The texture is chewy with a thin crispy crust, and the scent of warm herbs makes it feel celebratory even on an ordinary Tuesday.
Why You'll Love This Recipe
- This loaf is ready with minimal active hands on time, most of the time is gentle rising, which means you can prep and get on with other tasks while the dough rests.
- It uses common pantry staples and dried herbs, so you do not need specialty ingredients to achieve an artisan style loaf.
- The combination of mozzarella and Parmesan gives a balance of melty texture and savory depth, making it ideal for sandwiches, dipping, or alongside salads.
- It is crowd pleasing, great for feeding a family or a small gathering, and slices beautifully for toast, bruschetta, or garlic bread upgrades.
- Make ahead friendly, you can shape and refrigerate the loaf for slow overnight fermentation, or freeze baked slices for quick reheating later.
In my experience, this loaf consistently wins over guests who claim they do not like bread with herbs. My partner always remarks that the aroma alone makes the meal feel special, and at holiday buffets it disappears faster than anything else on the table. Baking it has become a ritual for cozy nights when I want something comforting but not fussy.
Ingredients
- All purpose flour: Use 4 cups of unbleached all purpose flour for a reliable structure, or substitute part bread flour for more chew, measure by spooning into the cup and leveling for accuracy. King Arthur or Bob s Red Mill give consistent results.
- Active dry yeast: One packet, 2 1/4 teaspoons, is a convenient single use size. Proofing in warm water around 110 degrees F ensures an active rise, avoid water that is hotter than 120 degrees F so you do not kill the yeast.
- Warm water: 1 3/4 cups, warmed to about 110 degrees F. The liquid hydrates the flour, helps gluten form, and activates the yeast for a steady rise.
- Salt: One tablespoon of fine salt is essential for flavor and for controlling fermentation, do not omit it even when using salty cheeses.
- Sugar: One tablespoon gives the yeast an easy food source and enhances browning without making the loaf sweet.
- Dried Italian herbs: Two tablespoons of a blend such as basil, oregano, thyme, and rosemary adds aromatic depth. Use a good quality dried mix or make your own from single herb jars for a fresher profile.
- Mozzarella cheese: One cup shredded whole milk mozzarella gives melty strands and a soft texture, pre shredding at home from a block helps avoid anti caking agents that can affect melting.
- Parmesan cheese: 1/2 cup finely grated Parmesan adds savory umami and a pleasant nutty finish, use real Parmigiano Reggiano for best flavor.
- Extra flour for dusting: A little additional all purpose flour on your bench prevents sticking while shaping.
Instructions
Activate the yeast: Combine the warm water at around 110 degrees F with the sugar and yeast in a small bowl, stir gently and let sit 5 to 10 minutes until foamy. If the surface does not foam, the yeast may be old and should be replaced, since foaming is the visual cue that fermentation has begun. Mix the dough: In a large mixing bowl, whisk together the flour, salt, and dried Italian herbs so they are evenly distributed. Make a well and pour in the foamy yeast mixture, stirring with a wooden spoon until a shaggy dough forms. Add the shredded mozzarella and grated Parmesan during mixing so the cheese distributes through the dough. Knead until smooth: Turn the dough onto a lightly floured surface and knead for 8 to 10 minutes until the dough becomes smooth and slightly elastic, or use a stand mixer fitted with a dough hook on low for 6 to 8 minutes. The dough should be tacky but not sticky, adjust with a tablespoon of flour if too wet, or a splash of water if too dry. First rise: Place the dough in a lightly oiled bowl, cover with a towel or plastic wrap, and let rise in a warm draft free spot for 45 to 60 minutes until doubled in size. A good test is to press a finger into the dough, if the indentation slowly springs back, it is ready. Shape and second rise: Punch down the dough gently and shape it into a round or oblong loaf. Place on a parchment lined baking sheet dusted with flour, cover loosely and allow a second rise of 30 to 40 minutes until puffy but not fully doubled. Bake and cool: Preheat the oven to 375 degrees F. Score the top with a sharp knife for controlled expansion, then bake for 25 to 35 minutes until the crust is deep golden brown and the loaf sounds hollow when tapped. For an accurate check, the internal temperature should be about 190 to 200 degrees F. Cool on a rack for at least 20 minutes before slicing so the crumb sets and the cheese settles.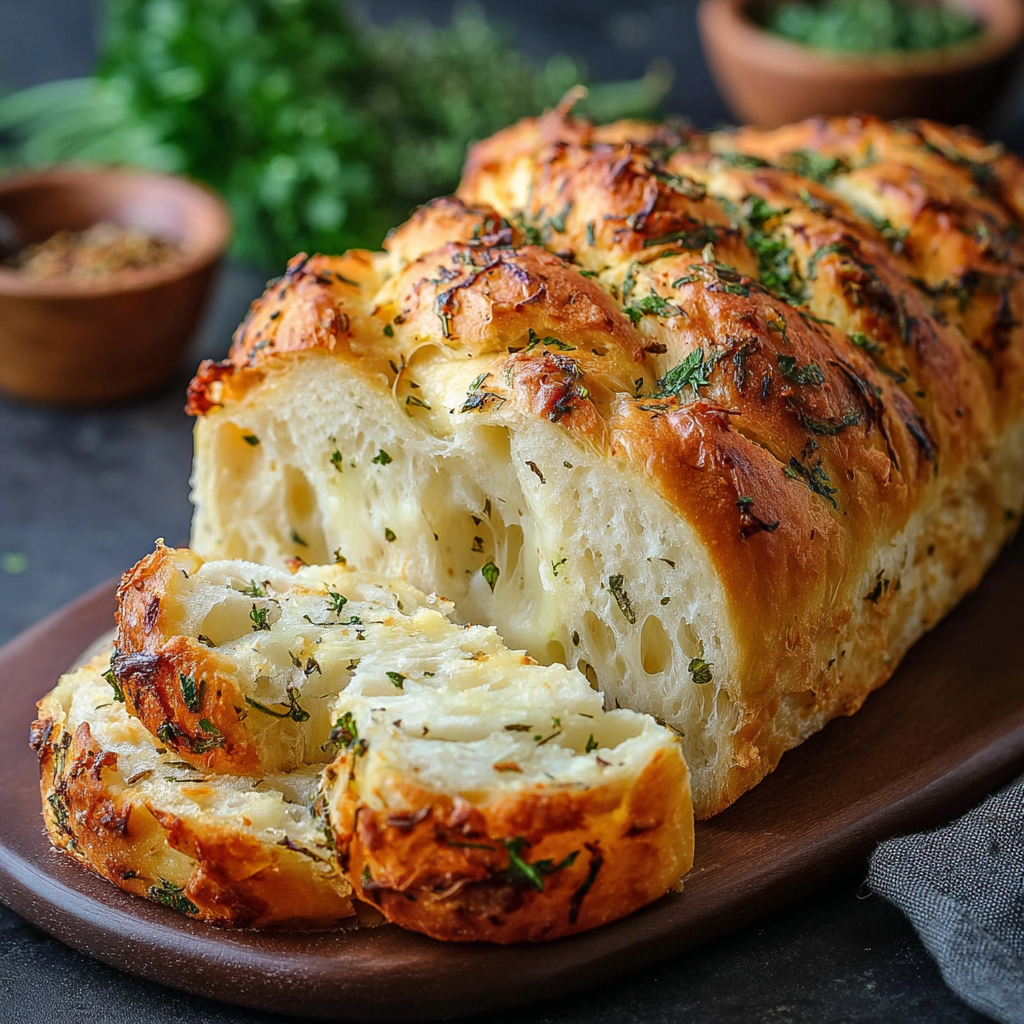
You Must Know
- This loaf freezes well for up to three months, slice before freezing for easy thawing and reheating in a toaster or oven.
- Store wrapped in a clean kitchen towel at room temperature for up to two days, beyond that refrigerate or freeze to maintain quality.
- The cheese will brown slightly while baking, which adds flavor, so a golden top is a positive indicator of readiness.
- Because the dough contains dairy, it is not dairy free or vegan, and the use of wheat flour means it is not gluten free.
My favorite thing about this loaf is the way it brings people together. I have served warm slices with olive oil and balsamic at small gatherings and watched it disappear within minutes. The cheese creates comforting pockets in each slice, and the dried herbs perfume the crumb so every bite feels intentional and homey. It is the sort of baking that rewards patience and invites conversation while it cools.
Storage Tips
To keep the loaf at peak quality, allow it to cool completely then wrap loosely in a clean tea towel for short term storage. For two to three days, keep it on the counter away from direct sunlight. For longer storage, slice and place in a freezer bag with air pressed out, where it will keep up to three months. Reheat frozen slices in a 350 degrees F oven for 8 to 12 minutes wrapped in foil if you prefer a softer crumb, or directly on a rack for a crisped exterior.
Ingredient Substitutions
If you want more chew swap one cup of the all purpose flour for bread flour, this will increase gluten and give a heartier texture. For a dairy free option use a plant based shredded cheese alternative and omit Parmesan, keeping in mind flavor and melt will differ. Fresh herbs may be used instead of dried, use three times the amount by volume, chop finely, and fold in at the end to preserve bright flavor. For a lower sodium loaf reduce salt to two thirds tablespoon and use a lower salt Parmesan.
Serving Suggestions
Serve warm slices with good extra virgin olive oil and a few drops of aged balsamic for dipping, or use it to make hearty grilled cheese with tomato soup for a cozy meal. It pairs well with pasta salads at buffets, or sliced thin for crostini topped with roasted vegetables. Garnish with extra grated Parmesan and a sprinkle of fresh parsley for presentation, and present on a wooden board with a bread knife to encourage sharing.
Cultural Background
While this loaf is not a traditional regional bread, it draws on Italian flavor principles where simple doughs are elevated by herbs and cheese. The idea of adding cheese into bread is common in many Italian family kitchens, where leftover cheeses are folded into dough to create a satisfying accompaniment to soups and antipasti. This version synthesizes those home cooking instincts into an easy to reproduce loaf for modern kitchens.
Seasonal Adaptations
In spring and summer swap dried herbs for a mix of fresh basil and thyme, folded in at the shaping stage to preserve vibrancy. In autumn add roasted garlic or a touch of finely chopped sun dried tomatoes for added depth. Around the holidays boost the Parmesan and add a teaspoon of fennel seeds for a warm aromatic twist that works well alongside roasted mains.
Meal Prep Tips
For convenient planning, shape the loaf and refrigerate it overnight on a parchment lined pan, covered, for a slow cold rise that develops flavor. In the morning bring it to room temperature and bake as directed. Alternatively, bake and then slice the loaf, freezing individual slices in small stacks separated by parchment for grab and go breakfasts or quick sandwich assembly during the week.
Share this loaf warm, and it will become part of your table conversation and kitchen repertoire. It is a simple way to bring the comforting flavors of Italy into everyday meals. Enjoy and make it your own with the herb and cheese combinations you love.
Pro Tips
Proof yeast in water at 110 degrees F until foamy to confirm yeast is active.
Knead until the dough is smooth and slightly elastic, it should pass the windowpane test when ready.
Cool the loaf for at least 20 minutes before slicing to allow the crumb to set.
This nourishing italian herb and cheese bread recipe is sure to be a staple in your kitchen. Enjoy every moist, high protein slice — it is perfect for breakfast or as a wholesome snack any time.
Tags
Italian Herb and Cheese Bread
This Italian Herb and Cheese Bread recipe makes perfectly juicy, tender, and flavorful steak every time! Serve with potatoes and a side salad for an unforgettable dinner in under 30 minutes.
Ingredients
Dough
Herbs and Cheese
Finishing
Instructions
Activate the yeast
Combine warm water at about 110 degrees F with sugar and yeast, stir and let sit 5 to 10 minutes until foamy.
Mix the dough
Whisk flour salt and dried herbs, add the foamy yeast mixture and stir until a shaggy dough forms, fold in cheeses so they distribute evenly.
Knead until smooth
Knead on a lightly floured surface for 8 to 10 minutes until smooth and elastic, or use a stand mixer with a dough hook for 6 to 8 minutes.
First rise
Place dough in a lightly oiled bowl cover and let rise in a warm spot 45 to 60 minutes until doubled in size.
Shape and second rise
Punch down shape into a round or oblong loaf place on a parchment lined baking sheet and let rise 30 to 40 minutes until puffy.
Bake and cool
Preheat oven to 375 degrees F score the top bake 25 to 35 minutes until golden and hollow sounding when tapped, cool on a rack 20 minutes before slicing.
Last Step: Please leave a rating and comment letting us know how you liked this recipe! This helps our business to thrive and continue providing free, high-quality recipes for you.
Nutrition
Did You Make This?
Leave a comment & rating below or tag
@royalrecipe on social media!
Categories:
You might also like...

5-Minute Air Fryer Roasted Garlic Magic That Wows
Learn how a 5-minute prep transforms a whole garlic bulb into silky, caramelized cloves in the air fryer. Perfect as a spread, mix-in, or flavor booster that elevates weeknight meals and party plates.

Air-Fried Pizza Rolls
Golden, melty pizza rolls made in the air fryer—crispy outside, gooey inside, ready in under 20 minutes. Perfect for snacks, parties, or quick dinners.

Air-Fried Rice Paper Noodle Rolls
Crispy, light rolls filled with vermicelli, tofu or shrimp, and crisp vegetables—air-fried for a healthier crunch and quick prep.
Did You Make This?
Leave a comment & rating below or tag @royalrecipe on social media!
Rate This Recipe
Share This Recipe
Enjoyed this recipe? Share it with friends and family, and don't forget to leave a review!
Comments (1)
This recipe looks amazing! Can't wait to try it.
Comments are stored locally in your browser. Server comments are displayed alongside your local comments.

Hi, I'm Riley!
What's Popular

30-Minute Meals!
Join to receive our email series which contains a round-up of some of our quick and easy family favorite recipes.