
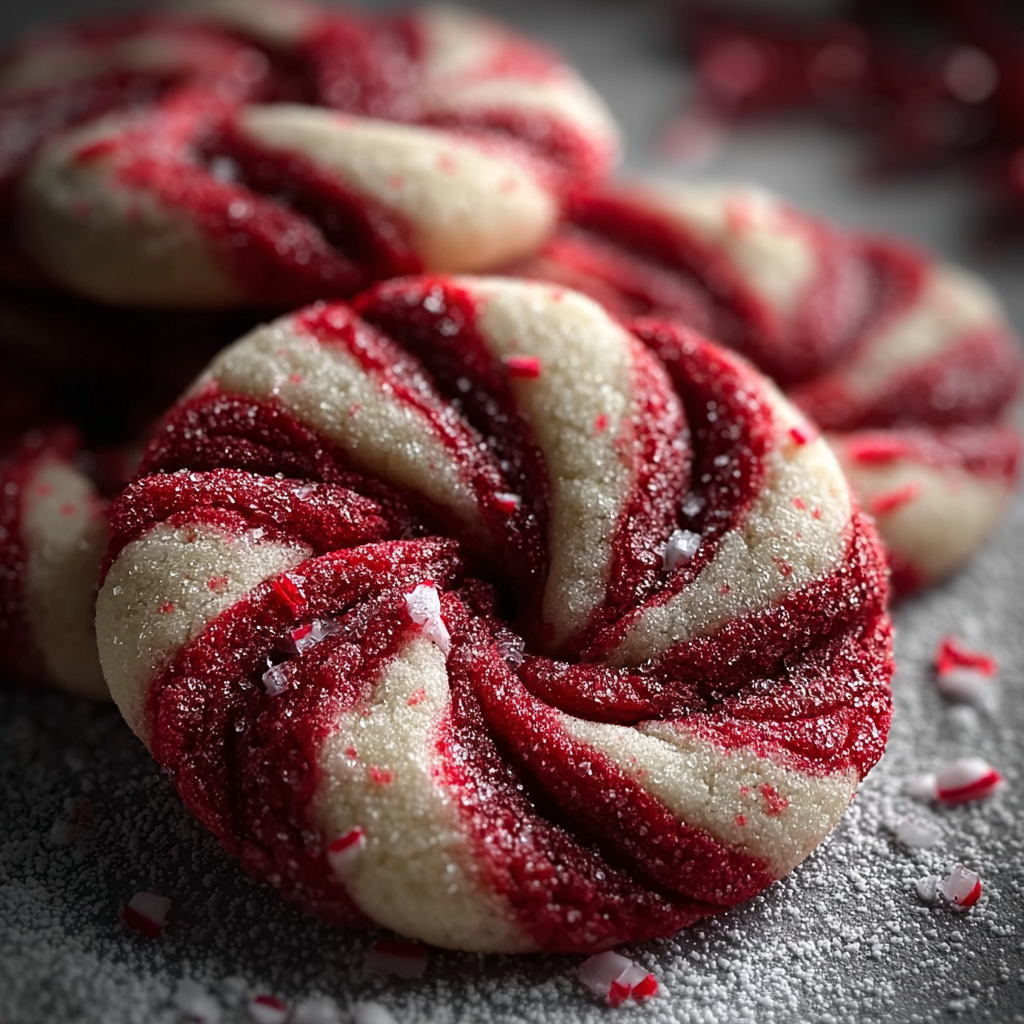
Magic of Candy Cane Cookies

Buttery, tender candy cane–shaped cookies with a bright peppermint finish — perfect for holiday sharing and easy to make with pantry staples.
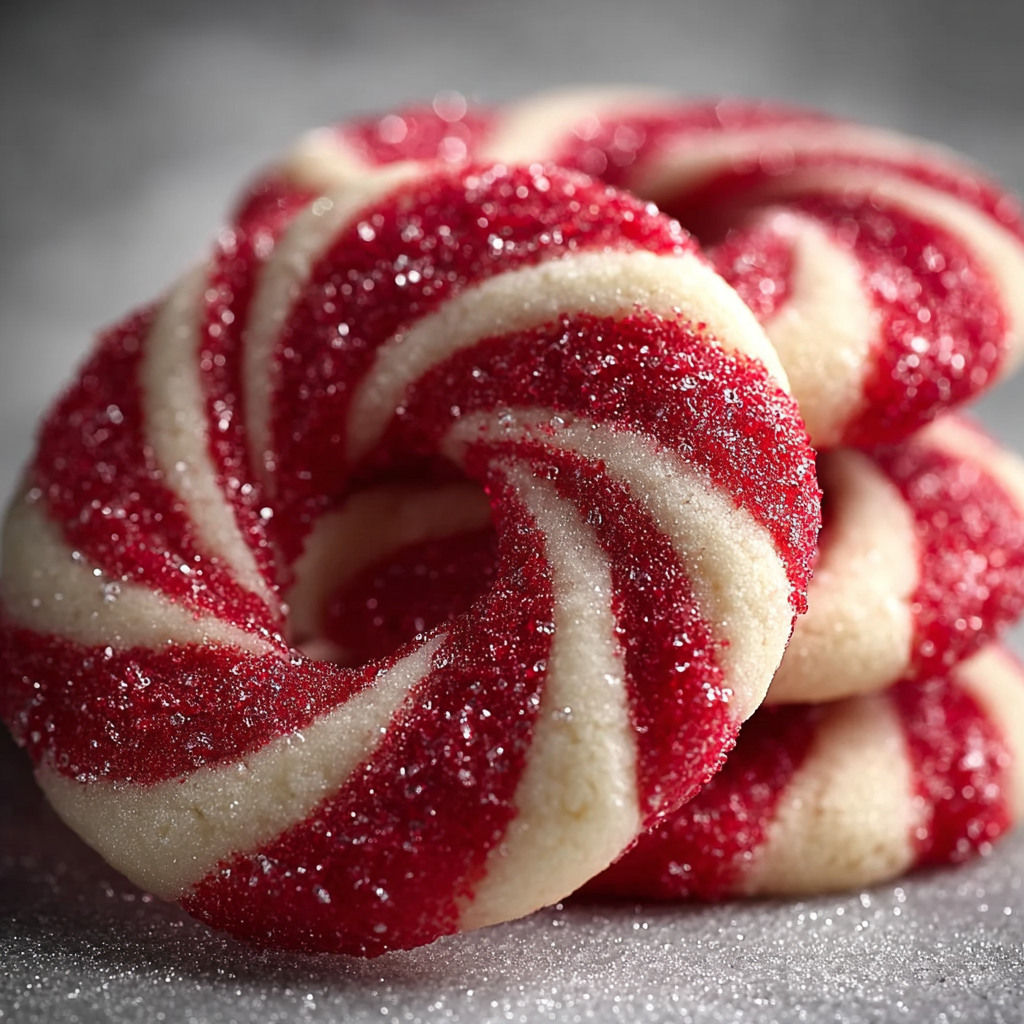
This recipe arrived in my kitchen one chilly December when I wanted something festive but small-batch to share with neighbors. The Magic of Candy Cane Cookies is exactly that: a simple, buttery dough that becomes delicate, slightly crisp-edged cookies flavored with peppermint and shaped into charming candy canes. I discovered this combination the year I wanted a project to make with my niece; she loved twisting the red and white ropes and I loved that the dough handled gently and predictably. The balance of powdered sugar and butter gives a melt-in-your-mouth bite, while the peppermint is lively without overpowering — the texture is tender inside with a subtle snap at the edges.
What makes this special for me is how the memories form while shaping them. One tray baked for a school fundraiser, another batch wrapped in parchment and tied with twine for a neighbor, and every time the aroma of vanilla and peppermint made people slow down. These cookies are forgiving: the dough is adaptable to small hands learning to shape, and the flavor invites variations from light mint to more intense candy-cane brightness when you increase the peppermint extract slightly. If you keep classic holiday music and a pot of tea nearby, this becomes less a task and more a ritual.
Why You'll Love This Recipe
- Short ingredient list using pantry staples: unsalted butter, powdered sugar, all-purpose flour, egg, and a touch of peppermint for that seasonal lift.
- Quick prep with a one-hour chill; active work time is about 20 minutes so it is perfect for a weekend baking session or an after-school activity.
- Make-ahead friendly: dough freezes well and shaped cookies can be baked from chilled for last-minute treats.
- Crowd-pleasing and visually charming: the candy cane shape delights both kids and adults at parties, cookie swaps, and gift boxes.
- Flexible for dietary tweaks and flavor swaps — you can reduce peppermint for a milder taste or add finely chopped chocolate for contrast.
- Bakes quickly in one small batch so it is ideal for trying again with color variations or different extracts.
I still remember my niece’s first perfect twist, eyes wide when red and white ropes became a candy cane. Family members always ask for these at holiday gatherings because they travel well, and friends tell me they appreciate a cookie that feels handcrafted without needing specialist equipment. Baking these became a small tradition where conversation and dough rolling happen at the same time.
Ingredients
- Unsalted butter (1 cup): Use high-quality butter such as Plugr or Kerrygold for the best flavor; softened to room temperature so it creams smoothly with the powdered sugar and creates a tender crumb.
- Powdered sugar (1 cup): Also called confectioners sugar; it dissolves into the butter for a fine, melt-away texture rather than a granular bite.
- Large egg (1): Adds structure and moisture; room temperature egg incorporates more easily and prevents the dough from tightening up.
- Vanilla extract (1 teaspoon): Pure vanilla will round out the peppermint and give depth; avoid imitation for best aromatic lift.
- Peppermint extract (1/2 teaspoon): Potent, so a little goes a long way; start with 1/2 teaspoon and increase to 3/4 teaspoon if you prefer a stronger mint punch.
- All-purpose flour (2 1/2 cups): Provides structure; measure by spooning into the cup and leveling for accuracy. King Arthur or Bob's Red Mill work well.
- Salt (1/2 teaspoon): Balances sweetness and lifts flavor — use fine sea salt or table salt.
- Red gel food coloring: Gel gives a vivid red without adding liquid; a small pea-sized amount is usually enough to get a bright stripe.
Instructions
Cream the butter and sugar: In a large bowl, beat 1 cup softened unsalted butter and 1 cup powdered sugar with an electric mixer on medium-high for 2 to 3 minutes until the mixture is pale and fluffy. You want it light — this traps air and contributes to tender cookies. Scrape the bowl once so everything is evenly aerated. Add the egg and extracts: Mix in 1 large room-temperature egg, 1 teaspoon vanilla extract, and 1/2 teaspoon peppermint extract on low speed until combined. If the mixture looks curdled, beat just until smooth; overmixing develops gluten later when flour is added. Combine dry ingredients: Whisk together 2 1/2 cups all-purpose flour and 1/2 teaspoon salt in a separate bowl. Gradually add the flour mixture to the wet ingredients on low speed, mixing until just combined. The dough should come together and be soft but not sticky. If it feels too sticky, add 1 tablespoon additional flour at a time. Divide and color: Split the dough into two equal portions. Add a small pea-sized amount of red gel food coloring to one half and knead gently until the color is even. Avoid overworking the dough; a few turns is enough to distribute the color. Chill the dough: Wrap each portion tightly in plastic wrap and refrigerate for 1 hour. Chilling firms the fat so the ropes hold their shape when twisted and baked. You can also chill overnight for convenience. Preheat and shape: Preheat the oven to 350°F (180°C). Roll equal-sized pieces of red and white dough into ropes about 1/4 inch thick. Lay the ropes side-by-side, press gently, and twist them together like a two-strand rope. Curve the top to form the candy cane hook and place on a parchment-lined baking sheet, leaving 1 inch of space. Bake and cool: Bake for 8 to 10 minutes until the edges are just set and the bottoms are lightly golden. Remove from the oven and allow the cookies to cool on the tray for 5 minutes before transferring to a wire rack to cool completely.
You Must Know
- Dough chills for firm shaping and bakes quickly — plan for a 1-hour chill to avoid spreading.
- These cookies freeze well: wrap shaped or baked cookies in airtight containers for up to 3 months.
- Contains dairy, egg, and wheat; not suitable for vegan or gluten-free diets without substitutions.
- High in sugar and butter — serve in moderation and store at room temperature up to 3 days or refrigerate up to 1 week.
My favorite thing about these cookies is how they instantly create a festive scene: the bright red stripe, the peppermint aroma, and the tiny imperfections that prove hand-shaped charm. Over the years I learned that a light hand when twisting keeps the stripes distinct and that slightly thinner ropes give a more delicate cookie that snaps just right.
Storage Tips
Store baked cookies in an airtight container at room temperature for up to 3 days to keep edges crisp and centers tender. For longer storage, freeze cooled baked cookies in a single layer on a sheet pan, then transfer to a freezer-safe container or zip-top bag for up to 3 months. To freeze unbaked shaped cookies, place the tray in the freezer until firm, then pack in layers with parchment paper between and bake from frozen, adding 1 to 2 minutes to the baking time. For thawing, move frozen baked cookies to the counter for 30 minutes; re-crisp in a 300°F oven for 3 to 4 minutes if needed.
Ingredient Substitutions
To make dairy-free, swap the butter for a firm plant-based butter at a 1:1 ratio — choose a brand formulated for baking to mimic solid fat behavior. For egg replacement, try using 3 tablespoons aquafaba (chickpea brine) whipped slightly as a substitute; the texture will be a touch less tender. To make gluten-free, use a cup-for-cup gluten-free flour blend that includes xanthan gum; the cookies will be slightly more crumbly. If you prefer a milder mint flavor, reduce peppermint extract to 1/4 teaspoon, or swap peppermint for almond extract for an entirely different flavor profile.
Serving Suggestions
These cookies are delightful on a holiday platter alongside gingerbread and shortbread. Present them in cellophane bags tied with red ribbon for gifts, or layer them in a tin with parchment. Pair with hot chocolate, peppermint tea, or a lightly sweetened coffee. For a dessert board, scatter cookies with chocolate-dipped pretzels, candied nuts, and small candies to contrast textures and flavors. Garnish cookie boxes with a sprig of evergreen for a festive touch.
Cultural Background
Candy cane shapes evoke European and American holiday traditions; while the exact origin is debated, the striped motif and peppermint flavor became strongly associated with Christmas in the 19th and 20th centuries. These cookies borrow the visual language of the candy cane and translate it into a classic cookie format, blending nostalgia with baking technique. The combination of mint and buttery dough mirrors the pairing found in many regional winter treats where mint signifies freshness in heavy, sweet confections.
Seasonal Adaptations
In colder months, amplify the peppermint to 3/4 teaspoon for a bolder winter kick. For Valentine’s Day, swap red for pink gel coloring and shape into small twisted hearts rather than hooks. During summer holiday events, exchange peppermint for lemon extract and use yellow gel color for bright, seasonal cookies. Add finely chopped toasted nuts or a sprinkling of coarse sugar before baking for textural variation tailored to the occasion.
Meal Prep Tips
Prepare dough over the weekend and portion it into labeled logs wrapped in plastic to keep in the refrigerator for up to 2 days or freeze for up to 3 months. Thaw overnight in the fridge before rolling. For efficient shaping on baking day, cut logs into equal lengths, roll a few at a time, and bake on multiple sheets in two racks, rotating positions mid-bake for even color. Pack baked cookies in airtight containers lined with parchment to preserve shape and prevent sticking.
These candy cane cookies are little ambassadors of holiday cheer: simple to make, full of personality, and incredibly giftable. Try the basic version once, then play with colors and flavors to make the recipe your own.
Pro Tips
Use gel food coloring to avoid adding extra liquid to the dough which can change texture.
Chill the dough for at least 1 hour so ropes keep their shape while baking.
Roll ropes thin (about 1/4 inch) for a delicate, crisp cookie; thicker ropes yield more tender centers.
This nourishing magic of candy cane cookies recipe is sure to be a staple in your kitchen. Enjoy every moist, high protein slice — it is perfect for breakfast or as a wholesome snack any time.
FAQs about Recipes
Can I freeze the dough or shaped cookies?
Yes. You can freeze shaped but unbaked cookies on a tray until firm, then transfer to a bag and bake from frozen, adding 1 to 2 minutes to the bake time.
Why should my egg and butter be room temperature?
Use room-temperature egg and softened butter for best integration; cold ingredients will make the dough harder to combine and may cause cracking when shaping.
Tags
Magic of Candy Cane Cookies
This Magic of Candy Cane Cookies recipe makes perfectly juicy, tender, and flavorful steak every time! Serve with potatoes and a side salad for an unforgettable dinner in under 30 minutes.
Ingredients
Dough
Instructions
Cream butter and sugar
Beat 1 cup softened unsalted butter and 1 cup powdered sugar until smooth and fluffy, about 2 to 3 minutes.
Add egg and extracts
Mix in 1 large room-temperature egg, 1 teaspoon vanilla extract, and 1/2 teaspoon peppermint extract until combined.
Combine dry ingredients
Whisk together 2 1/2 cups all-purpose flour and 1/2 teaspoon salt. Gradually add to wet mixture and mix until just combined.
Divide and color
Split dough in half and color one half with red gel food coloring, kneading gently to distribute color evenly.
Chill the dough
Wrap each dough portion in plastic and chill in the refrigerator for 1 hour to firm up.
Preheat oven and shape
Preheat oven to 350°F (180°C). Roll equal pieces of red and white dough into ropes, twist together, and shape into candy canes.
Bake and cool
Place on a parchment-lined baking sheet and bake 8 to 10 minutes, or until just set. Cool on trays before transferring to a wire rack.
Last Step: Please leave a rating and comment letting us know how you liked this recipe! This helps our business to thrive and continue providing free, high-quality recipes for you.
Nutrition
Did You Make This?
Leave a comment & rating below or tag
@royalrecipe on social media!
Categories:
You might also like...

5-Minute Air Fryer Roasted Garlic Magic That Wows
Learn how a 5-minute prep transforms a whole garlic bulb into silky, caramelized cloves in the air fryer. Perfect as a spread, mix-in, or flavor booster that elevates weeknight meals and party plates.

Air-Fried Pizza Rolls
Golden, melty pizza rolls made in the air fryer—crispy outside, gooey inside, ready in under 20 minutes. Perfect for snacks, parties, or quick dinners.

Air-Fried Rice Paper Noodle Rolls
Crispy, light rolls filled with vermicelli, tofu or shrimp, and crisp vegetables—air-fried for a healthier crunch and quick prep.
Did You Make This?
Leave a comment & rating below or tag @royalrecipe on social media!
Rate This Recipe
Share This Recipe
Enjoyed this recipe? Share it with friends and family, and don't forget to leave a review!
Comments (1)
This recipe looks amazing! Can't wait to try it.
Comments are stored locally in your browser. Server comments are displayed alongside your local comments.

Hi, I'm Riley!
What's Popular

30-Minute Meals!
Join to receive our email series which contains a round-up of some of our quick and easy family favorite recipes.