
Mint Brownies (Fudgy Peppermint Chocolate Squares)

Fudgy, mint-kissed brownies with a deep chocolate backbone and a cool peppermint finish — an easy, crowd-pleasing treat for holidays and everyday indulgence.

Why You'll Love This Recipe
- Ready in under 40 minutes from start to finish: about 15 minutes active prep and roughly 20–25 minutes in the oven, making it ideal for last-minute dessert plans.
- Uses pantry staples like cocoa powder, all-purpose flour, and brown sugar — no need for fancy equipment or obscure ingredients.
- One-bowl mixing for minimal cleanup; melted butter replaces creaming so you avoid extra dishes and still get a glossy, fudgy crumb.
- Flexible and forgiving: add chocolate chunks for texture, a splash of espresso to deepen the chocolate, or skip the espresso for a purer mint profile.
- Make-ahead friendly: the brownies hold up well stored at room temperature for a day and freeze beautifully for gifting or meal prep.
- Great for crowds and seasonal baking — easily doubled in a 9x13 pan or scaled down for a smaller tin without losing the fudgy texture.
My family always greets these with enthusiasm. I remember bringing a pan to a potluck where people assumed they were store-bought; when I told them they were made from a single bowl, jaws dropped. Over the years I’ve learned small adjustments — like using room-temperature eggs and folding in half the chips before baking — that consistently yield glossy tops and moist centers.
Ingredients
- Salted butter — 1/2 cup (1 stick), melted: Using salted butter adds a subtle savory lift that balances the sweetness; if you only have unsalted, add a pinch (about 1/8 teaspoon) of salt. Melt it gently to avoid hot spots.
- Light brown sugar — 3/4 cup + 1 tablespoon: The molasses in light brown sugar keeps the brownies moist and gives a slight caramel depth. Pack it lightly into the measuring cup for accuracy.
- Large eggs — 2, at room temperature: Room-temperature eggs emulsify better with melted butter, leading to a glossy, even crumb. If you forget to bring them to room temp, place them in warm water for 5 minutes.
- Peppermint extract — 3/4 teaspoon: High-quality extract is key here. Start with 3/4 teaspoon; if you prefer a stronger mint note, add up to 1 teaspoon but taste carefully — peppermint can overpower the chocolate.
- All-purpose flour — 3/4 cup: Measure by spooning into the cup and leveling off to avoid dense results. This amount keeps the brownies tender rather than cakey.
- Cocoa powder — 3/4 cup (unsweetened): Use Dutch-process cocoa for a darker, mellower chocolate flavor or natural cocoa for a brighter, more acidic note; either works well.
- Espresso powder — 3/4 teaspoon (optional): A small amount enhances the chocolate without adding coffee flavor. Omit if you want just peppermint and chocolate.
- Cornstarch — 1 tablespoon: Adds a soft, slightly chewy texture and helps the brownies stay fudgy rather than rising into cake.
- Baking powder — 1/2 teaspoon: A tiny lift prevents the brownies from becoming too dense while preserving a fudgy center.
- Chocolate chips or chunks — 1/2 cup: Use semisweet or bittersweet chips for balance; chop a bar into chunks if you prefer pockets of molten chocolate.
Instructions
Prep and preheat: Preheat the oven to 350°F. Line an 8x8-inch baking pan with parchment, leaving an overhang for easy removal, and lightly grease the parchment with a little melted butter. This ensures clean edges and easy lifting when the brownies cool. Mix wet ingredients: In a large mixing bowl, whisk together the melted butter and light brown sugar until smooth and glossy. Add the eggs one at a time, whisking well after each addition to fully emulsify and create a satin-like batter. Stir in the peppermint extract; this is when the mint aroma really brightens the mixture. If the butter was very hot, let it cool slightly before adding the eggs to prevent curdling. Combine dry ingredients: In a separate bowl, sift together the all-purpose flour, unsweetened cocoa powder, cornstarch, baking powder, and espresso powder (if using). Sifting removes lumps and ensures even distribution — cocoa especially benefits from sifting to avoid pockets of bitterness. Fold and add chocolate: Gently fold the dry ingredients into the wet mixture with a spatula until just combined; avoid overmixing. Fold in half of the chocolate chips to distribute them through the batter, then pour into the prepared pan and sprinkle the remaining chips on top for a pretty finish and extra melty pockets. Bake and test: Bake at 350°F for 20–25 minutes. Begin checking at 18 minutes: the edges should be set and slightly pulling away from the pan, while the center remains soft but not liquid. A toothpick inserted near the center should come out with a few moist crumbs — not wet batter. Tent with foil if the top browns too quickly. Cool and slice: Cool the pan on a wire rack for at least 20 minutes before lifting the brownies out using the parchment overhang. For cleaner slices, chill the pan for 30 minutes then cut with a sharp knife warmed under hot water and wiped dry between cuts.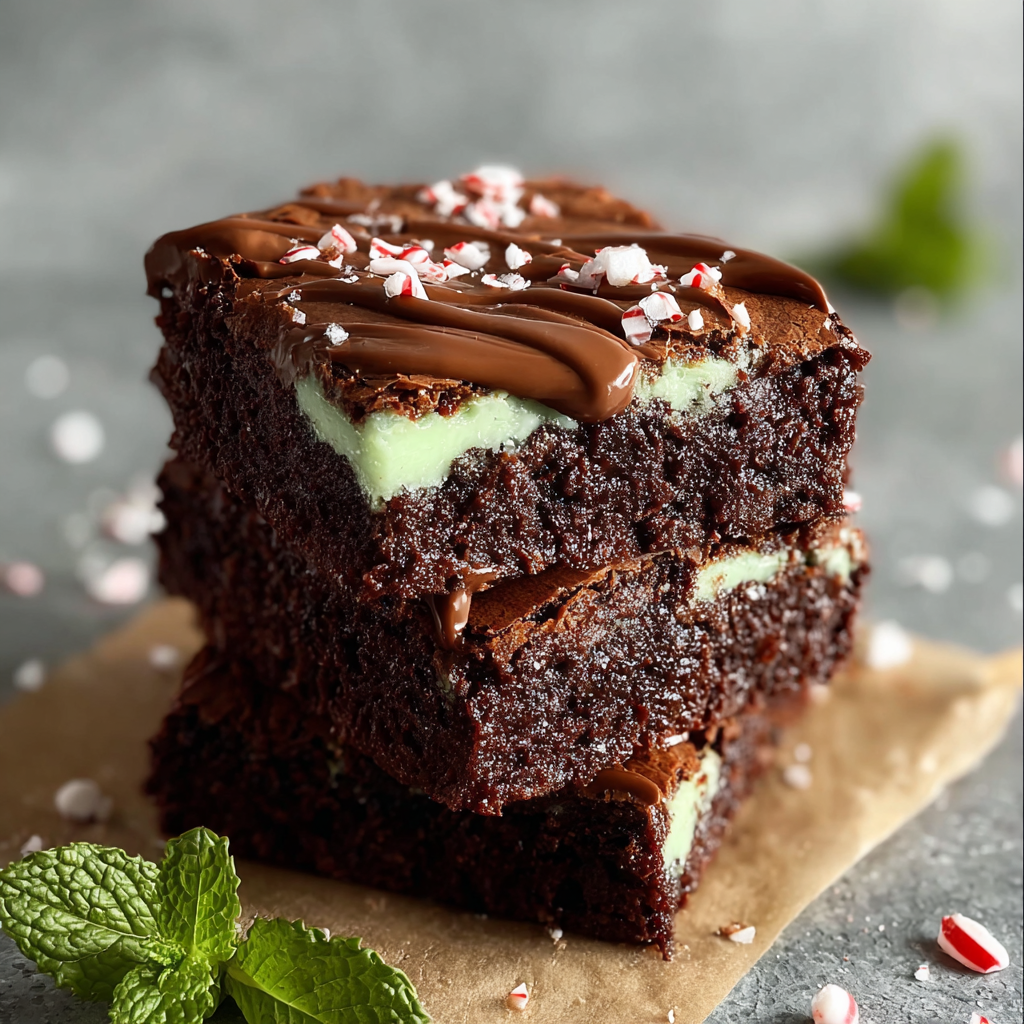
You Must Know
- Texture: These squares are intentionally fudgy — a moist center with a slightly crackly top. Overbaking will produce a cakier texture.
- Storage: Store at room temperature in an airtight container for up to 3 days, or refrigerate up to a week for firmer slices.
- Freezing: Freeze wrapped slices for up to 3 months; thaw at room temperature or warm briefly in the microwave.
- Allergens: Contains eggs, dairy, and gluten. Use appropriate substitutes for dietary needs.
- Serving size: The recipe yields about 9 generous squares; cut smaller for more servings.
My favorite part is how a little peppermint extract can transform a dense chocolate bar into something lively and refined. I often make a tray for holiday hosting and another for an after-dinner treat — the immediate feedback is always the same: a delighted pause and then, “More, please.”

Storage Tips
Store cooled brownies in an airtight container at room temperature for up to three days; layer them between sheets of parchment to prevent sticking. For longer storage, wrap individual squares tightly in plastic wrap and place in a freezer-safe bag for up to three months. Thaw overnight in the refrigerator or at room temperature for an hour. To revive a slightly dry brownie, warm it in the microwave for 8–10 seconds or place a slice in a 300°F oven for 4–5 minutes — the texture will soften and the chocolate will re-melt.
Ingredient Substitutions
If you need to swap ingredients, use unsalted butter plus 1/8 teaspoon salt in place of salted butter. For a dairy-free option, substitute plant-based butter and use dairy-free chocolate chips — the texture will be slightly different but still rich. To make them gluten-free, replace the all-purpose flour with a 1:1 gluten-free blend that contains xanthan gum. If you prefer a less pronounced mint flavor, reduce the peppermint to 1/2 teaspoon; for a more intense finish, increase to 1 teaspoon but add cautiously.
Serving Suggestions
Serve these squares warm with a scoop of vanilla ice cream and a drizzle of hot fudge for an indulgent dessert, or cut into small bite-sized pieces for a party platter alongside shortbread and citrus cookies. Garnish with fresh mint leaves or a light dusting of powdered sugar for presentation. For a grown-up twist, offer a small carafe of coffee flavored with a cinnamon stick to complement the mint and chocolate.
Cultural Background
Brownies are an American classic, believed to have originated in the late 19th or early 20th century as an adaptation of chocolate cakes and confections. The mint-chocolate pairing gained popularity with the rise of peppermint candies and holiday treats; over time it became a staple in seasonal baking. This version blends classic brownie technique with a flavor profile often associated with winter holidays, but the combination is timeless and enjoyed year-round.
Seasonal Adaptations
For winter holidays, fold in chopped candy canes near the end of baking or sprinkle crushed candy on top after they come out of the oven for a festive crunch. In summer, swap peppermint extract for orange oil and add orange zest for a bright citrus twist. For St. Patrick’s Day, add a few drops of green food coloring or sandwich the cooled brownies with a thin layer of mint-flavored buttercream.
Meal Prep Tips
Make a double batch and freeze portions for quick dessert options during busy weeks. Bake, cool, then cut into portions and freeze flat on a sheet pan before transferring to a bag — this prevents sticking. Thaw individual squares overnight in the fridge and warm for 10–15 seconds in the microwave for a freshly-baked experience. Label bags with date and portion size for easy rotation.
These mint brownies have become a small obsession in my kitchen for their ease and reliable crowd-pleasing flavor. Whether you make them for a casual coffee break or a holiday table, they are forgiving, fast, and delicious — give them a try and make small tweaks until they match your personal ideal of minty chocolate heaven.
Pro Tips
Use room-temperature eggs so they emulsify easily with the melted butter and sugar, producing a glossy batter.
Sift cocoa powder and dry ingredients to avoid lumps and ensure even distribution — this improves texture.
Chill the brownies for cleaner slices; run a sharp knife under hot water and dry it between cuts for neat edges.
If you prefer a more pronounced chocolate flavor, add 1/4 teaspoon espresso powder even if you don't want coffee notes — it deepens chocolate.
To freshen slightly stale brownies, warm in the microwave for 8–12 seconds or in a 300°F oven for 4–6 minutes.
This nourishing mint brownies (fudgy peppermint chocolate squares) recipe is sure to be a staple in your kitchen. Enjoy every moist, high protein slice — it is perfect for breakfast or as a wholesome snack any time.
FAQs about Recipes
How do I know when the brownies are done?
Check with a toothpick inserted near the center — it should come out with a few moist crumbs but not wet batter. Edges should be set and slightly pulling from the pan.
How should I store leftovers?
Store cooled brownies in an airtight container at room temperature for up to 3 days or freeze for up to 3 months.
Tags
Mint Brownies (Fudgy Peppermint Chocolate Squares)
This Mint Brownies (Fudgy Peppermint Chocolate Squares) recipe makes perfectly juicy, tender, and flavorful steak every time! Serve with potatoes and a side salad for an unforgettable dinner in under 30 minutes.
Ingredients
Brownie Base
Instructions
Preheat and prepare pan
Preheat oven to 350°F. Line an 8x8-inch baking pan with parchment paper and lightly grease. This ensures easy removal and clean edges.
Whisk wet ingredients
Whisk the melted butter with the light brown sugar until smooth. Add eggs one at a time, mixing thoroughly after each. Stir in peppermint extract and allow mixture to rest for a minute.
Sift and combine dry ingredients
Sift together flour, cocoa powder, cornstarch, baking powder, and espresso powder (if using) to remove lumps and evenly distribute leavening.
Fold batter and add chips
Gently fold the dry ingredients into the wet until just combined. Fold in half the chocolate chips, pour batter into the pan, and sprinkle remaining chips on top.
Bake and cool
Bake 20–25 minutes at 350°F. Edges should be set and center slightly soft; a toothpick will show moist crumbs. Cool in pan 20 minutes, then lift out with parchment and cool before slicing.
Last Step: Please leave a rating and comment letting us know how you liked this recipe! This helps our business to thrive and continue providing free, high-quality recipes for you.
Nutrition
Did You Make This?
Leave a comment & rating below or tag
@royalrecipe on social media!
Categories:
You might also like...

5-Minute Air Fryer Roasted Garlic Magic That Wows
Learn how a 5-minute prep transforms a whole garlic bulb into silky, caramelized cloves in the air fryer. Perfect as a spread, mix-in, or flavor booster that elevates weeknight meals and party plates.

Air-Fried Pizza Rolls
Golden, melty pizza rolls made in the air fryer—crispy outside, gooey inside, ready in under 20 minutes. Perfect for snacks, parties, or quick dinners.

Air-Fried Rice Paper Noodle Rolls
Crispy, light rolls filled with vermicelli, tofu or shrimp, and crisp vegetables—air-fried for a healthier crunch and quick prep.
Did You Make This?
Leave a comment & rating below or tag @royalrecipe on social media!
Rate This Recipe
Share This Recipe
Enjoyed this recipe? Share it with friends and family, and don't forget to leave a review!
Comments (1)
This recipe looks amazing! Can't wait to try it.
Comments are stored locally in your browser. Server comments are displayed alongside your local comments.

Hi, I'm Riley!
What's Popular

30-Minute Meals!
Join to receive our email series which contains a round-up of some of our quick and easy family favorite recipes.