
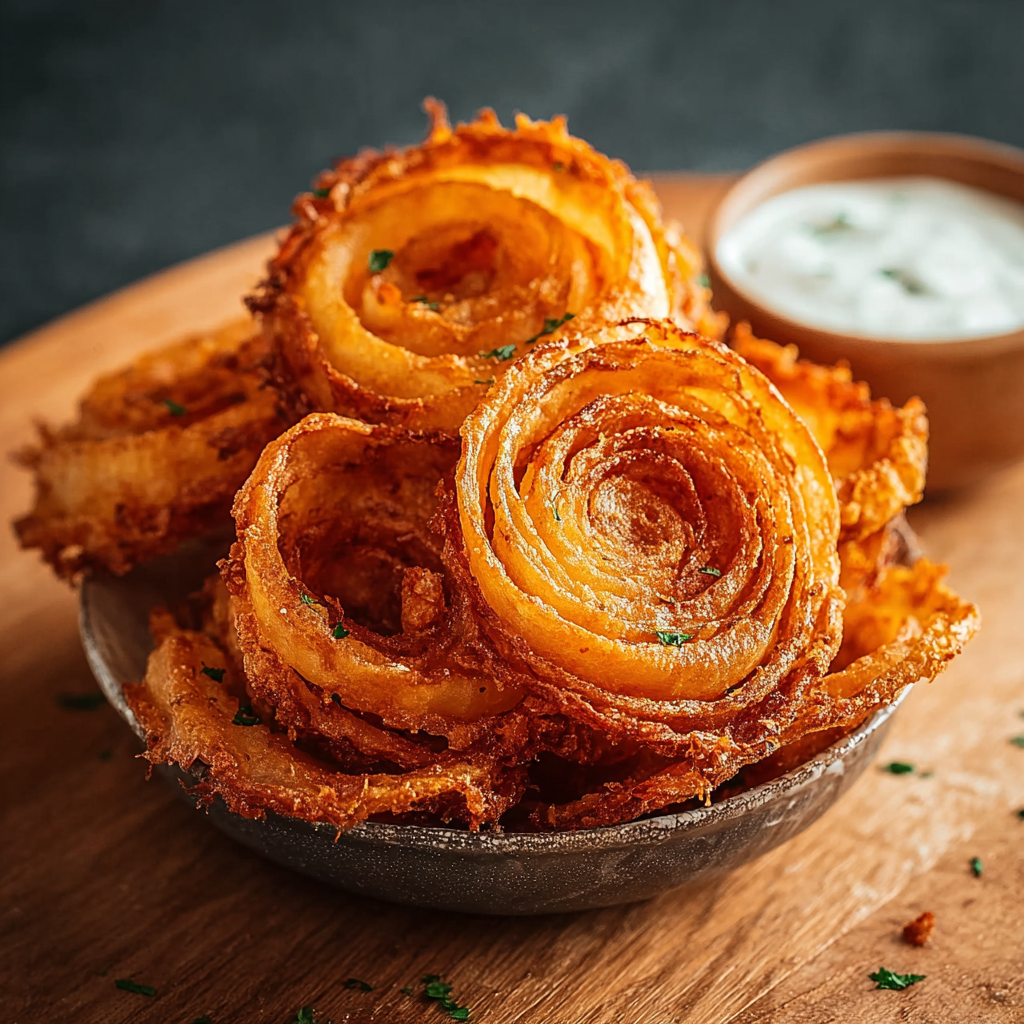
Onion Ring Chips

Extra-crispy onion ring chips coated in seasoned flour and panko for a crunchy, irresistible snack. Perfect for sharing or serving alongside burgers and dips.
Why You'll Love This Recipe
- Ultra-crispy texture from a double-coating method — seasoned flour, tangy buttermilk, then panko — delivers the satisfying crunch of a chip with the sweet bite of onion.
- Quick to prepare: about 20 minutes active prep and 15 minutes frying time, so you can have hot chips ready in roughly 35 minutes.
- Uses common pantry staples — all-purpose flour, paprika, garlic powder, and panko — no specialty ingredients required.
- Make-ahead friendly: slice onions in advance and store in the fridge; final dredging and frying take minutes, perfect for entertaining.
- Versatile for pairing: serve with ketchup, spicy mayo, ranch, or a smoky barbecue dip — a crowd-pleasing finger food for parties or casual dinners.
- Customizable spice level: add cayenne or chili powder for heat, or swap panko for cornflakes for a different crunch profile.
I’ve served these at family movie nights and backyard barbecues; they vanish faster than anything else on the table. My niece declared them better than store-bought chips, and friends often ask for the quick method when we host. The simplicity and texture make them a reliable hit every time.
Ingredients
- Onions (2 large): Choose sweet or yellow onions for a balance of sugar and bite. Slice into 1/4-inch rings using a sharp knife or mandoline for uniform thickness so they fry evenly.
- All-purpose flour (1 cup): Acts as the first dry layer to help the buttermilk adhere. Use an unbleached brand for a cleaner flavor; King Arthur or similar brands work well.
- Garlic powder (1 teaspoon): Adds background savoriness without overpowering the onion.
- Paprika (1 teaspoon): Choose sweet or smoked paprika depending on whether you want a smoky hint.
- Salt (1/2 teaspoon) and black pepper (1/2 teaspoon): Basic seasoning — adjust to taste. Coarse salt can be swapped for fine if preferred.
- Buttermilk (1 cup): Provides acidity that tenderizes the onion and improves batter adhesion. If you don’t have buttermilk, mix 1 cup milk with 1 tablespoon lemon juice or vinegar and let sit 5 minutes.
- Panko breadcrumbs (2 cups): The secret to extra crunch. Use Japanese-style panko for large flakes that fry to a light, crunchy crust.
- Vegetable oil: For frying. Use a neutral oil with a high smoke point such as canola, sunflower, or peanut oil.
Instructions
Prepare the onions: Saw through the ends and peel, then slice each onion into 1/4-inch rings. Separate the rings gently and lay them on paper towels. Pat dry — removing surface moisture helps the coatings adhere and reduces splatter when frying. Mix the seasoned flour: In a shallow bowl, whisk together 1 cup all-purpose flour, 1 teaspoon garlic powder, 1 teaspoon paprika, 1/2 teaspoon salt, and 1/2 teaspoon black pepper until evenly combined. This seasoned dry mix is your first coating layer and adds flavor inside the crust. Prepare wet and dry stations: Arrange three shallow bowls or pans: the seasoned flour, 1 cup buttermilk, and 2 cups panko. Keep them in a line for efficient dredging. If you prefer a thicker crust, use a double-dip method: flour, buttermilk, then flour again, then buttermilk, and finally panko. Coat the rings: Dredge each ring in the seasoned flour, shake off excess, dunk into buttermilk for full coverage, then press into panko until well coated. For the crispiest result, press panko into the surface so it adheres firmly. Place coated rings on a wire rack while you heat the oil. Heat the oil and fry: Pour oil into a heavy-bottomed skillet or Dutch oven to a depth of about 1 1/2 inches. Heat to 350°F (use a thermometer). Fry rings in small batches so temperature stays steady, about 2 to 3 minutes per side, until golden brown. Transfer to a wire rack set over a baking sheet to drain; this keeps them crisp. Finish and serve: Sprinkle lightly with a pinch of fine salt while still hot. Serve immediately with your favorite dips. If holding for a short time, keep warm in a 200°F oven on a wire rack so they stay crisp.
You Must Know
- These chips are best eaten fresh — they retain peak crunch for about 30 minutes after frying; store in a single layer at room temperature for up to a day but they will soften.
- They freeze well pre-fried: flash-freeze on a tray, then store in a freezer bag for up to 3 months. Fry from frozen for a quick snack (add 1–2 minutes to frying time).
- High in carbs from flour and panko and contain dairy, so they are not dairy-free or gluten-free without substitutions.
- Maintain oil temperature around 350°F to prevent greasy chips — too cool and the coating soaks oil; too hot and they brown before crisping through.
What I love most is how simple technique elevates humble ingredients: thin slicing, careful dredging, and proper oil temperature transform onions into snackable crisps. Guests often guess we used a special batter, but it’s really about layering textures and paying attention to heat.
Storage Tips
Store cooled chips in a paper bag or a loosely covered container at room temperature for up to one day to preserve crispness; airtight containers trap moisture and soften them. For longer storage, freeze in a single layer on a tray, then transfer to a resealable bag for up to three months. Reheat from frozen in a preheated 375°F oven on a wire rack for 8–10 minutes or refry briefly in hot oil for best results. Use a wire rack rather than paper towels to avoid steam buildup while cooling.
Ingredient Substitutions
If you need gluten-free options, substitute a 1:1 gluten-free flour blend for all-purpose flour and use gluten-free panko or crushed gluten-free cornflakes for the outer coating. For dairy-free, swap buttermilk with a plant-based milk plus 1 tablespoon vinegar per cup to mimic acidity; note the texture will be slightly different. To add heat, mix 1/4 teaspoon cayenne or smoked chipotle powder into the flour. For a cornmeal crunch, replace half the panko with fine cornmeal for a heartier bite.
Serving Suggestions
Serve these chips as an appetizer with a trio of dips: spicy sriracha mayo, classic ranch, and a smoky barbecue sauce. They pair beautifully with burgers, pulled pork, or alongside a fresh green salad for contrast. For a party board, present them in paper cones with small ramekins of dipping sauces. Garnish with flaky sea salt and a squeeze of lemon to lift the flavors.
Cultural Background
Thin, fried onion snacks echo fairground and diner traditions where onions are often battered and fried. Panko-based coatings are a nod to Japanese techniques that prioritize light crunch, while the buttermilk dip ties to Southern American comfort food. The result is a cross-cultural take that blends the airy crisp of panko with the tangy richness of buttermilk and the classic seasoning of American onion rings.
Seasonal Adaptations
In summer, use sweet Vidalia onions for a naturally sweeter chip and serve with chilled herb dips. In cooler months, swap in storage onions and add warming spices like smoked paprika and a pinch of cumin. For holiday gatherings, add grated Parmesan to the panko for a festive, savory crust that pairs well with roasted meats.
Meal Prep Tips
Slice onions and store them dry in the refrigerator up to 24 hours before frying. Prepare the flour mix and panko in separate, airtight containers and assemble just before frying to prevent the panko from getting damp. If making ahead for an event, pre-coat and freeze on a tray; then fry directly from frozen for consistent results and minimal last-minute work.
These onion ring chips are a small technique away from becoming your new snack obsession — crisp edges, tender centers, and endless dipping possibilities. Try a test batch, tweak the seasoning to your liking, and enjoy the delightful crunch with friends and family.
Pro Tips
Slice onions uniformly (1/4 inch) for even frying; a mandoline helps achieve consistent thickness.
Press panko firmly into the buttermilk-coated rings to ensure maximum adhesion and crunch.
Maintain oil temperature at around 350°F; use a probe thermometer for accuracy.
Drain on a wire rack instead of paper towels to prevent steam from softening the coating.
This nourishing onion ring chips recipe is sure to be a staple in your kitchen. Enjoy every moist, high protein slice — it is perfect for breakfast or as a wholesome snack any time.
FAQs about Recipes
How do I keep the chips from getting greasy?
Keep oil at 350°F and fry in small batches to avoid soggy chips.
Can I make these ahead of time?
Flash-freeze coated but unfried chips on a tray, then store in freezer bags for up to 3 months.
Tags
Onion Ring Chips
This Onion Ring Chips recipe makes perfectly juicy, tender, and flavorful steak every time! Serve with potatoes and a side salad for an unforgettable dinner in under 30 minutes.
Ingredients
Main
Dry Coating
Wet & Finish
Instructions
Prepare onions
Peel and slice 2 large onions into 1/4-inch rings. Separate rings and pat dry with paper towels to remove surface moisture.
Make seasoned flour
Combine 1 cup all-purpose flour, 1 teaspoon garlic powder, 1 teaspoon paprika, 1/2 teaspoon salt, and 1/2 teaspoon black pepper in a shallow bowl and whisk until even.
Set up dredging stations
Arrange three shallow bowls: seasoned flour, 1 cup buttermilk, and 2 cups panko. This assembly speeds up coating and keeps panko dry until use.
Coat the rings
Dredge each ring in flour, shake off excess, dip into buttermilk, then press into panko until well coated. Place on a wire rack while oil heats.
Fry in batches
Heat oil to 350°F in a heavy skillet or Dutch oven. Fry coated rings in small batches for 2–3 minutes per side until golden. Drain on a wire rack to keep crisp.
Season and serve
Sprinkle hot chips lightly with fine salt and serve immediately with your favorite dips. Keep warm in a 200°F oven if holding briefly.
Last Step: Please leave a rating and comment letting us know how you liked this recipe! This helps our business to thrive and continue providing free, high-quality recipes for you.
Nutrition
Did You Make This?
Leave a comment & rating below or tag
@royalrecipe on social media!
Categories:
You might also like...

5-Minute Air Fryer Roasted Garlic Magic That Wows
Learn how a 5-minute prep transforms a whole garlic bulb into silky, caramelized cloves in the air fryer. Perfect as a spread, mix-in, or flavor booster that elevates weeknight meals and party plates.

Air-Fried Pizza Rolls
Golden, melty pizza rolls made in the air fryer—crispy outside, gooey inside, ready in under 20 minutes. Perfect for snacks, parties, or quick dinners.

Air-Fried Rice Paper Noodle Rolls
Crispy, light rolls filled with vermicelli, tofu or shrimp, and crisp vegetables—air-fried for a healthier crunch and quick prep.
Did You Make This?
Leave a comment & rating below or tag @royalrecipe on social media!
Rate This Recipe
Share This Recipe
Enjoyed this recipe? Share it with friends and family, and don't forget to leave a review!
Comments (1)
This recipe looks amazing! Can't wait to try it.
Comments are stored locally in your browser. Server comments are displayed alongside your local comments.

Hi, I'm Riley!
What's Popular

30-Minute Meals!
Join to receive our email series which contains a round-up of some of our quick and easy family favorite recipes.