
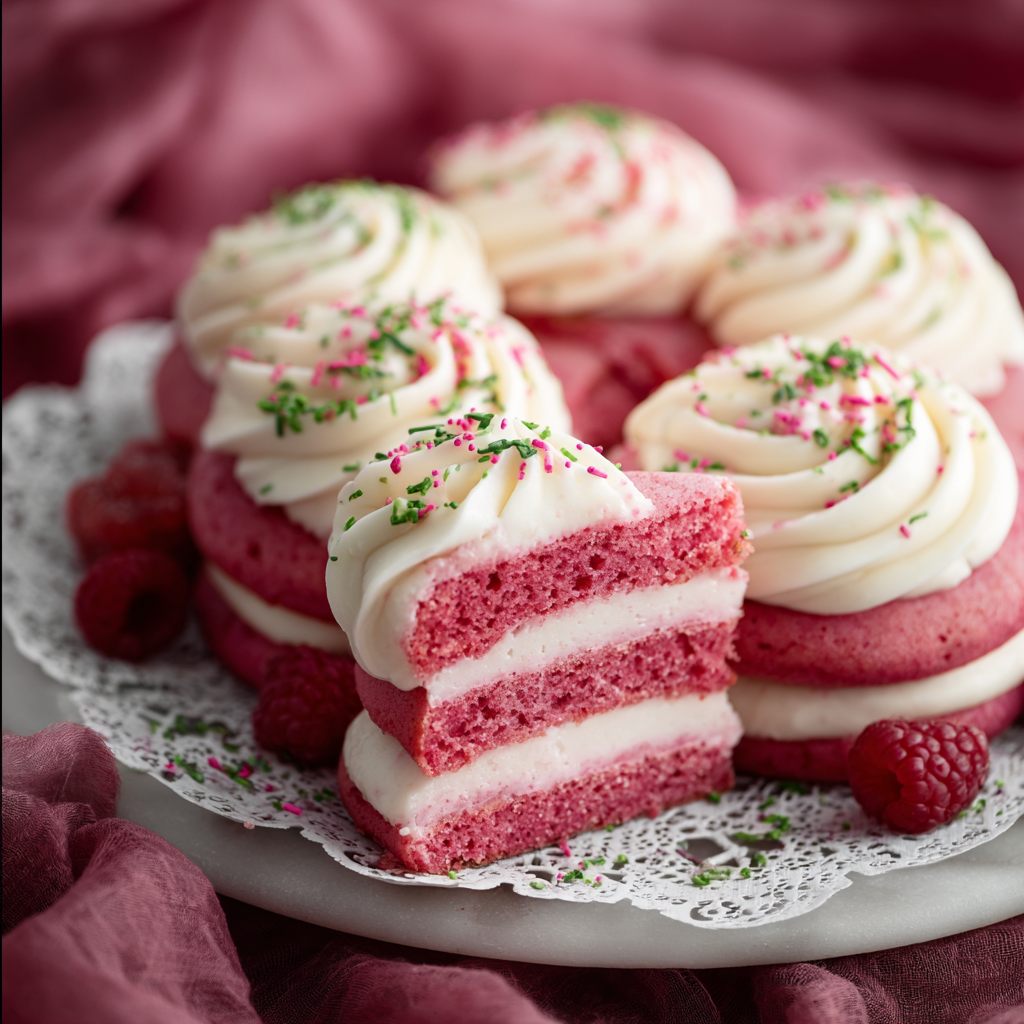
Pink Velvet Cakes

Light, tender pink velvet layers finished with silky vanilla cream cheese frosting and festive sprinkles — a charming cake for celebrations and cozy afternoons.
This pink velvet cake has been my go-to for birthdays, baby showers, and any time I want a cake that looks as joyful as it tastes. I first developed this version one winter when I wanted something softer than red velvet but with the same moist crumb and tangy frosting. The color makes it feel celebratory without the intensity of red dye, and the crumb is unusually tender thanks to a balance of butter and eggs that keeps the interior rich yet airy. Friends always comment on how delicate the texture is, and kids inevitably reach for the sprinkles first.
I discovered the final proportions after several experiments with different fats and mixing techniques. Using softened salted butter adds a subtle savory lift that balances the sweetness; the cake batter flavoring gives a rounded, bakery-like aroma; and the vanilla cream cheese topping provides the tang that cuts through the butteriness. This combination creates a cake that slices cleanly and sings when served slightly chilled — great the same day or after an overnight rest in the refrigerator.
Why You'll Love This Recipe
- Delicate crumb and reliable rise — the combination of creamed butter, sugar, and properly sifted flour yields a tender texture that holds its shape when layered and frosted.
- Quick to make — from bowl to oven in about 25 minutes of active time and ready to assemble after a short cool-down, so it’s perfect for last-minute celebrations.
- Uses pantry-friendly ingredients — most items are staples (butter, sugar, flour, eggs) with just a touch of cake batter flavoring and pink dye to create that signature hue.
- Frosting balances sweetness — vanilla cream cheese topping is silky and slightly tangy, so a little goes a long way and you won’t need an overpowering sugar hit.
- Make-ahead friendly — layers can be baked a day ahead and wrapped tightly; frosting improves in texture after resting a few hours in the fridge.
- Crowd-pleasing presentation — the pink interior with white frosting and Christmas sprinkles feels festive for holidays or themed parties.
My family’s reaction the first time I brought this to a holiday brunch was telling: everyone asked for the recipe, and we finished the whole cake in a single afternoon. I like that it’s elegant and homey at once — a cake to show off without fuss.
Ingredients
- Salted butter (1 1/2 cups): Use high-quality European-style butter if you can — the higher fat content gives a richer mouthfeel. Soften it to room temperature for easier creaming and better aeration.
- Granulated sugar (1 1/2 cups): Standard white sugar provides structure and helps create a fine, even crumb when creamed with butter.
- Eggs (3): Large eggs at room temperature incorporate more evenly; they help leaven and stabilize the batter while contributing moisture.
- Cake batter flavoring (1 1/2 tsp): Adds that bakery-style aroma — a small amount goes a long way. If unavailable, increase vanilla by 1/2 teaspoon as a substitute.
- Pink food coloring: Gel color concentrates provide vibrant hues without thinning the batter; add gradually until you reach a soft pink.
- All-purpose flour (4 1/2 cups): Measure by spooning into the cup and leveling off for consistency. Sift or whisk to aerate and remove lumps.
- Baking powder (3 tsp): Ensures a reliable rise — check freshness (less than 6 months for best results).
- For the vanilla cream cheese topping: Unsalted or salted butter (1/4 cup), cream cheese (8 oz) at room temperature, vanilla (2 tsp), powdered sugar (4 cups), a pinch of salt, and milk or heavy cream to thin as needed.
- Christmas sprinkles: Use sturdy, non-melting sprinkles for the best look and texture on the finished cake.
Instructions
Prepare the Pans and Oven: Preheat the oven to 350°F. Grease and line two 8- or 9-inch round pans with parchment. This prevents sticking and ensures bottoms release cleanly. If you prefer higher layers, use three pans and slightly reduce bake time per layer. Cream Butter and Sugar: In a large bowl, beat 1 1/2 cups softened salted butter and 1 1/2 cups granulated sugar on medium-high until pale and fluffy, about 3–5 minutes. Proper creaming traps air that contributes to rise — stop when the mixture is visibly lighter in color and has a ribbon-like texture when lifted with the beater. Add Eggs and Flavoring: Beat in eggs one at a time, scraping the bowl between additions so everything emulsifies. Mix in 1 1/2 teaspoons cake batter flavoring and a few drops of pink coloring until evenly tinted. Overbeating after adding flour can toughen the crumb, so keep mixing just until combined in later steps. Combine Dry Ingredients: Whisk together 4 1/2 cups all-purpose flour and 3 teaspoons baking powder in a separate bowl. Sifting here helps ensure an even distribution of leavening agents and prevents pockets of baking powder from forming. Fold Dry into Wet: Add the dry mixture to the butter mixture in three additions, alternating with any additional wet (if using milk for slight loosening). Use a spatula to fold gently; stop as soon as streaks disappear to avoid overworking the gluten. Bake Until Set: Divide batter evenly between prepared pans. Smooth tops and tap lightly to remove large air bubbles. Bake 22–28 minutes until a toothpick inserted in the center comes out with a few moist crumbs and the cake springs back when pressed gently. Cool and Level: Let layers cool in the pans for 10 minutes, then invert onto a wire rack to cool completely. If the tops domed, level them with a serrated knife for stable stacking and even frosting layers. Make the Vanilla Cream Cheese Topping: Beat 1/4 cup softened butter and 8 oz room-temperature cream cheese until smooth. Add 2 teaspoons vanilla and a pinch of salt. Gradually beat in 4 cups powdered sugar until smooth; thin with 1–3 tablespoons milk or heavy cream to reach spreading consistency. Assemble and Decorate: Place one layer on your serving plate, spread a thin coat of frosting, add the second layer, and crumb-coat the whole cake. Chill 15–30 minutes, then apply a final coat and smooth. Finish with Christmas sprinkles while frosting is still soft.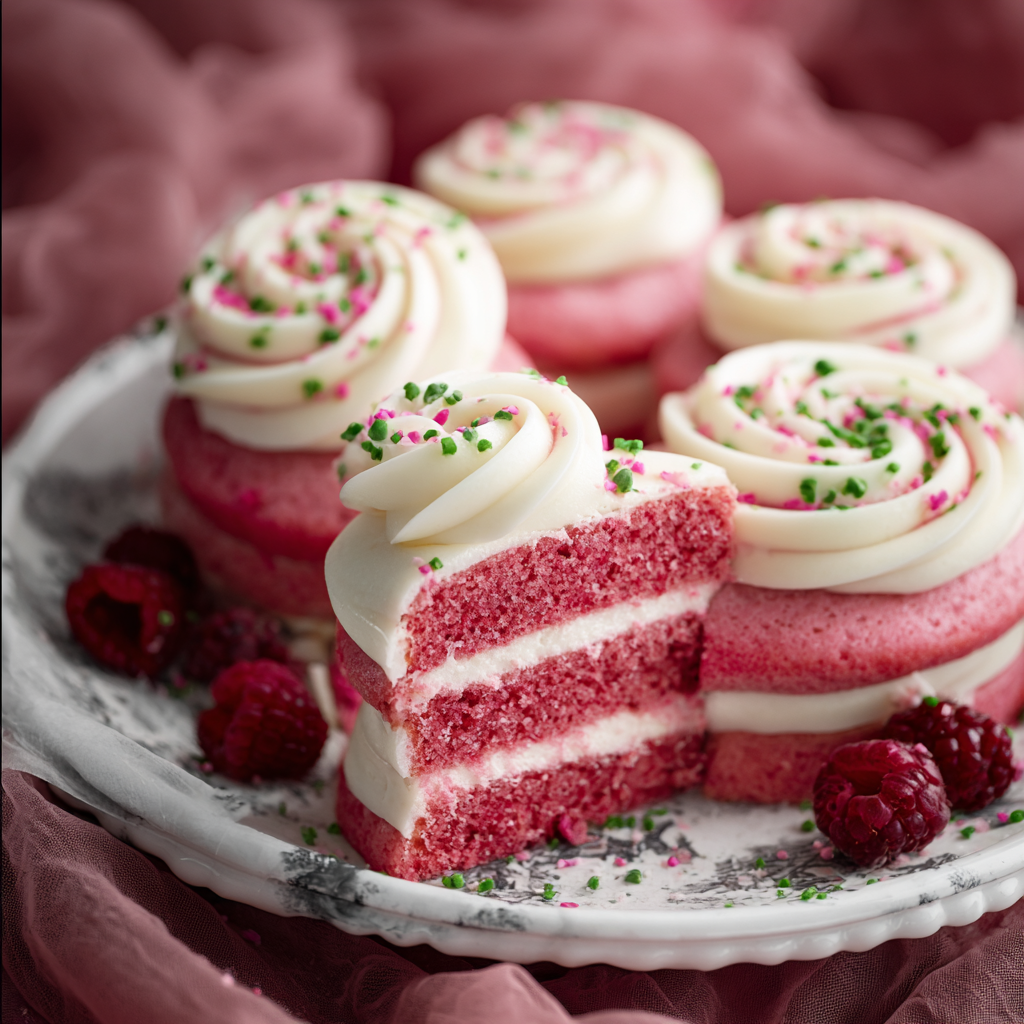
You Must Know
- High in calories and carbohydrates — a single serving contains roughly 400–450 kcal depending on frosting thickness.
- Store covered in the refrigerator for up to 4 days; layers keep well wrapped for up to 3 days if you plan to frost later.
- Freezes well — uncut layers wrapped tightly in plastic and foil will keep up to 3 months; thaw overnight in the refrigerator before frosting.
- Contains common allergens: eggs, dairy, and gluten. Use suitable substitutes to accommodate dietary restrictions.
My favorite aspect of this cake is how forgiving it is — even when I slightly overmix or underbake a touch, the cream cheese layer creates an illusion of perfection. I remember baking a triple-batched version for a family reunion; the bright pink layers and smiling faces made the effort worthwhile and created a lasting photo everyone still talks about.

Storage Tips
Store the finished cake in an airtight cake carrier or cover loosely with plastic wrap and refrigerate. Frosting contains cream cheese, which benefits from refrigeration; the cake will firm up, making slices cleaner. At room temperature, the cake can be left uncovered for a few hours when serving, but return to the refrigerator within two hours to keep dairy ingredients safe. For longer storage, freeze individual slices wrapped in parchment and foil; reheat gently at room temperature for 30–45 minutes before serving.
Ingredient Substitutions
If you need dairy-free options, substitute plant-based butter and cream cheese alternatives; note that texture and tang will differ slightly. For egg-free versions, try a commercial egg replacer or aquafaba (3 tablespoons aquafaba replaces one egg), but expect a slightly denser crumb. To reduce sugar, swap half the granulated sugar with a granular sugar substitute formulated for baking and reduce powdered sugar in the frosting slightly — taste and texture will vary.
Serving Suggestions
Serve slightly chilled with a light dusting of extra powdered sugar or a scattering of fresh berries for color contrast. Pair with a bright, citrusy tea or sparkling elderflower for an elegant pairing. For a kid-friendly presentation, add sprinkles around the base and piped rosettes of frosting; for dinner parties, trim the edges and plate each slice with a small dollop of mascarpone and a few raspberries.
Cultural Background
Velvet cakes trace their lineage to 19th-century butter cakes prized for their smooth crumb and fine texture. The term "velvet" referenced that satin-like mouthfeel, often achieved by using specific fats and careful creaming techniques. The pink variation borrows the soft coloration trend from classic red velvet but offers a gentler hue that became popular for baby showers and springtime gatherings because it feels whimsical without the intensity of deep red dyes.
Seasonal Adaptations
In winter, finish the cake with cinnamon-spiced cream cheese or top with sugared cranberries for a holiday presentation. For spring, fold a small amount of lemon zest into the frosting and use pastel sprinkles. In summer, add a thin layer of strawberry jam between layers for extra freshness and bright flavor that complements the cream cheese well.
Meal Prep Tips
For advance prep, bake the layers 1–2 days ahead and keep them wrapped in the refrigerator. Make the frosting the day before and refrigerate; rewhip briefly before using to restore fluffiness. If you’re preparing multiple cakes, label each wrapped layer with the date and orientation to make assembly quicker. Use shallow, wide containers for slices to speed up thawing if frozen.
This cake always brings people together — it’s playful, forgiving, and pretty enough to make any table feel special. I hope you enjoy baking it as much as my family and I do: taste, share, and make it your own.
Pro Tips
Bring eggs and cream cheese to room temperature for smoother integration and less lumpy frosting.
Use gel food coloring to achieve vibrant pink without altering batter consistency.
Chill the cake briefly after a crumb coat to make final frosting smoother and easier to handle.
Measure flour by spooning into a cup and leveling to avoid a dry, dense outcome.
This nourishing pink velvet cakes recipe is sure to be a staple in your kitchen. Enjoy every moist, high protein slice — it is perfect for breakfast or as a wholesome snack any time.
Tags
Pink Velvet Cakes
This Pink Velvet Cakes recipe makes perfectly juicy, tender, and flavorful steak every time! Serve with potatoes and a side salad for an unforgettable dinner in under 30 minutes.
Ingredients
Cake
Vanilla Cream Cheese Frosting
Decoration
Instructions
Prepare oven and pans
Preheat oven to 350°F and grease and line two 8- or 9-inch round pans with parchment paper for easy removal.
Cream butter and sugar
Beat 1 1/2 cups softened butter with 1 1/2 cups sugar until pale and fluffy, about 3–5 minutes, to incorporate air for lift.
Add eggs and flavoring
Beat in eggs one at a time, then add 1 1/2 teaspoons cake batter flavoring and pink food coloring until evenly combined.
Combine dry ingredients
Whisk together 4 1/2 cups flour and 3 teaspoons baking powder, then add to wet ingredients in thirds using a spatula to fold until just combined.
Bake and cool
Divide batter between pans and bake 22–28 minutes until a toothpick shows moist crumbs. Cool in pans 10 minutes, then transfer to a rack to cool completely.
Make frosting
Beat 1/4 cup butter and 8 oz cream cheese until smooth, add 2 teaspoons vanilla and salt, then gradually add 4 cups powdered sugar and thin with milk if needed.
Assemble and decorate
Level layers if needed, spread frosting between layers, crumb-coat, chill briefly, then finish with a smooth outer layer and Christmas sprinkles.
Last Step: Please leave a rating and comment letting us know how you liked this recipe! This helps our business to thrive and continue providing free, high-quality recipes for you.
Nutrition
Did You Make This?
Leave a comment & rating below or tag
@royalrecipe on social media!
Categories:
You might also like...

5-Minute Air Fryer Roasted Garlic Magic That Wows
Learn how a 5-minute prep transforms a whole garlic bulb into silky, caramelized cloves in the air fryer. Perfect as a spread, mix-in, or flavor booster that elevates weeknight meals and party plates.

Air-Fried Pizza Rolls
Golden, melty pizza rolls made in the air fryer—crispy outside, gooey inside, ready in under 20 minutes. Perfect for snacks, parties, or quick dinners.

Air-Fried Rice Paper Noodle Rolls
Crispy, light rolls filled with vermicelli, tofu or shrimp, and crisp vegetables—air-fried for a healthier crunch and quick prep.
Did You Make This?
Leave a comment & rating below or tag @royalrecipe on social media!
Rate This Recipe
Share This Recipe
Enjoyed this recipe? Share it with friends and family, and don't forget to leave a review!
Comments (1)
This recipe looks amazing! Can't wait to try it.
Comments are stored locally in your browser. Server comments are displayed alongside your local comments.

Hi, I'm Riley!
What's Popular

30-Minute Meals!
Join to receive our email series which contains a round-up of some of our quick and easy family favorite recipes.