
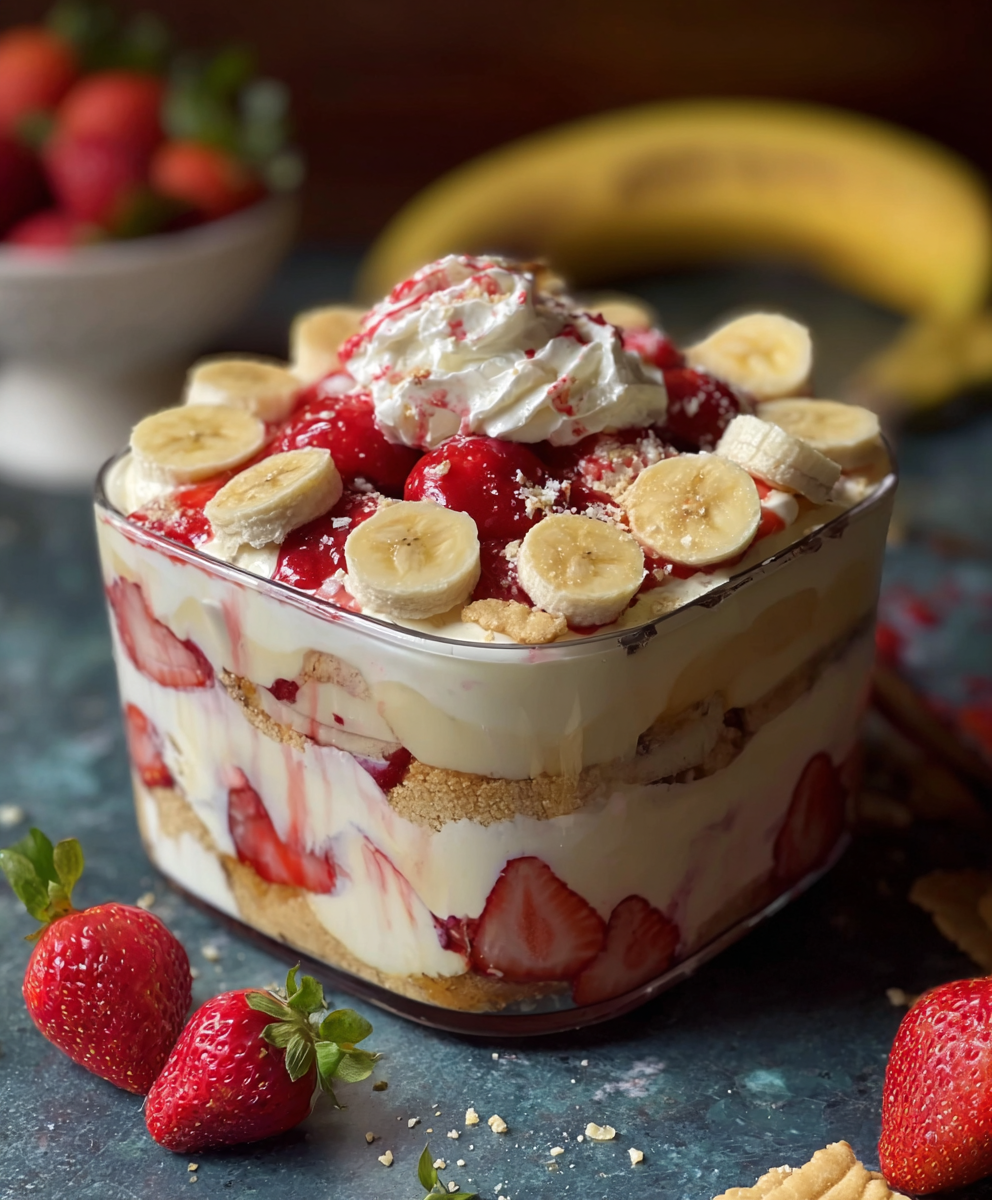
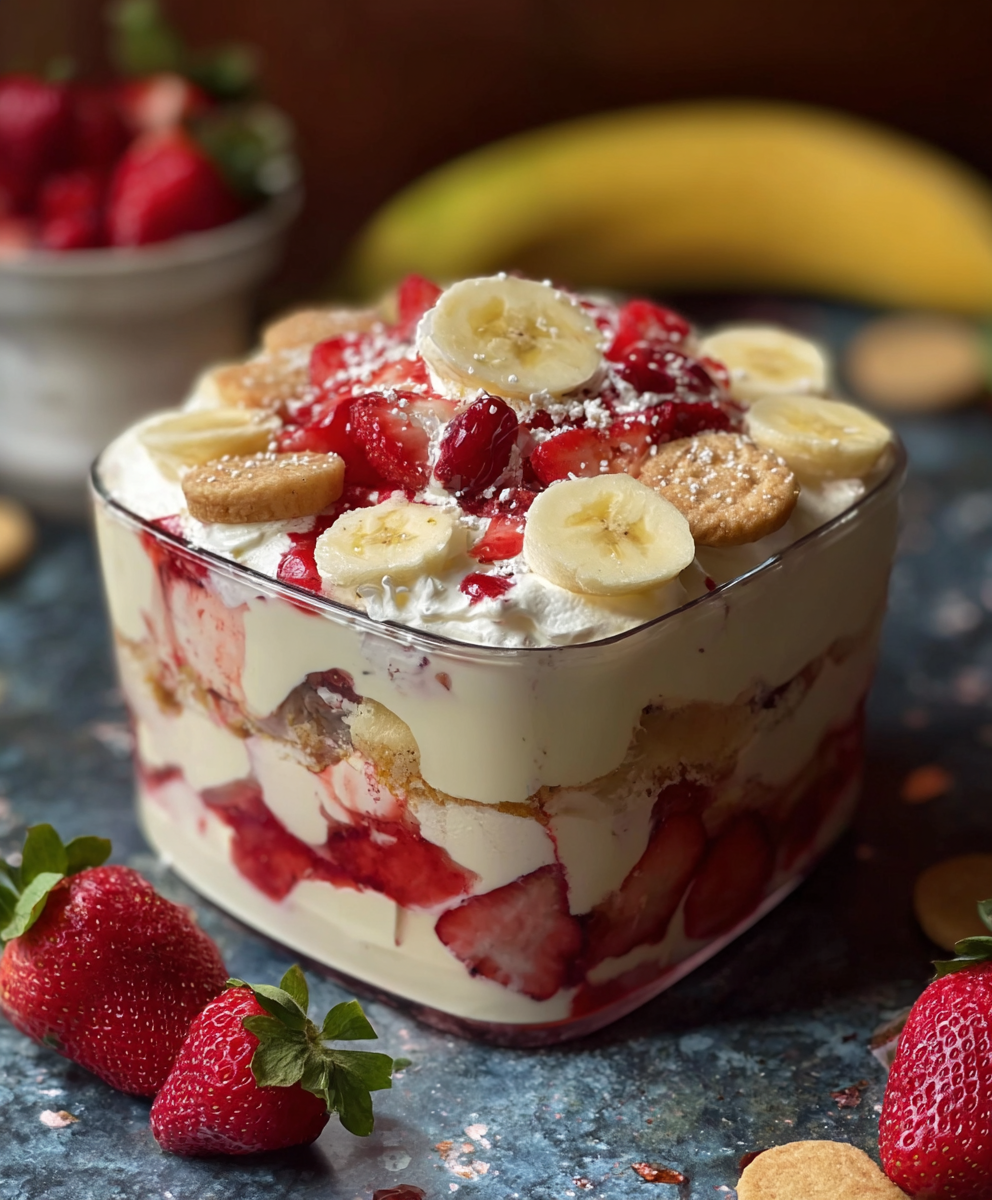
Strawberry Banana Pudding Dream

A no-bake, crowd-pleasing layered dessert of vanilla wafers, ripe bananas, fresh strawberries and a silky French vanilla pudding-cream cheese filling — chill, slice, and enjoy.
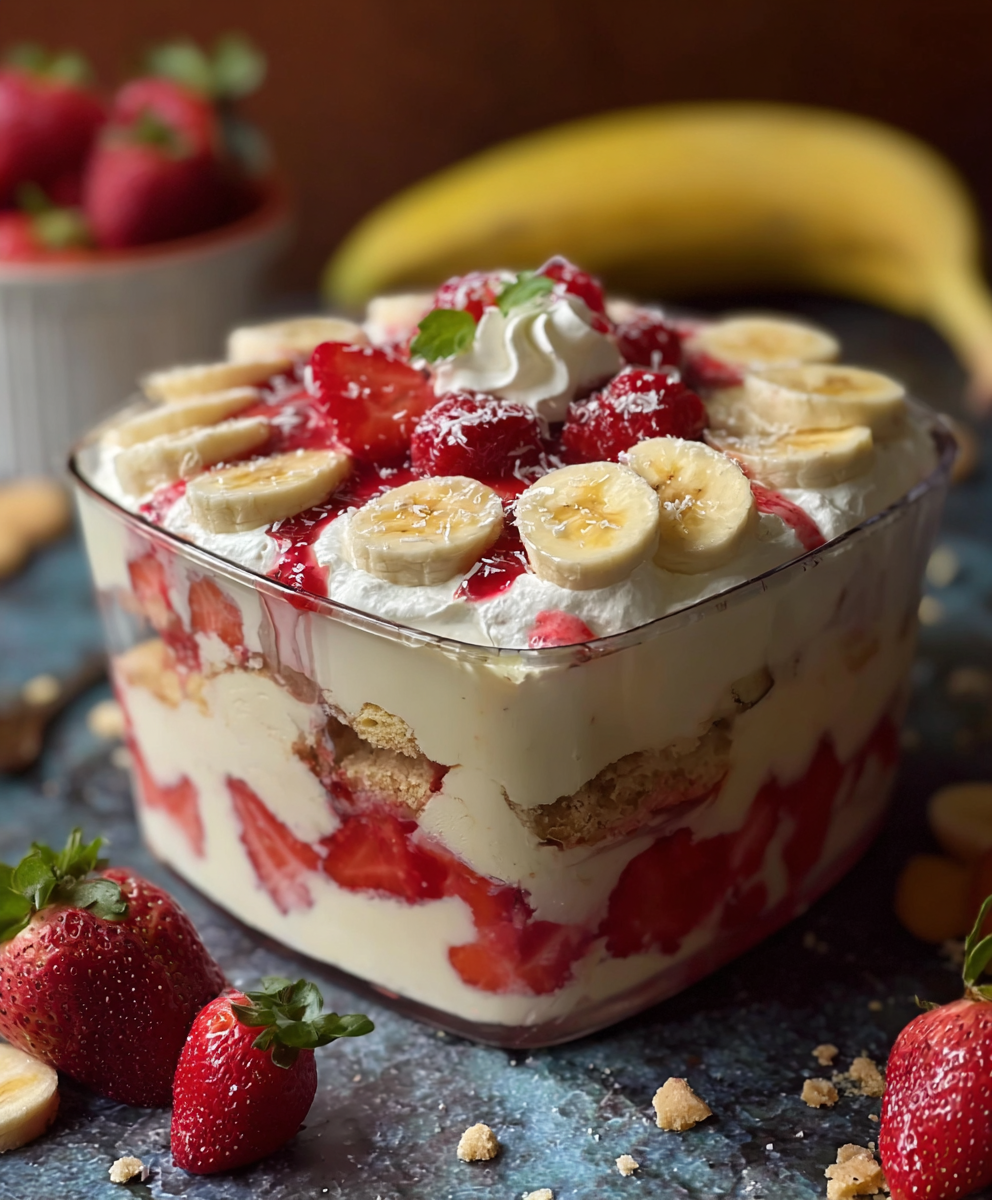
This layered strawberry banana pudding has been a summer staple in my family for years. I first made it for a neighborhood potluck after discovering a forgotten box of vanilla wafers and a surplus of ripe bananas on the counter. The combination of tangy cream cheese, sweetened condensed milk, and instant French vanilla pudding creates a luxuriously smooth filling that contrasts beautifully with the crisp-to-soft texture of the wafers and the bright freshness of sliced strawberries. It’s the kind of dessert that arrives at the table looking casual and comforting, but disappears fast because everyone wants a second helping.
I love this version because it balances nostalgia with a slightly elevated flavor profile — the cream cheese adds body and a slight tang that trims the sweetness, while the sweetened condensed milk and whipped topping keep the filling light and spoonable. It’s forgiving: use 6 bananas for a lighter fruit presence or 8 if you want more banana in every bite. I usually assemble it the night before and let it chill at least four hours; the wafers soften into tender layers that feel almost like a no-bake cake. This is the dessert I reach for for summer barbecues, neighborhood potlucks, or a cozy Sunday when I want something that feels special but requires very little active work.
Why You'll Love This Recipe
- Hands-off assembly: ready to serve with about 20 minutes of active time and a minimum 4-hour chill so it’s perfect for make-ahead entertaining.
- Pantry-friendly base: uses staple ingredients like vanilla wafers and instant pudding mix alongside fresh fruit for a crowd-pleasing flavor that’s easy to source.
- Texture play: crunchy wafers soften into tender layers while fruit adds freshness and the filling remains silky thanks to cream cheese and sweetened condensed milk.
- Flexible yield: doubles or halves easily — a single 9x13 dish serves about 10–12, great for potlucks or family meals.
- Kid-approved and versatile: the mild vanilla flavors appeal to children while adults appreciate the elevated filling; can be adapted for dietary needs with simple swaps.
- Minimal equipment and no baking required, leaving your oven free in warm weather.
I first realized this dish’s staying power when a picky teenager at a family reunion declared it “the only dessert worth eating,” and the bowl was empty within an hour. Over time I’ve refined the balance of fruit to filling and learned that slightly underripe bananas hold their shape best between layers.
Ingredients
- Vanilla wafers (2 boxes): These form the base layers. Look for classic vanilla wafers or sandwich-style cookies if you prefer a slightly sweeter crunch. I usually use 2 standard boxes (about 11–12 oz each) for a 9x13 dish; extra cookies are helpful for snacking.
- Bananas (6–8), sliced: Choose bananas that are ripe but still firm — they should have a little yellow with minimal brown spots so they slice cleanly without becoming mushy between layers.
- Strawberries (1 container): Fresh hulled and sliced strawberries add brightness and acidity. A typical 1-pint or 12-oz container works well; if strawberries are out of season, use frozen-thawed (drained) for convenience.
- Milk (2 cups): Whole milk gives the creamiest texture for the instant pudding, but 2% works fine if you prefer a lighter finish.
- French vanilla instant pudding mix (1 box, 5 oz): This thickens the filling and infuses a vanilla custard note without baking.
- Cream cheese (1 8-oz package), softened: Room-temperature cream cheese whips into the mixture for body and slight tang. Full-fat yields the best texture; be sure it’s fully softened to avoid lumps.
- Sweetened condensed milk (1 14-oz can): Adds sweetness and a silky, dense mouthfeel — a little goes a long way to achieve that rich custard-like filling.
- Whipped topping (1 12-oz container): Folded on top for lightness and a cloud-like finish; you can use stabilized whipped cream if you prefer a fresher dairy flavor.
Instructions
Step 1 — Soften and combine the cream cheese and condensed milk: In a large mixing bowl, beat the 8-oz softened cream cheese with the entire 14-oz can of sweetened condensed milk until completely smooth and lump-free. Use an electric mixer on medium speed for 1–2 minutes and scrape the bowl sides with a spatula. The mixture should be glossy and pourable; if small lumps remain, continue mixing briefly. Smoothness here prevents grainy pockets in the final dish. Step 2 — Add pudding and milk: Spoon the 5-oz French vanilla instant pudding mix into the cream cheese mixture and pour in 2 cups of cold milk. Whisk or beat on low until the pudding is fully hydrated and the filling thickens slightly, about 1–2 minutes. The cold milk helps the pudding set more slowly and encourages a silky texture once chilled. Step 3 — Prepare fruit and wafers: Slice 6–8 bananas into 1/4-inch rounds and hull and slice the strawberries. Have your two boxes of vanilla wafers ready. For a neat presentation, arrange slices so larger pieces sit near the dish edge. If bananas are very ripe, toss slices with a teaspoon of lemon juice to prevent browning. Step 4 — Layer the dish: In a 9x13 serving dish, place a single layer of vanilla wafers to cover the bottom. Add a layer of banana slices followed by a layer of strawberries. Pour half of the pudding mixture evenly over the fruit and cookies, smoothing with an offset spatula to fill gaps. The pudding acts as the binder so distribute it uniformly. Step 5 — Repeat and finish: Repeat the wafer, banana, and strawberry layers, then pour the remaining pudding mixture on top. Spread the 12-oz container of whipped topping evenly over the final layer, creating a smooth finish. For a decorative touch, use a fork to create light swirls. Step 6 — Chill and serve: Cover the dish with plastic wrap and refrigerate for at least 4 hours, preferably overnight. Chilling allows the cookies to soften and the flavors to meld. Slice with a sharp knife and serve chilled. If you need to transport it, keep it chilled until ready to serve.
You Must Know
- This keeps well refrigerated for up to 3 days; for best texture, serve within 48 hours.
- Freezing is not recommended because the whipped topping and fresh fruit separate on thawing, but the filling can be frozen separately up to 1 month.
- High in sugars and dairy — a rich, indulgent dessert; consider lighter milk or stabilized low-fat alternatives if desired.
- Wafers soften as they chill and should be tender but not mushy after 4 hours — that’s your visual cue that it’s ready.
- Chill time is crucial: the pudding needs time to set and meld with the condensed milk and cream cheese for the ideal spoonable consistency.
One of my favorite parts of making this is how the smell of vanilla and fresh strawberries fills the kitchen while it chills. At family gatherings the first person to reach for the dish is often the one who couldn’t wait for the official “dessert time,” which is the surest compliment in any cook’s book.
Storage Tips
Store the dish tightly covered in the refrigerator for up to 3 days. Use an airtight container or press plastic wrap directly onto the surface of the whipped topping to prevent a film. If you need to prepare ahead, assemble and chill for 12–24 hours; after 48 hours, the texture of the fruit will begin to soften noticeably. To freeze elements separately, place the pudding-filling in a freezer-safe container for up to 1 month and thaw overnight in the refrigerator before reassembling with fresh fruit and wafers.
Ingredient Substitutions
For a lighter filling, substitute low-fat cream cheese and use 2% milk; reduce sweetened condensed milk to 10 oz and add 2 tablespoons of honey if you prefer a slightly less dense sweetness. To make it gluten-free, swap vanilla wafers for certified gluten-free vanilla cookies and confirm the pudding mix is gluten-free. For a dairy-free version, use a dairy-free cream cheese, coconut condensed milk, and a coconut-based whipped topping — note that coconut flavor will be more pronounced.
Serving Suggestions
Serve chilled in slices from a 9x13 dish or scoop into individual bowls. Garnish with a fan of fresh strawberry slices and a thin banana slice atop each portion for a pretty presentation. For a barbecue, pair with lightly sweet iced tea or a crisp sparkling wine. Add toasted sliced almonds or crushed vanilla wafer crumbs for contrast, or serve with a side of lemon curd for those who want an extra citrus punch.
Cultural Background
Layered pudding desserts like this draw from classic American no-bake traditions popularized in home cooking throughout the 20th century. Instant pudding mixes and sweetened condensed milk became common pantry items that made layered desserts quick and accessible. The combination of wafer layers and pudding evokes classic Southern potluck and family-style desserts, where practicality and flavor come together for communal eating.
Seasonal Adaptations
In summer, use ripe local strawberries and slightly underripe bananas for structure. In late winter, switch to mandarin segments and thawed frozen berries for a citrus twist, or fold in a cup of chopped macerated peaches in midsummer. For a holiday variation, sprinkle toasted pecans and add a pinch of ground nutmeg to the whipped topping for warmth.
Meal Prep Tips
Assemble the filling and store in the refrigerator for up to 2 days, but keep fruit and wafers separate until assembly to maintain texture. If preparing for a party, lay down the first wafer layer and fruit the night before, add half the filling day-of and finish right before guests arrive to keep the top layer looking fresh. Use shallow, wide containers for faster chilling and quicker serving at busy events.
This Strawberry Banana Pudding Dream is simple, nostalgic, and endlessly adaptable — a dessert that invites creativity while staying reliably delicious. Make it your own and enjoy sharing it with family and friends.
Pro Tips
Soften the cream cheese to room temperature for at least 30 minutes before mixing to avoid lumps and ensure a silky filling.
Slice bananas just before layering or toss them lightly with lemon juice to slow browning.
Use an offset spatula to spread the pudding and whipped topping evenly for neat layers and a smooth finish.
Chill for at least 4 hours; overnight is preferable for best texture and flavor melding.
Reserve a few wafers for crumbling on top at serving time to add a fresh crunchy texture.
This nourishing strawberry banana pudding dream recipe is sure to be a staple in your kitchen. Enjoy every moist, high protein slice — it is perfect for breakfast or as a wholesome snack any time.
FAQs about Recipes
Can I make this ahead of time?
Yes, assembling the dish the night before (about 8–12 hours prior) usually gives the best texture because the wafers soften and the flavors meld. Refrigerate covered until serving.
How long does it last in the fridge?
It will keep in the refrigerator for up to 3 days. The first 48 hours offer the best texture for fruit and whipped topping.
Tags
Strawberry Banana Pudding Dream
This Strawberry Banana Pudding Dream recipe makes perfectly juicy, tender, and flavorful steak every time! Serve with potatoes and a side salad for an unforgettable dinner in under 30 minutes.
Ingredients
Base
Fruit
Filling
Topping
Instructions
Combine cream cheese and condensed milk
In a large bowl, beat the softened cream cheese and sweetened condensed milk until smooth and glossy, about 1–2 minutes with an electric mixer. Scrape down the sides to ensure no lumps remain.
Add pudding mix and milk
Add the instant French vanilla pudding mix and 2 cups cold milk. Whisk until the pudding is fully hydrated and the mixture thickens slightly, about 1–2 minutes.
Prepare fruit and wafers
Slice bananas into 1/4-inch rounds and hull and slice strawberries. Lay out the vanilla wafers for easy layering. Toss banana slices lightly with lemon juice if very ripe.
Layer wafers, fruit, and filling
In a 9x13 dish, place a single layer of wafers, add a layer of bananas then strawberries, and pour half the pudding mixture evenly over the fruit and cookies. Smooth the surface with a spatula.
Repeat layers and top
Repeat the wafer and fruit layers, pour the remaining pudding filling over the top, and spread the whipped topping evenly across the surface. Create light swirls for a decorative finish.
Chill before serving
Cover and refrigerate for at least 4 hours or overnight. Slice or scoop chilled portions and garnish if desired. Store leftovers refrigerated up to 3 days.
Last Step: Please leave a rating and comment letting us know how you liked this recipe! This helps our business to thrive and continue providing free, high-quality recipes for you.
Nutrition
Did You Make This?
Leave a comment & rating below or tag
@royalrecipe on social media!
Categories:
You might also like...

5-Minute Air Fryer Roasted Garlic Magic That Wows
Learn how a 5-minute prep transforms a whole garlic bulb into silky, caramelized cloves in the air fryer. Perfect as a spread, mix-in, or flavor booster that elevates weeknight meals and party plates.

Air-Fried Pizza Rolls
Golden, melty pizza rolls made in the air fryer—crispy outside, gooey inside, ready in under 20 minutes. Perfect for snacks, parties, or quick dinners.

Air-Fried Rice Paper Noodle Rolls
Crispy, light rolls filled with vermicelli, tofu or shrimp, and crisp vegetables—air-fried for a healthier crunch and quick prep.
Did You Make This?
Leave a comment & rating below or tag @royalrecipe on social media!
Rate This Recipe
Share This Recipe
Enjoyed this recipe? Share it with friends and family, and don't forget to leave a review!
Comments (1)
This recipe looks amazing! Can't wait to try it.
Comments are stored locally in your browser. Server comments are displayed alongside your local comments.

Hi, I'm Riley!
What's Popular

30-Minute Meals!
Join to receive our email series which contains a round-up of some of our quick and easy family favorite recipes.